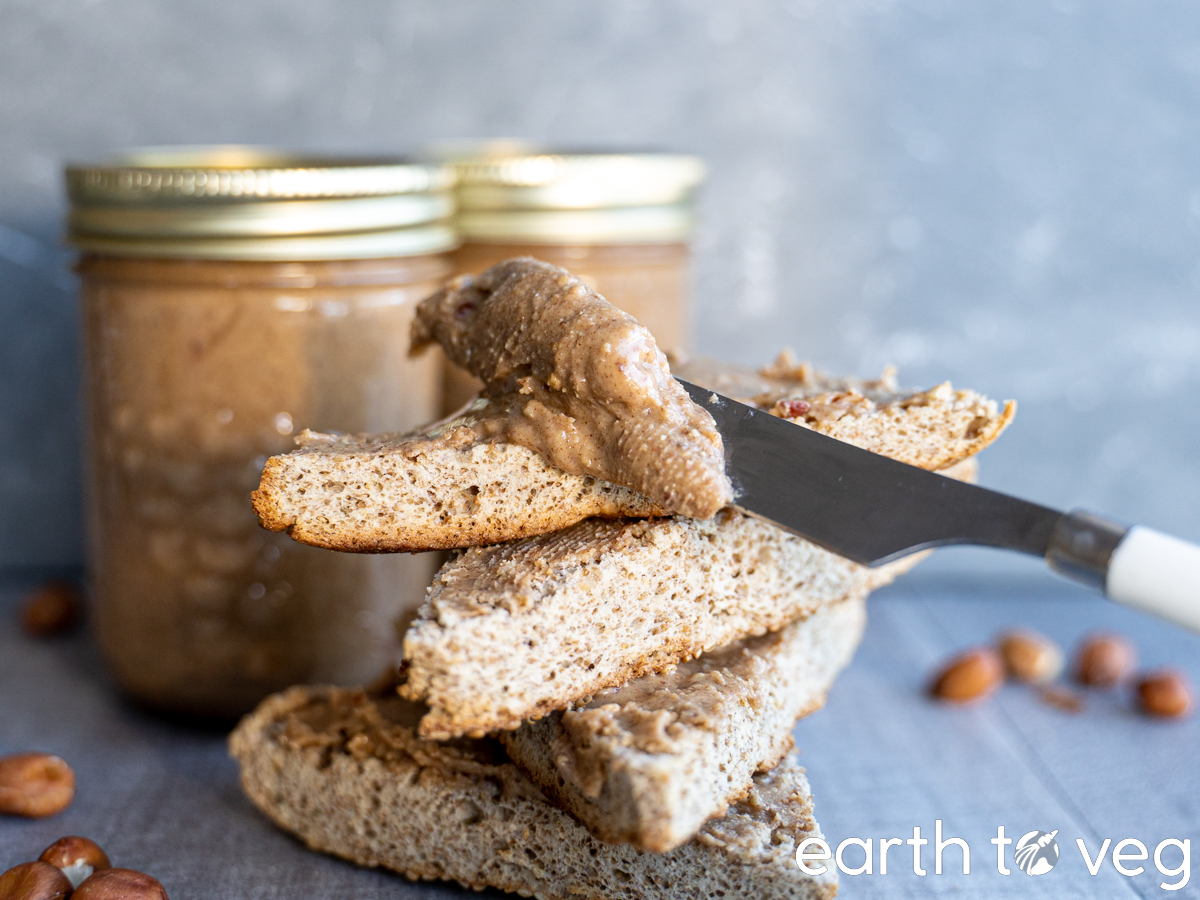
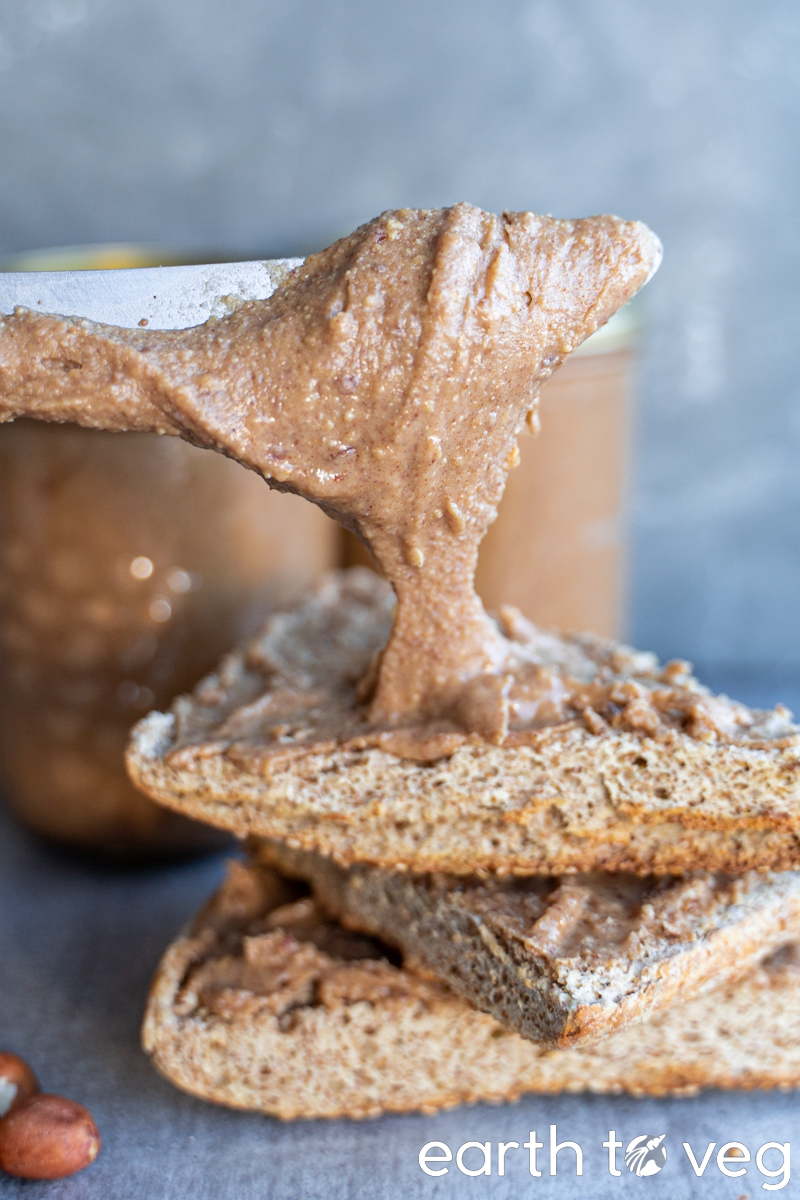
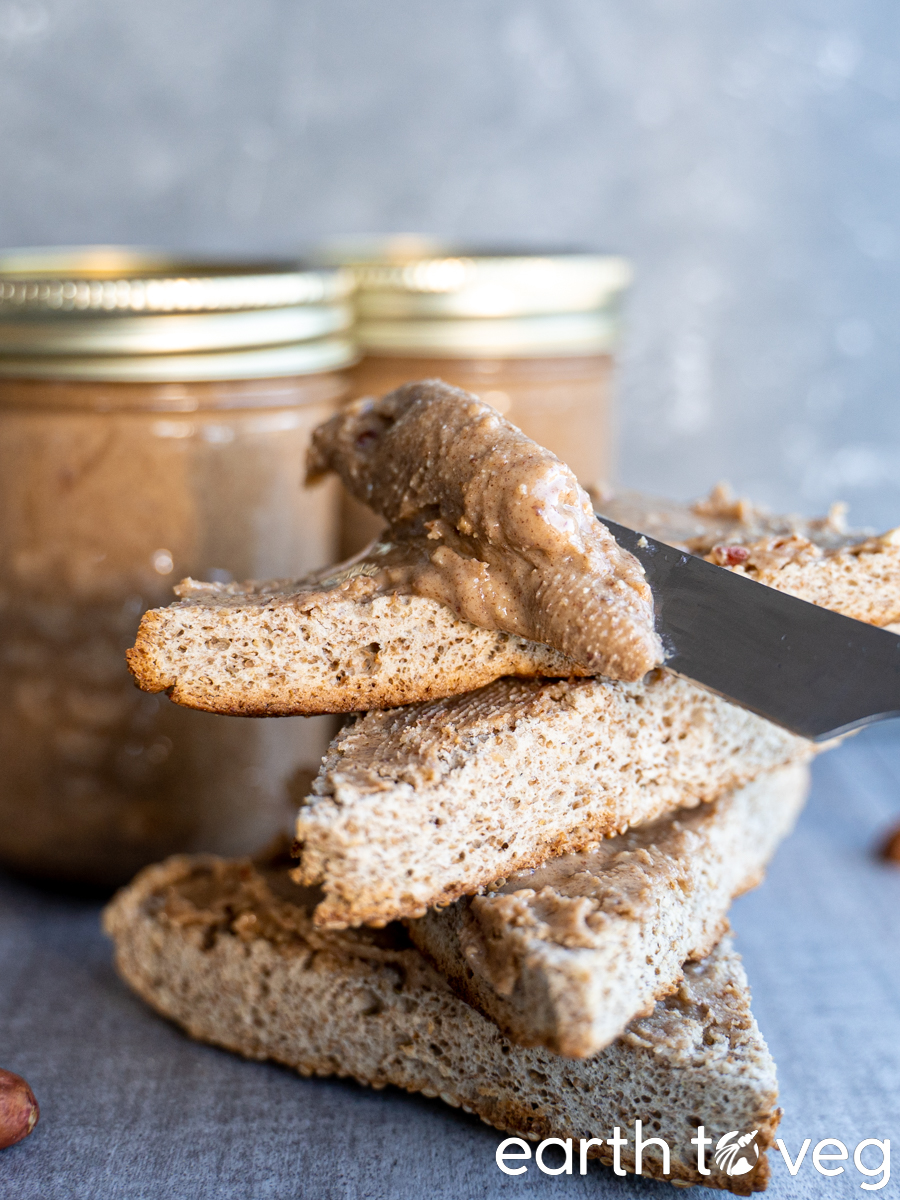
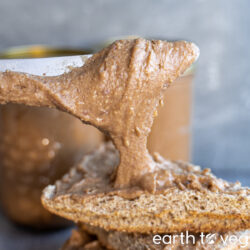
Next time you make peanut butter, try keeping the peanut skins on. Homemade Skin-On Peanut Butter, blended to smooth and creamy perfection in a Vitamix, delivers a healthy dose of fibre and antioxidants without compromising taste. All while reducing food waste in the kitchen!
(Allergic to nuts? Try my Homemade Pumpkin Seed Butter or Roasted Sesame Paste recipes instead.)
Why Skin-On Peanut Butter is the Best
Here’s a few reasons I prefer making homemade peanut butter without removing the skins:
- Laziness: Not having to peel the skin off each peanut saves a lot of time and effort.
- Lower food waste: By giving a purpose to your peanut skins, you’re saving them from the trash bin and using more of each peanut.
- The skins are nutritious: Peanut skins contain lots of fibre and antioxidants, in addition to other beneficial compounds.
- This peanut butter doesn’t separate: Once you take your homemade PB out of the blender, put it into jars and stick them into the refrigerator. Most natural peanut butters tend to separate over time with the oil floating to the top, but as long as you keep the jars refrigerated and don’t add extra oil, you won’t have this issue.
And honestly? I don’t taste much of a difference between skin-on peanut butter and the regular stuff. You’d be hard-pressed to tell them apart in a blind taste test. (Peanut skins are rich in tannins—the substance that gives tea and coffee their bitter taste—which I feel gives the peanut butter a slightly earthier flavour. But that might just be placebo on my part, heh.)
What You’ll Need
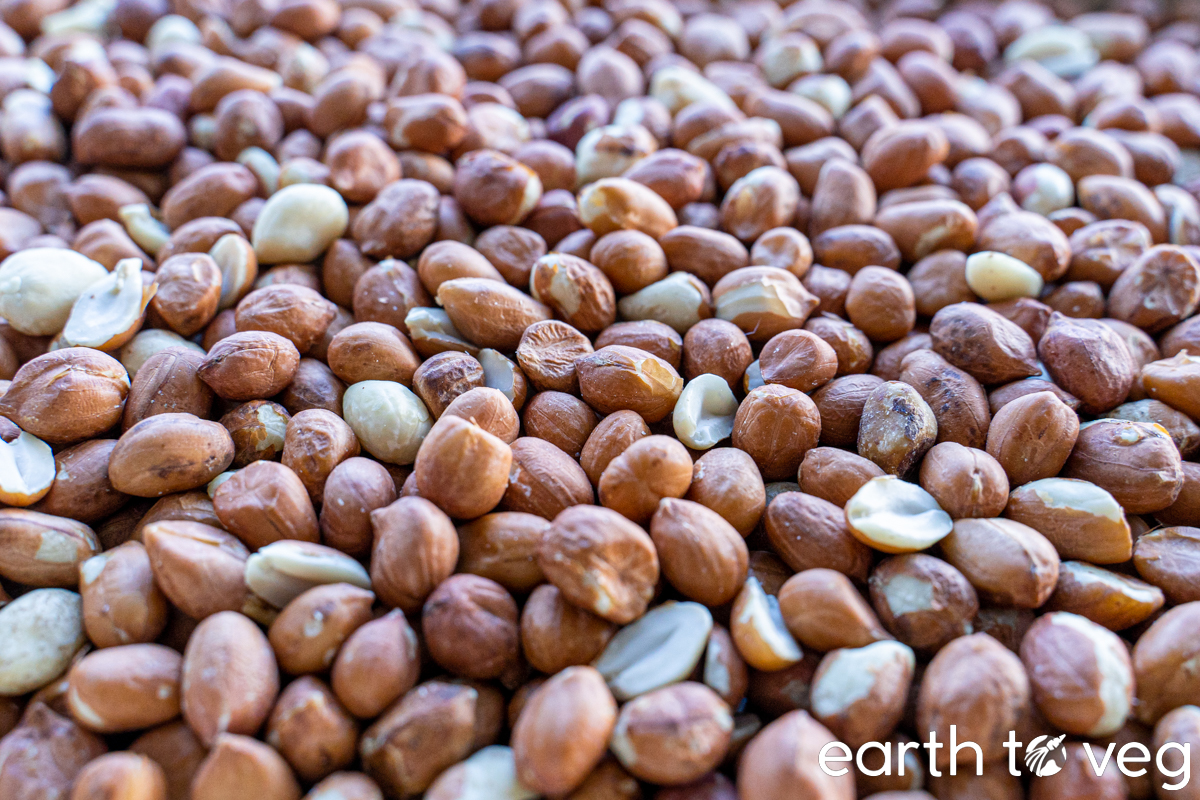
- Peanuts (preferably skin-on)
- Bit of sugar
- Pinch of salt
That’s it. Really.
The salt and sugar are optional, but they make the peanut butter tastier. (And more addictive… let that be a warning.)
Lots of recipes say to add a bit of extra oil, but that’s not necessary with this recipe. (No more greasy pool of oil at the top of the peanut butter jar!)
Step-by-Step Process
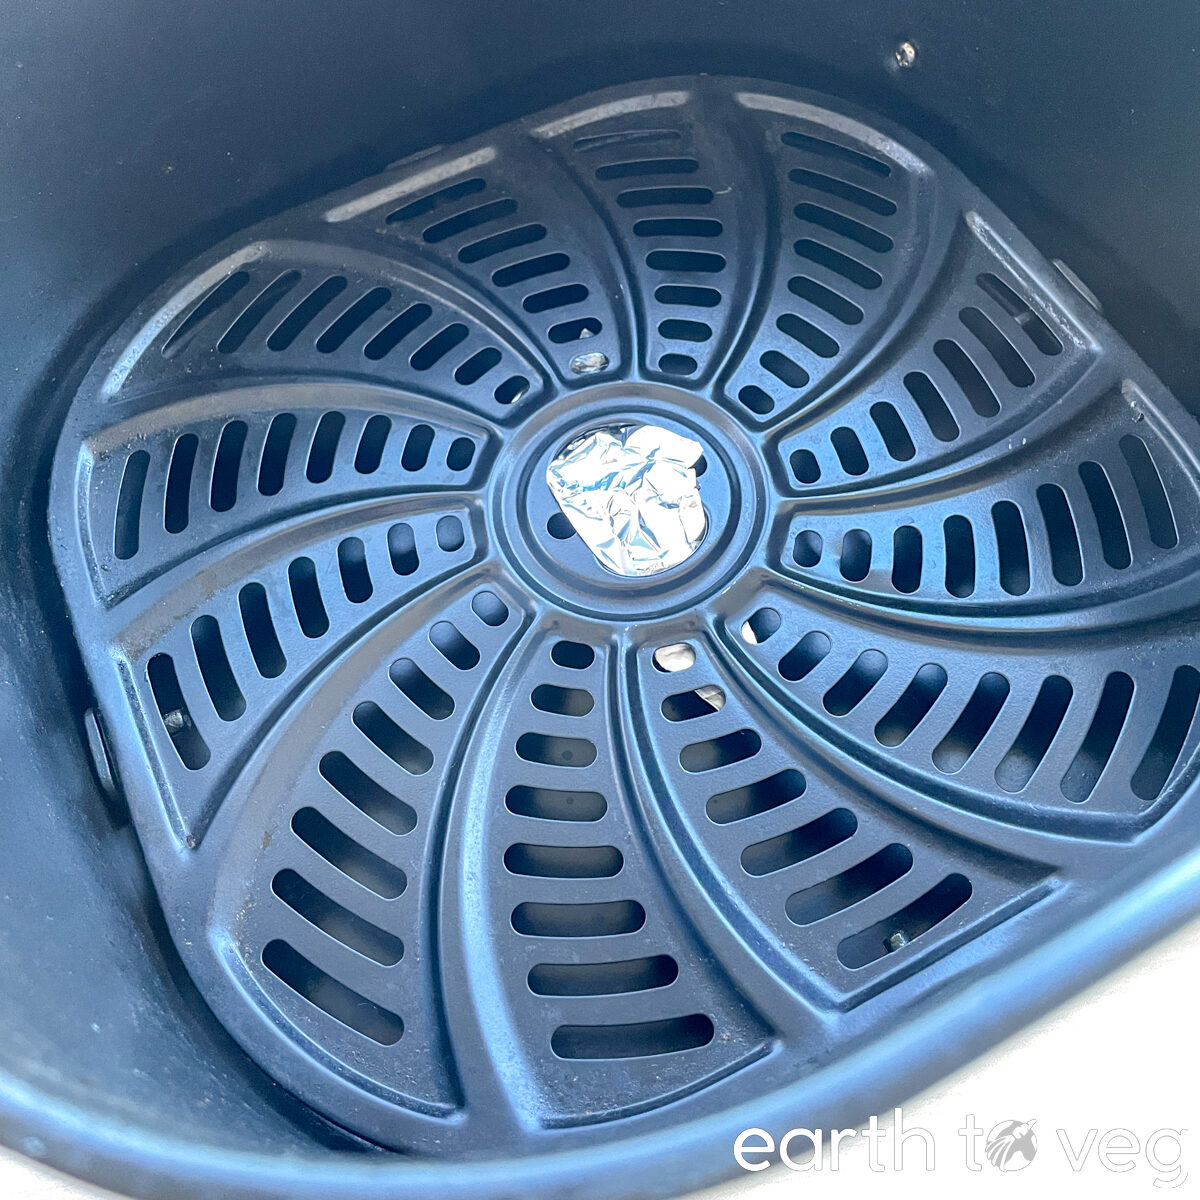
Start by roasting your peanuts. I find that buying raw peanuts and roasting them fresh gives the best-tasting results. However, pre-roasted peanuts will do fine; just skip to the next step. You can roast raw peanuts using:
- Air fryer: for 18 minutes at 160C/320F for 18 minutes, tossing twice
- Oven: for 20 minutes at 175C/350F for 20 minutes. Stir twice throughout using a wooden spoon.
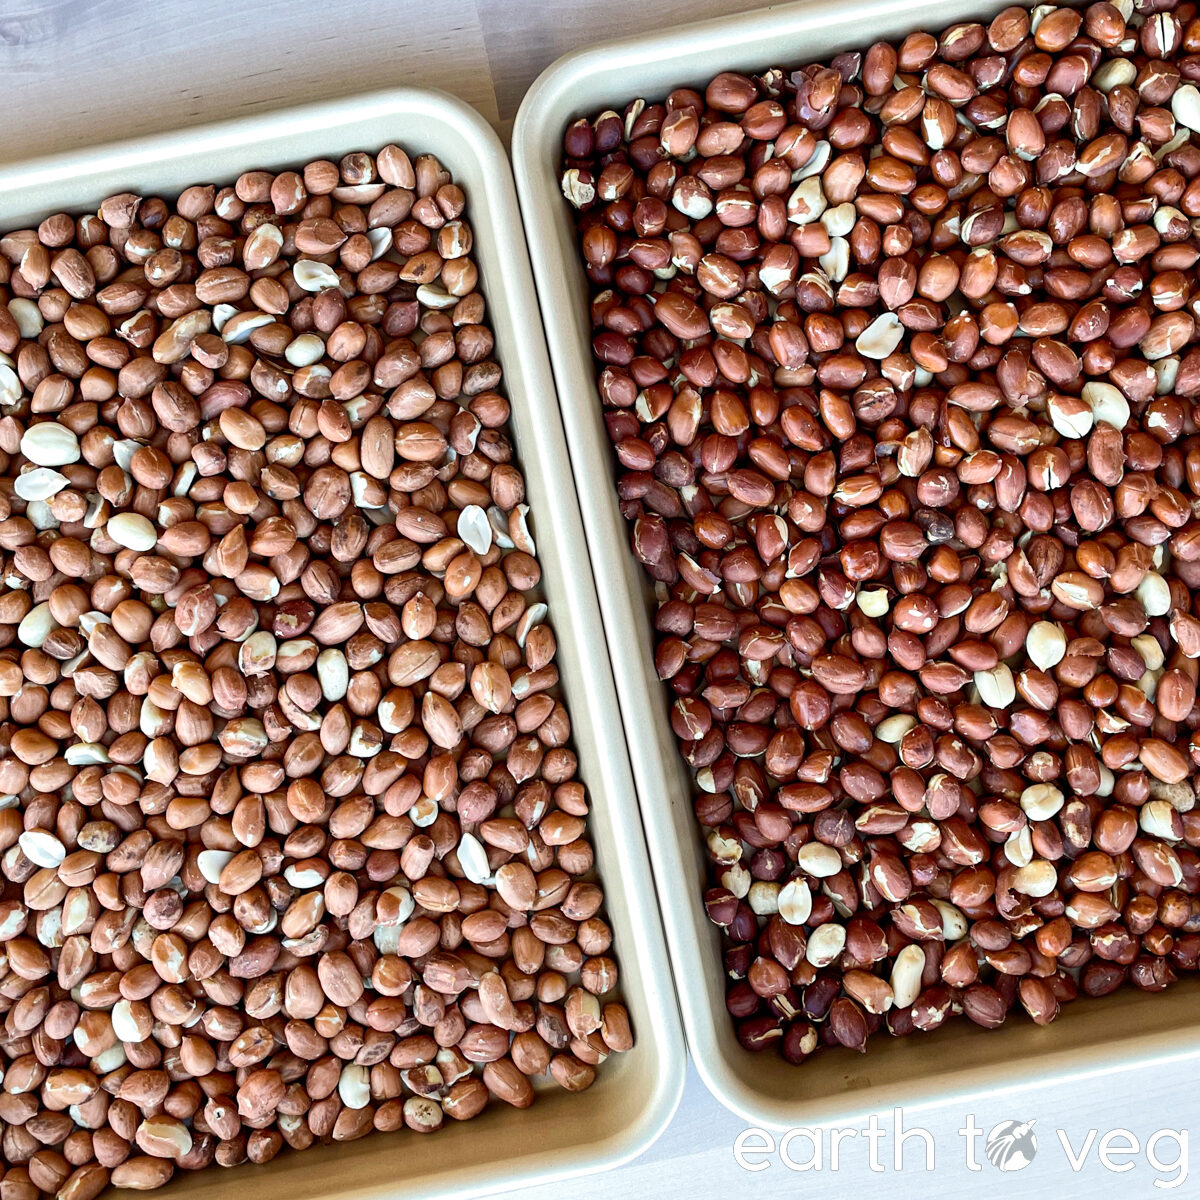
(Note these roasting times are for 600g of peanuts in a single air fryer basket or a single quarter-sheet baking pan. If you are roasting less peanuts, ie. each peanut is more spread out, then the roasting time will reduce drastically so check on them frequently. Don’t burn your nuts!)
Tip for using an air fryer: if you have a model similar to mine, where the air frying rack has a large gap in the middle, you can wedge in a piece of tin foil to stop the nuts from falling through.
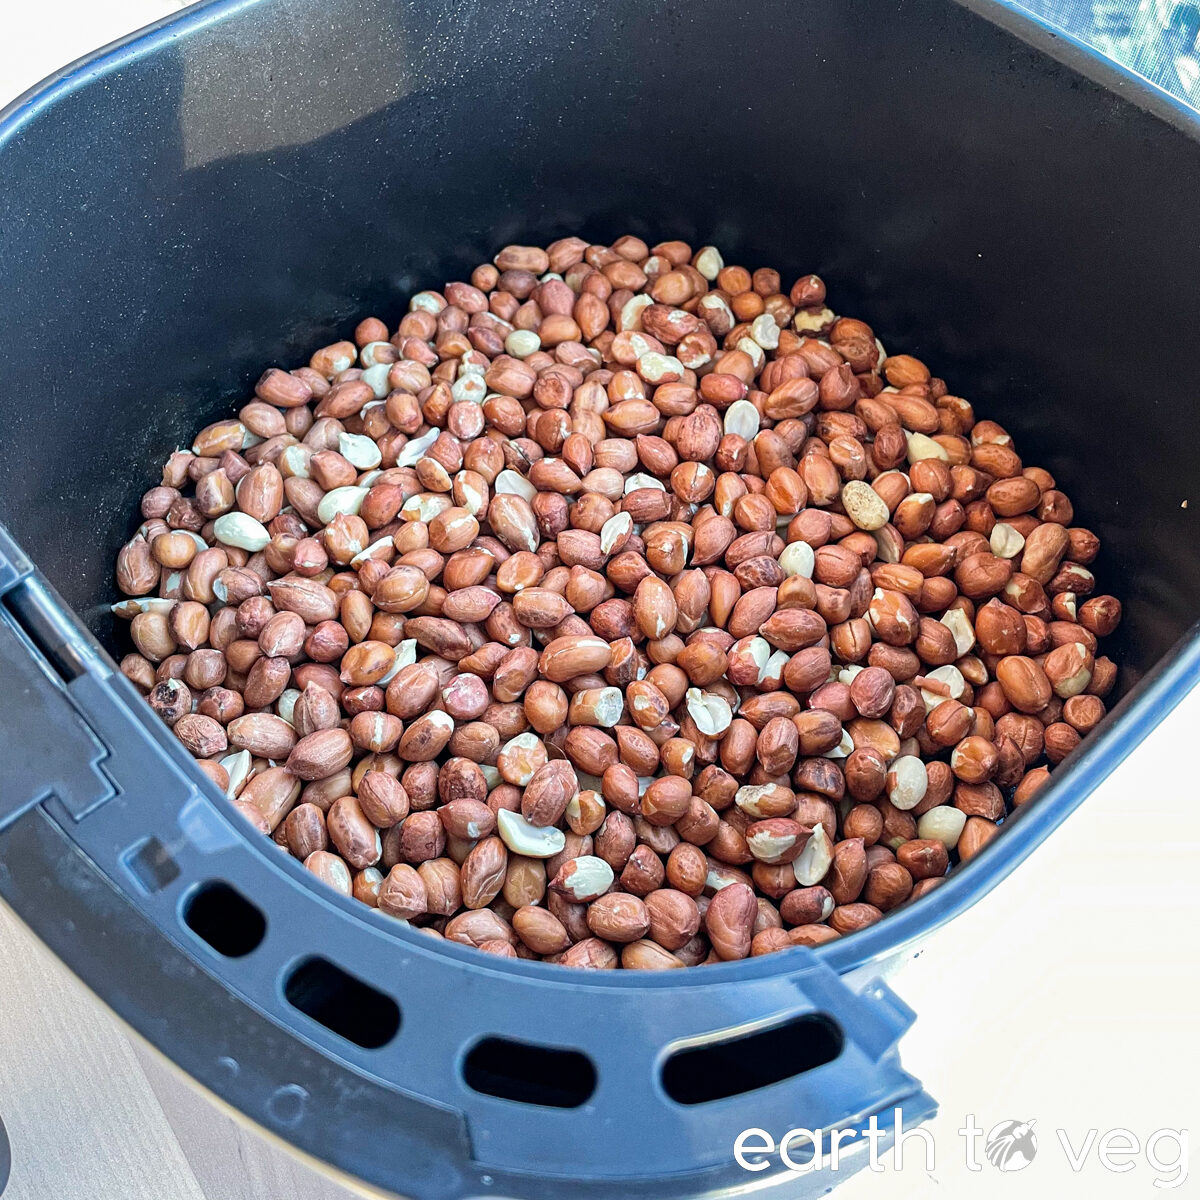
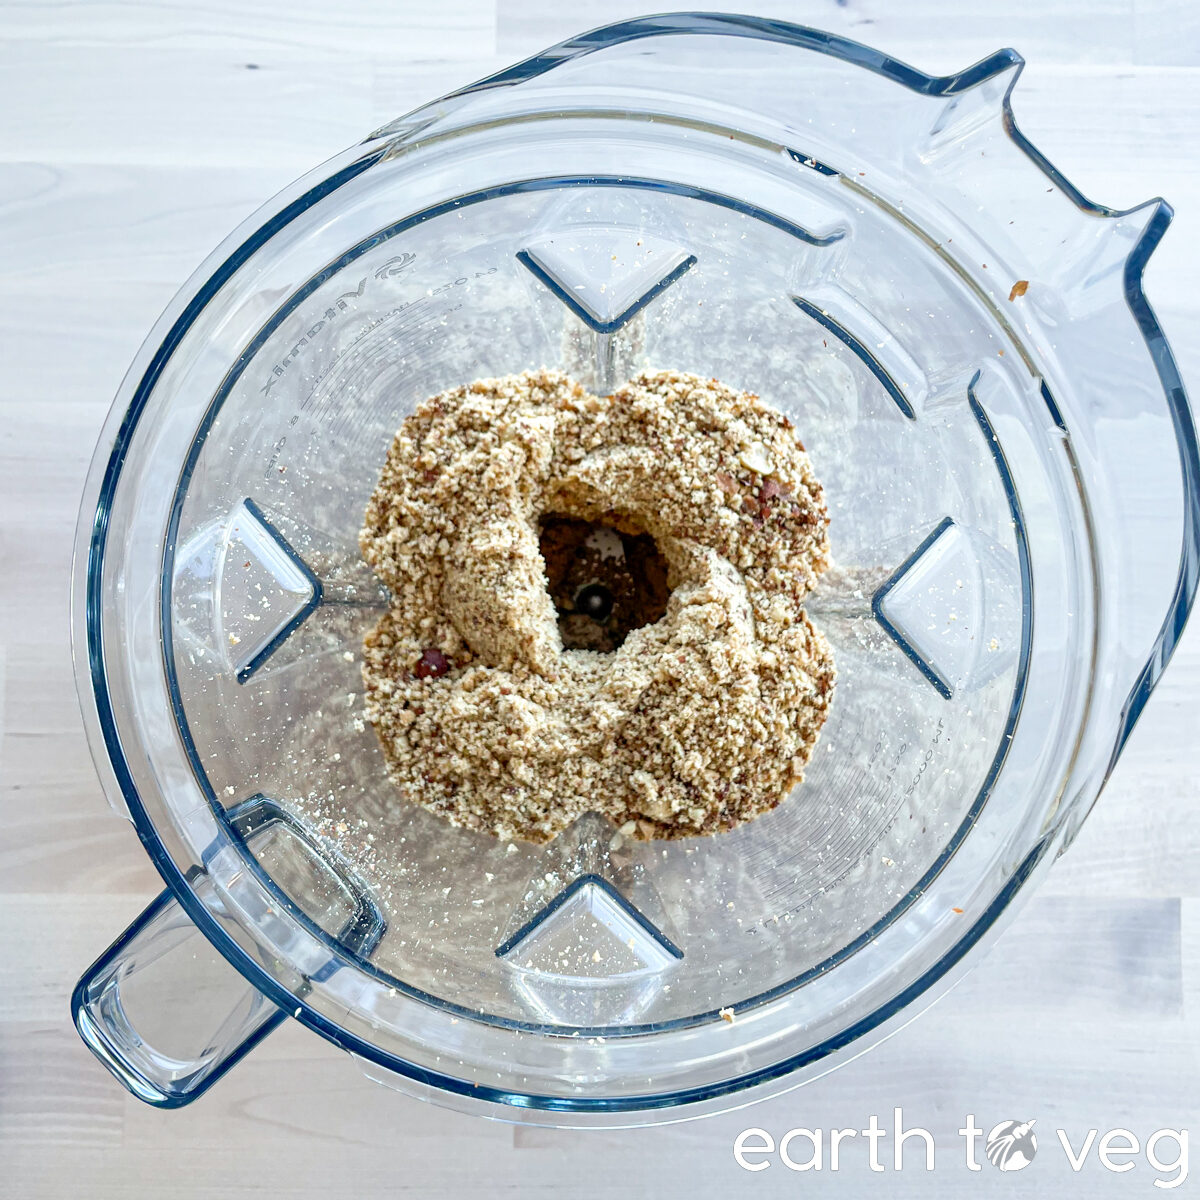
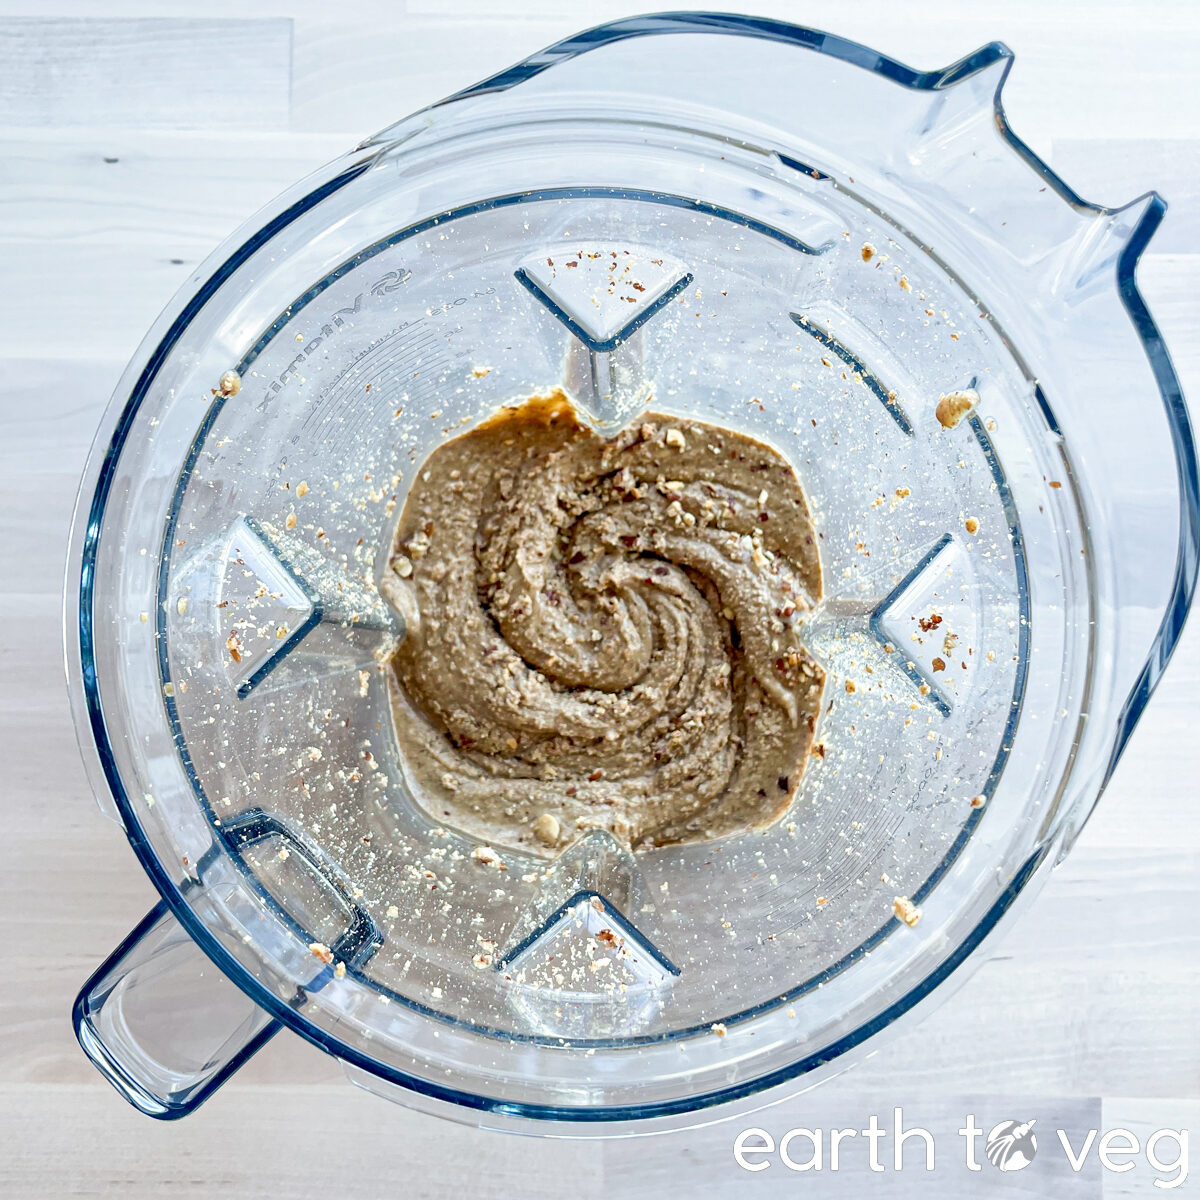
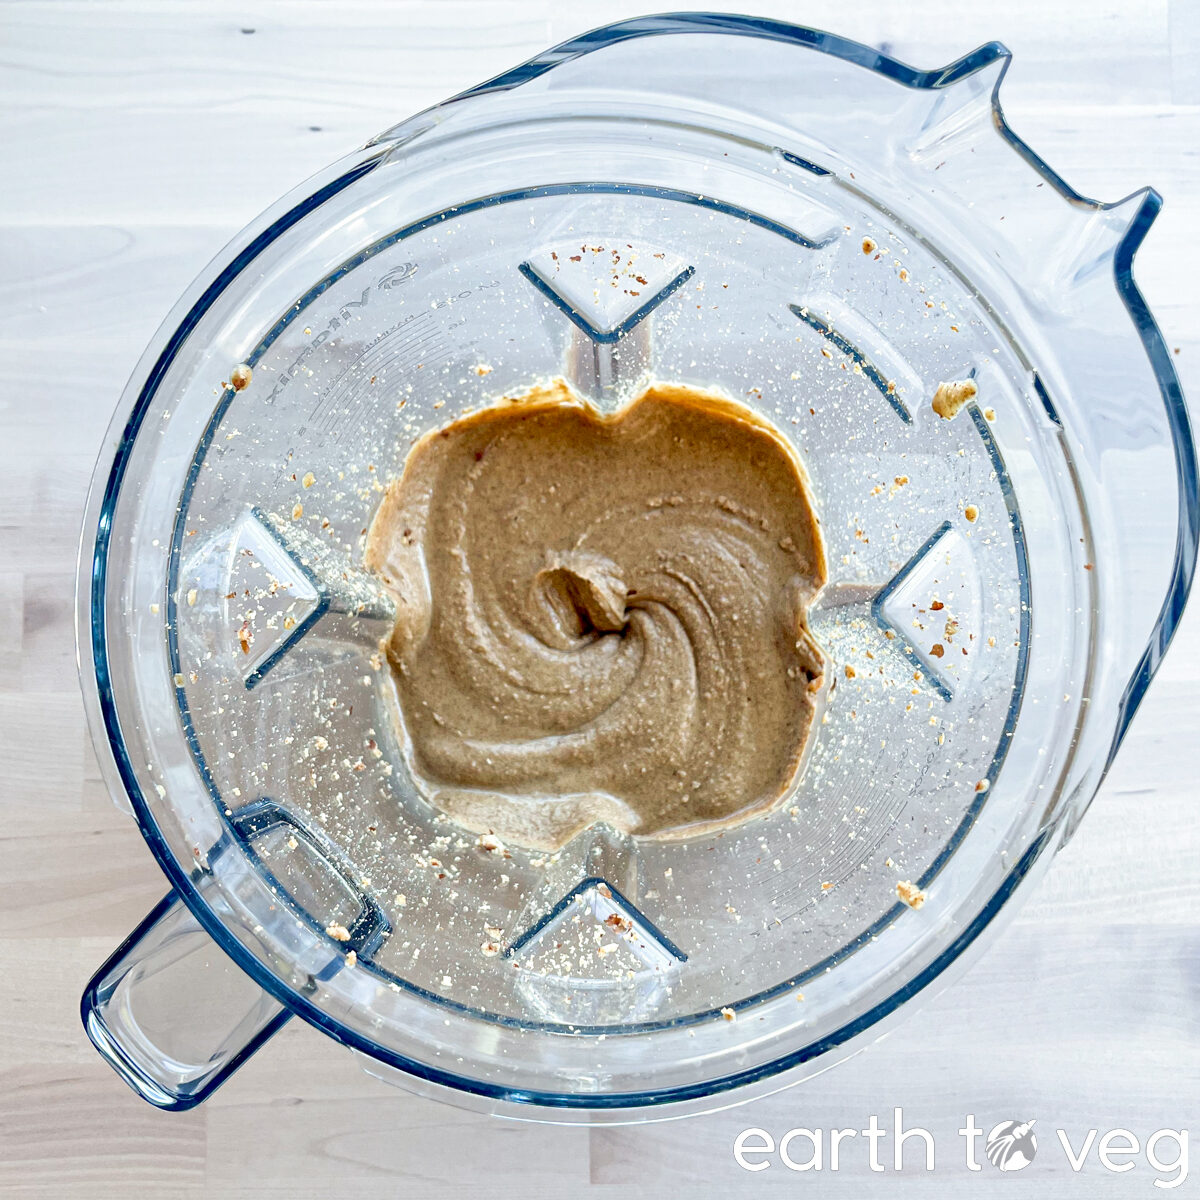
Let the peanuts cool down before adding them to a Vitamix blender.
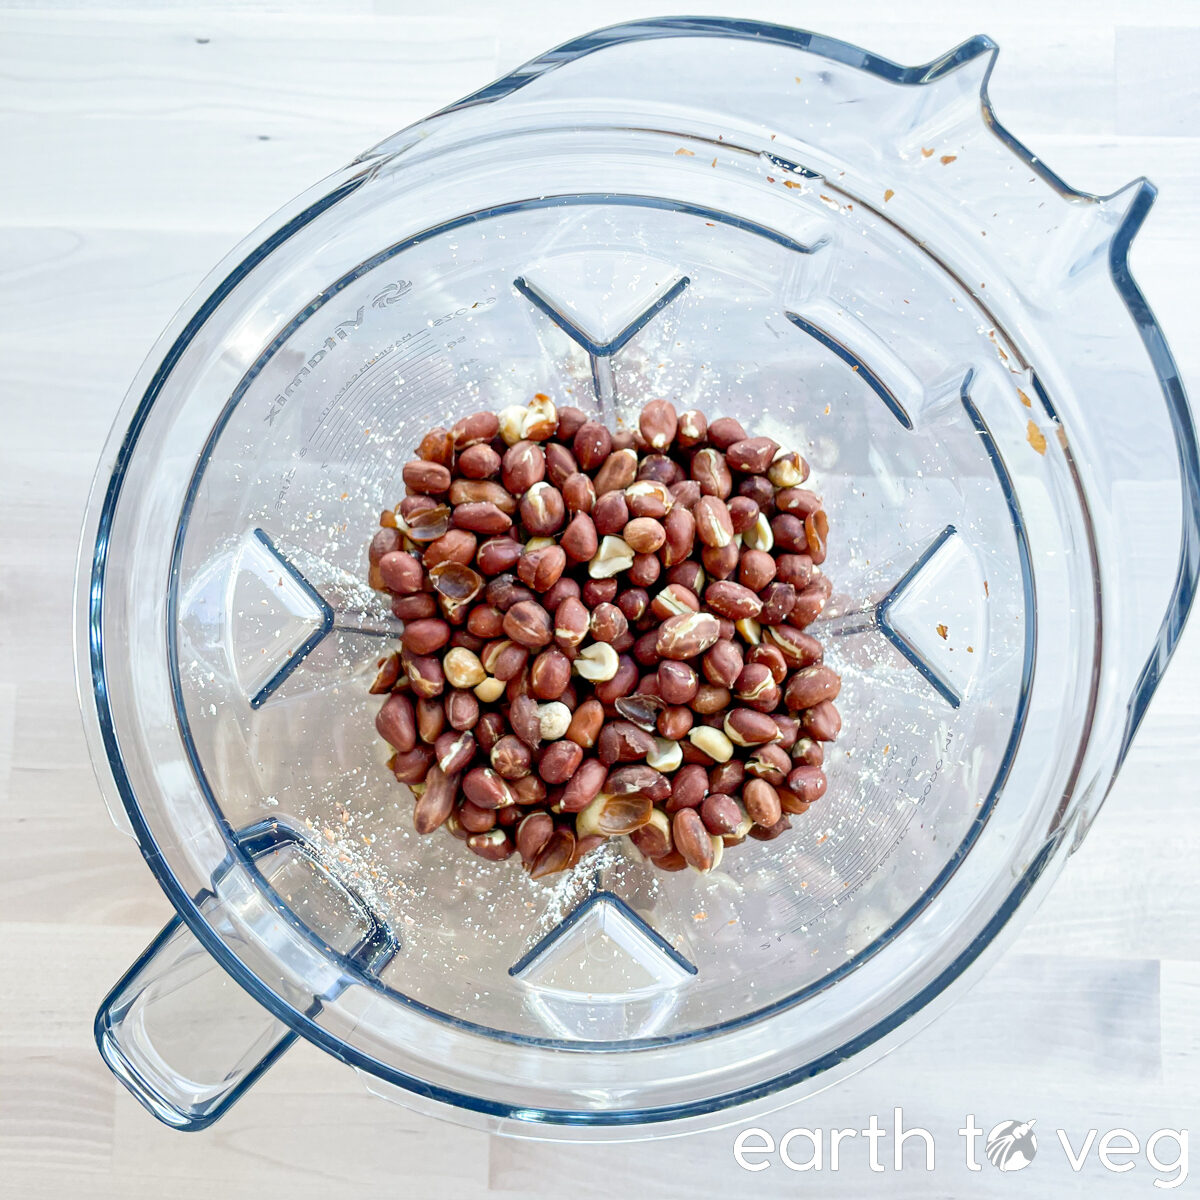
Blend on high speed for 2 minutes, using the tamper to continuously push down the peanuts until they are all fully blended. If you want a bit of texture in your peanut butter, you can stop at 1.5 minutes, but it will take a full 2 minutes to achieve a smooth peanut butter.
That’s it!
Vitamix vs Blendtec: Vitamix blenders are best-suited for making nut butters because 1) they have the motor power needed to blend whole nuts into a smooth paste 2) they come with a tamper which allows you to push the ingredients down into the blades as you blend. I have also tried making peanut butter in a Blendtec, which is just as powerful but doesn’t come with a tamper. It was cumbersome because I had to stop the blender and scrape the peanuts into the bottom of the jar several times to get them fully blended. However, Blendtec also sells a smaller jar called the Twister Jar, which is specifically designed for thick blends like peanut butter. This one has worked pretty well in my experience, but you will need to scale down the ingredients for this recipe by two-thirds because of the smaller size.
Make Ahead & Storage Tips
Store homemade peanut butter in an airtight jar at room temperature for up to 2 weeks, or in the fridge for 3-6 months. (It depends on how fresh your nuts are. Peanut butter takes a long time to actually become unsafe to eat, but the oils in the nuts will go rancid over time and acquire an off flavour.)
Peanut Butter Flavour Variations
Feeling fancy? Here are some spins on traditional peanut butter:
- Cinnamon peanut butter: Double the sugar and 1 tsp ground cinnamon or pumpkin pie spice.
- Chocolate peanut butter: Increase the sugar to 1/3 cup and add 1/4 cup cocoa powder.
- Maple peanut butter: Substitute the sugar with maple syrup. You can also add more maple syrup for a sweeter peanut butter.
If you made homemade peanut butter with a tasty flavour variation, be sure to let me know in the comments!
Recipe FAQs
Refrigerate in a container with tight-fitting lid. Homemade peanut butter contains no preservatives, and the fats will go rancid quickly at room temperature. Keeping them in the fridge ensures they’ll stay fresh for longer.
It depends on how fresh your nuts are, but generally around 3-6 months in the fridge. Peanut butter takes a long time to actually become unsafe to eat, but the oils in the nuts degrade and acquire an off flavour over time.
Yes. Adding salt and sugar makes it taste closer to regular storebought peanut butter, which usually contains a bit of both. But totally not necessary. If you don’t want to add any extraneous ingredients, feel free to omit them.
It depends. Some recipes are formulated using highly processed peanut butters (think Kraft or Skippy) which have a lot of additives that influence the baking process. For best results, choose a recipe that calls for natural peanut butter.
If you’re having trouble making homemade peanut butter, this could be down to a few factors:
Blender is not powerful enough. I have made this successfully in both a Vitamix and Blendtec, but other blenders may have more difficulty.
Blending time is too short. In my experience, it will take at least a minute and a half, sometimes up to two and a half minutes on the highest speed setting, to fully grind the peanuts into peanut butter.
Not using roasted peanuts. I’m not sure why, but the peanuts seem to release their oil better after they’ve been roasted. If you use raw peanuts, they may not turn into peanut butter as easily and you might risk burning out your blender’s motor. Also, raw peanut butter just doesn’t taste as good. So why are you doing that?!
More Vegan American Recipes
Recipe Card
Did you make this recipe? Please consider leaving a rating below to let me know how you liked it. You can also take a picture and tag me on Instagram @earthtoveg, I will shout you out in my Stories!
Skin-On Peanut Butter Recipe
Equipment
- Vitamix or Blendtec blender (see Note 1)
Ingredients
Switch between volume vs weight measurements:
- 4 cups skin-on peanuts
- 1 tsp fine salt or 1/2 tbsp kosher salt *optional
- 2 tbsp brown sugar *optional
Instructions
- If using raw peanuts, first roast them: in the air fryer at 160 °C (320 °F) for 18 minutes, or oven at 175 °C (350 °F) for 20 minutes, tossing twice. (See Note 2.)
- Add all the roasted and cooled peanuts to a Vitamix blender. Blend on high speed for 2 minutes, using the tamper to continuously push down the peanuts until they have turned into a smooth peanut butter.
Notes
- Vitamix blenders are best-suited for making nut butters because 1) they have the motor power needed to blend whole nuts into a smooth paste 2) they come with a tamper which allows you to push the ingredients down into the blades as you blend. I’ve also tried making peanut butter in a Blendtec, which is just as powerful but doesn’t come with a tamper. It was cumbersome because I had to stop the blender and scrape the peanuts into the bottom of the jar several times to get them fully blended. However, Blendtec sells a smaller jar called the Twister Jar, which is specifically designed for thick blends like peanut butter. This one has worked pretty well in my experience, but you will need to blend in batches because of the smaller size.
- The roasting times are for 600g of peanuts in a single batch (a single air fryer basket or a single quarter-sheet baking pan). If you are roasting less peanuts, ie. each peanut is more spread out, then the roasting time will reduce drastically. Don’t burn your nuts!
Hey Kelly,
I ran into this just looking for a basic peanut butter recipe. It surprised me so much, I had to do my own research.
And what did I find? To my shock and amazement, the number of people who say you must remove the skins. They are nuts!
If I am sitting with a bowl of peanuts in the shell, I crack them open and eat them! I do not worry about the skins – if they make it to my mouth I eat them, if they fall off, well I am not going to bother fishing them out of the bowl. LOL
But, of course use the skins. That was not even a concern of mine!
I am very proud of you for educating the world!!!
Haha I totally agree. USE THE SKINS!!! But almost every recipe starts with peeled peanuts so for a long time it didn’t even occur to me to use unpeeled nuts… until I got gifted a bag of skin-on peanuts that I wanted to turn into peanut butter, but I was too lazy to peel them. And this recipe is the result!
this article is very useful, thank you for making a good recipe
I have spent years “de-skinning” my peanuts! This was so easy and quick. It also tastes delicious !!
Thank you!
Lol I’m glad I’ve been able to save you some time 😀
do I have to roast my peanuts first. I have organic, raw valencia peanuts and try to avoid roasting or boiling them.
Hi Kat, roasting releases the oils in the peanuts so if you don’t roast them first you may find it difficult to blend them into a smooth paste – you might have to add some oil to get them going in the blender. Also, raw peanut butter isn’t going to taste quite as nutty and flavourful. But if you do try to making this with raw peanuts let me know how it goes – I’m interested to hear about your results.
My first attemot at making and it was perfect! Thank you 🤩.
Now to figure out how to make crunchy Peanut butter 😀
So happy it was a success, Rafiat 💖 For homemade crunchy peanut butter, I think the best way would be to roughly crush up some roasted and skinned peanuts, then mix into the smooth peanut butter you just made. Let me know how it goes for you!
This is great! I love peanut butter!
Best peanut butter ever!!! Thank you for sharing the tips and the recipe!! I substituted the sugar with a bit of honey and it is awesome. I don’t think I’ll ever use store-bought peanut butter ever again!!!!
Ahh that makes me so happy to hear Claire. And I agree, nothing beats the flavour and satisfaction of making it fresh at home 😁
Just made this today, leaving the skins on the peanuts is a gamechanger! No more messy dirty towels from trying to get all the skins off…
Thank you for your helpful tips on which blender to use!
No problem!