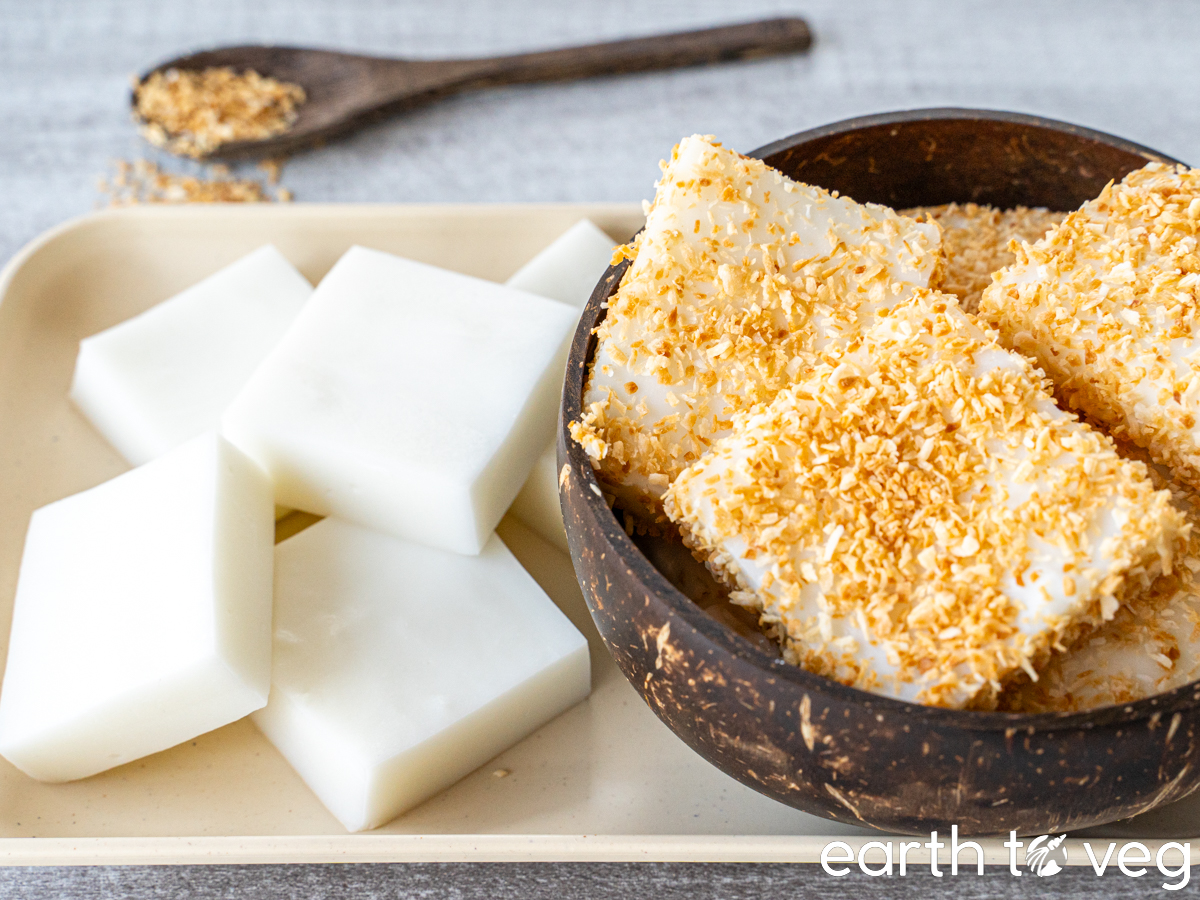
Hawaiian Haupia, or Coconut Milk Pudding, is the easiest 4-ingredient dessert to make. All it takes is coconut milk, cornstarch, sugar, and ten minutes of whisking to whip up these creamy, dreamy, tropical sweet squares. Coat them in Toasted Coconut for extra flavour. Naturally dairy-free and gluten-free, to boot.
Why This Recipe Works
- Simple: Four ingredients, stirred together in a pot… it can’t be any easier. The cooking process is similar to Muhallebi (which also uses just four ingredients), but haupia emphasizes the flavour of coconut milk.
- Tested to perfection: I tested this recipe eight times, playing around with the ingredient ratios and cooking times. In the end I came up with this recipe which is both quick to make and also stays firm when sliced, with lots of rich coconut flavour. The hands-on time is only 15 minutes, from turning on the stove to pouring the haupia into a container.
- Naturally dairy-free and gluten-free: The traditional recipe for haupia contains no gluten or animal products. So you won’t feel like you’re missing out on anything when making this authentic Hawaiian dessert!
Ingredients and Substitutions

A few important notes on the ingredients used in traditional Haupia:
Coconut Milk: Make sure to use canned coconut milk, which is meant for cooking and baking, like Aroy-D or Thai Kitchen. Don’t use coconut milk beverages like Silk or SoDelicious, which are thinner and not nearly as creamy. The richer the coconut milk you use, the better your haupia will taste. Some modern recipes cut the coconut milk with regular milk, but the original versions use only coconut milk. That’s why haupia is the perfect dessert for coconut lovers!
Cornstarch: The traditional thickener for haupia are the roots of the pia plant, aka Polynesian arrowroot. This plant is native to Southeast Asia but Polynesian settlers brought it over to Hawaii thousands of years ago. These days, it’s been mostly replaced by the cheaper and more accessible cornstarch. Cornstarch is now the thickener of choice for Hawaiian haupia makers. (It’s also what I use to thicken my Pink Pineapple Pie filling.)
Note: I would not recommend substituting another starch for cornstarch as they may result in different textures.

I’ve tested this recipe with tapioca starch, which resulted in haupia with stretchy, goopy texture. Contrast this to haupia made with cornstarch, which was more firm with a little bit of bounce.
(If you’re looking for ways to use tapioca starch, consider making Coconut Pandan Kaya. This is another coconut-based sweet treat. Unlike haupia, it is best made with tapioca starch instead of cornstarch.)
Sugar: Traditional haupia uses regular white granulated sugar, as it preserves the pure whiteness of the pudding, but you can substitute with any sweetener of your choice (even zero-calorie options like stevia or monkfruit). Note that using a sugar-free alternative will result in a less rich-tasting pudding.
Tip: You can adjust the sweetness to taste. I would start with adding the amount given in the recipe card (which is on the lower end). Once the mixture is thickened on the stove, use a spoon to remove a small amount and let it cool. Taste to see if it’s sweet enough and stir in more sugar if desired.
For a full list of ingredients and quantities, refer to the recipe card at the bottom of this post.
Step-by-Step Process
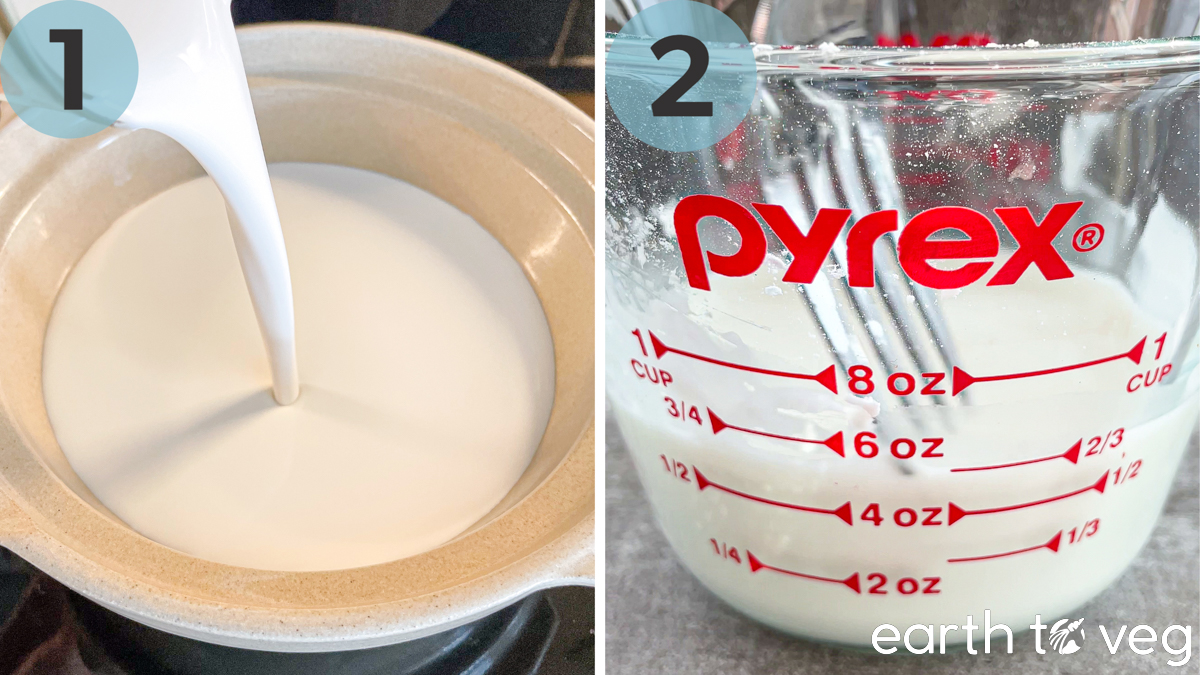
Step 1: Start by heating your coconut milk until it starts to simmer. Stir frequently to prevent the bottom from burning.
Step 2: Meanwhile, in a separate bowl or measuring cup, whisk together the cornstarch and water until smooth.
Tip: It’s important to stir the cornstarch and water together first before mixing it with the coconut milk and sugar to ensure you don’t end up with any cornstarch lumps in your haupia.

Step 3: Add the sugar along with the cornstarch-water mixture to the simmering coconut milk. Stir continuously.
Step 4: The haupia will immediately start to thicken. Once it reaches a glue-like consistency with a glossy sheen, remove from heat.
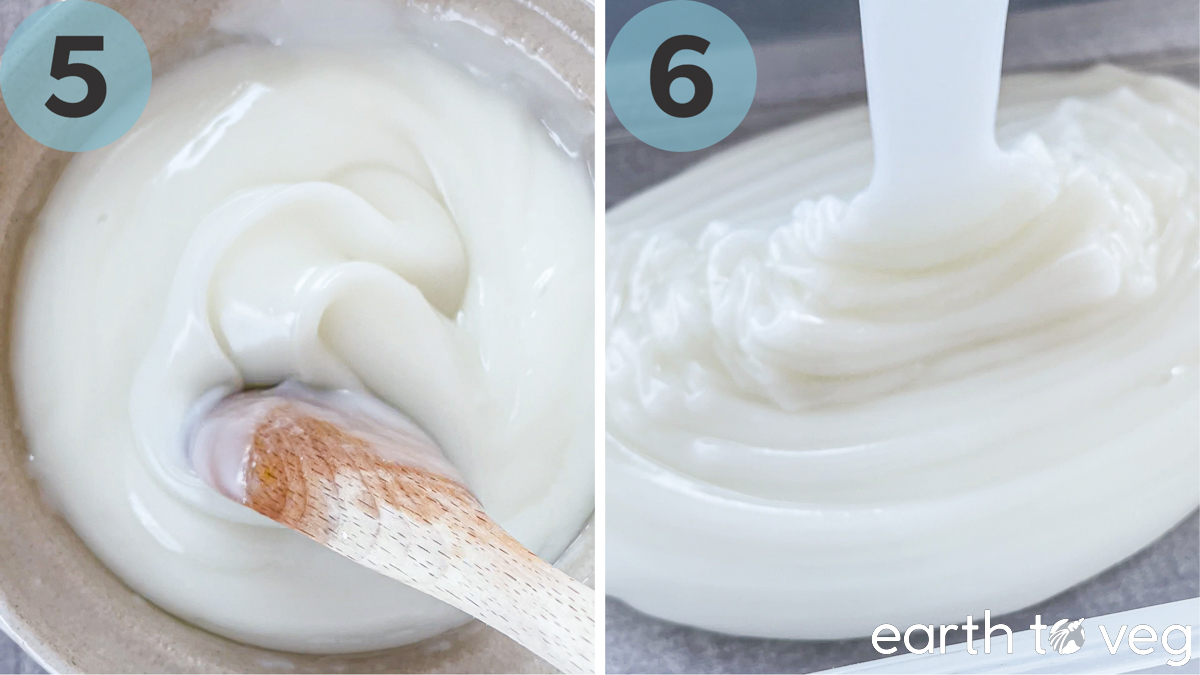
Step 5: Let the haupia cool slightly. Continue to stir as it cools, to prevent a skin from forming on the top.
Step 6: Pour the mixture into a square or rectangular container. Smooth the top with your spoon or spatula.
Note: Cooling the haupia in the pot before pouring it into the mold will stop cracks from forming on the surface of the haupia as it chills. I use this lunch box container as a mold and it’s the ideal size.

Step 7: Let cool, uncovered, at room temperature for an hour. Then cover and refrigerate.
Step 8: Chill for at least four hours before slicing. Serve cold.
Optional: Coat sliced haupia squares in Toasted Coconut Shavings to give it some extra crunch and roasted flavour!
Storage Tips
Fridge: Haupia has a shelf life of up to two days in the refrigerator. Coconut milk goes bad quickly at room temperature. So make sure to refrigerate it as soon as it cools down to room temperature and bring it out shortly before serving.
Freezer: Haupia’s texture changes a lot after freezing and defrosting. I don’t recommend!
Recipe FAQs
Haupia has a strong coconut flavor that is rich, slightly sweet, and pleasantly creamy. It is often compared to a coconut custard or gelatin, but it is firmer in texture. Haupia is usually lightly sweetened, and it carries the natural essence of coconut, making it a favorite among those who enjoy tropical flavors.
“Hau” means cool in Hawaiian, as the dessert is meant to be served cold. “Pia” is the name of an ancient plant whose roots produce a starch similar to arrowroot or cornstarch. Pia starch was the original thickener used to make haupia. So the name of Haupia basically translates to “cold arrowroot,” which is pretty accurate if you ask me!
Haupia has been a part of Hawaiian cuisine and culture for centuries. It’s deeply rooted in the traditions of the Hawaiian people and is often associated with special occasions, celebrations, and gatherings. It’s also made from simple and locally available ingredients, primarily coconut milk and a thickening agent (originally starch from the pia plant, which grew wild on the islands, but these days, mostly cornstarch). Coconut trees are abundant in Hawaii, making coconut a staple ingredient in many dishes.
More Coconut Milk Recipes

Recipe Card
Did you make this recipe? Please consider leaving a rating below to let me know how you liked it. You can also take a picture and tag me on Instagram @earthtoveg, I will shout you out in my Stories!

Hawaiian Haupia (Coconut Pudding Squares)
Equipment
- Saucepan, saucier, or small stockpot (a 1-qt pot is the perfect size)
- Square baking pan or tupperware container (any size between 6”×7” to 8”×9” will work; here's the one I recommend)
- Rubber spatula or wooden spoon
Ingredients
Switch between volume vs weight measurements:
- 1 14-oz can coconut milk anywhere between 12 to 14 oz (340 to 400 g) is fine
- ½ cup cornstarch see Note 1
- ½ cup water
- ¼ cup sugar to taste; see Notes 2 and 3
- ½ cup Toasted Shredded Coconut *optional
Instructions
- Heat coconut milk on medium-high heat until simmering. Make sure to stir frequently to prevent the bottom from burning.
- Meanwhile, in a separate bowl, whisk together 1/2 cup cornstarch and 1/2 cup water until smooth (see Note 4).
- Add 1/4 cup sugar along with the cornstarch-water mixture to the coconut milk while stirring continuously.
- The haupia should immediately start to thicken. Once it reaches a glue-like consistency, remove it from the heat and let it cool for 5 minutes. Continue to stir frequently as it cools, in order to prevent a skin from forming on the surface.
- Pour the thickened mixture into a square or rectangular container. Smooth the top with your spoon or spatula.
- Let cool, uncovered, at room temperature for an hour before covering tightly and transferring to the fridge. Refrigerate for at least four hours before slicing.
- Optional: Coat the sliced haupia squares in toasted coconut flakes.
Notes
- Cornstarch: Do not substitute tapioca starch for cornstarch. Tapioca starch results in a stretchy, goopy texture whereas haupia should be relatively firm and slightly bouncy to the touch.
- Sugar: Traditional haupia uses regular granulated sugar, as it preserves the pure whiteness of the pudding, but you can substitute with any sweetener of your choice (even zero-calorie options like stevia or monkfruit).
- Tip: You can adjust the sweetness to taste. Start with adding the amount given in the recipe card (which is on the lower end). Once the mixture is thickened on the stove, use a spoon to remove a small amount and let it cool. Taste to see if it’s sweet enough and stir in more sugar if desired before removing from heat.
- Important: It’s important to stir the cornstarch and water together first before mixing it with the coconut milk and sugar to ensure your haupia turns out as smooth and glossy as possible.
Too much corn flour masks the coconut flavor
Are you seriously using half a cup of cornstarch?
It’s typically 5 tablespoons max, but it’s better to use Pia (arrowroot opener)
I’m curious how this turns out I don’t wanna waste a batch of coconut to try
5 tbsp should be enough but I put 1/2 cup as it is more foolproof (even if people don’t simmer for long enough, it should still set up properly). I would love to try making it with real Polynesian arrowroot but that’s quite difficult to source here.
Do you use sweetened coconut milk or unsweetened?
Unsweetened! If using sweetened, you might want to dial back the sugar in the recipe.