Taro Paste is a rich, creamy spread with many uses, from mixing up Taro Bubble Tea to stuffing into decadent pastries. With a high-powered blender, it’s a breeze to make at home. (Instructions are also available for making this without a blender.) This paste is naturally gluten-free, egg-free, and dairy-free. For more sweet and creamy spreads, check out my recipes for Pandan Kaya and Rhubarb Butter too.
A Versatile Sweet Paste
Us East and Southeast Asians really like our sweet and creamy pastes. They are used in a mind-boggling variety of desserts. Here’s a few examples to show you what I’m talking about:
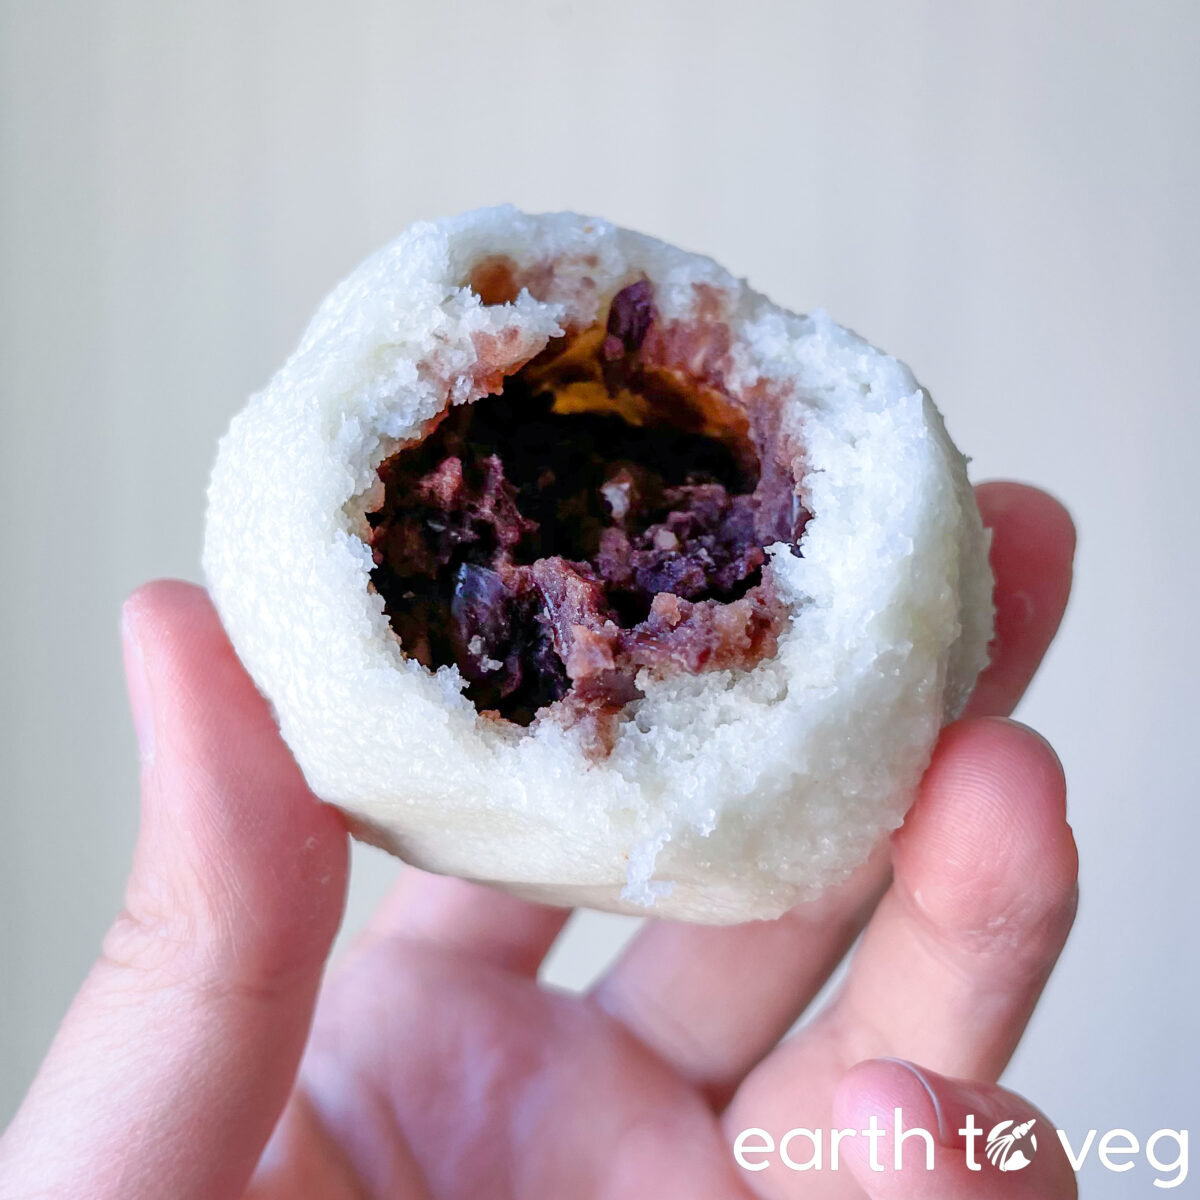

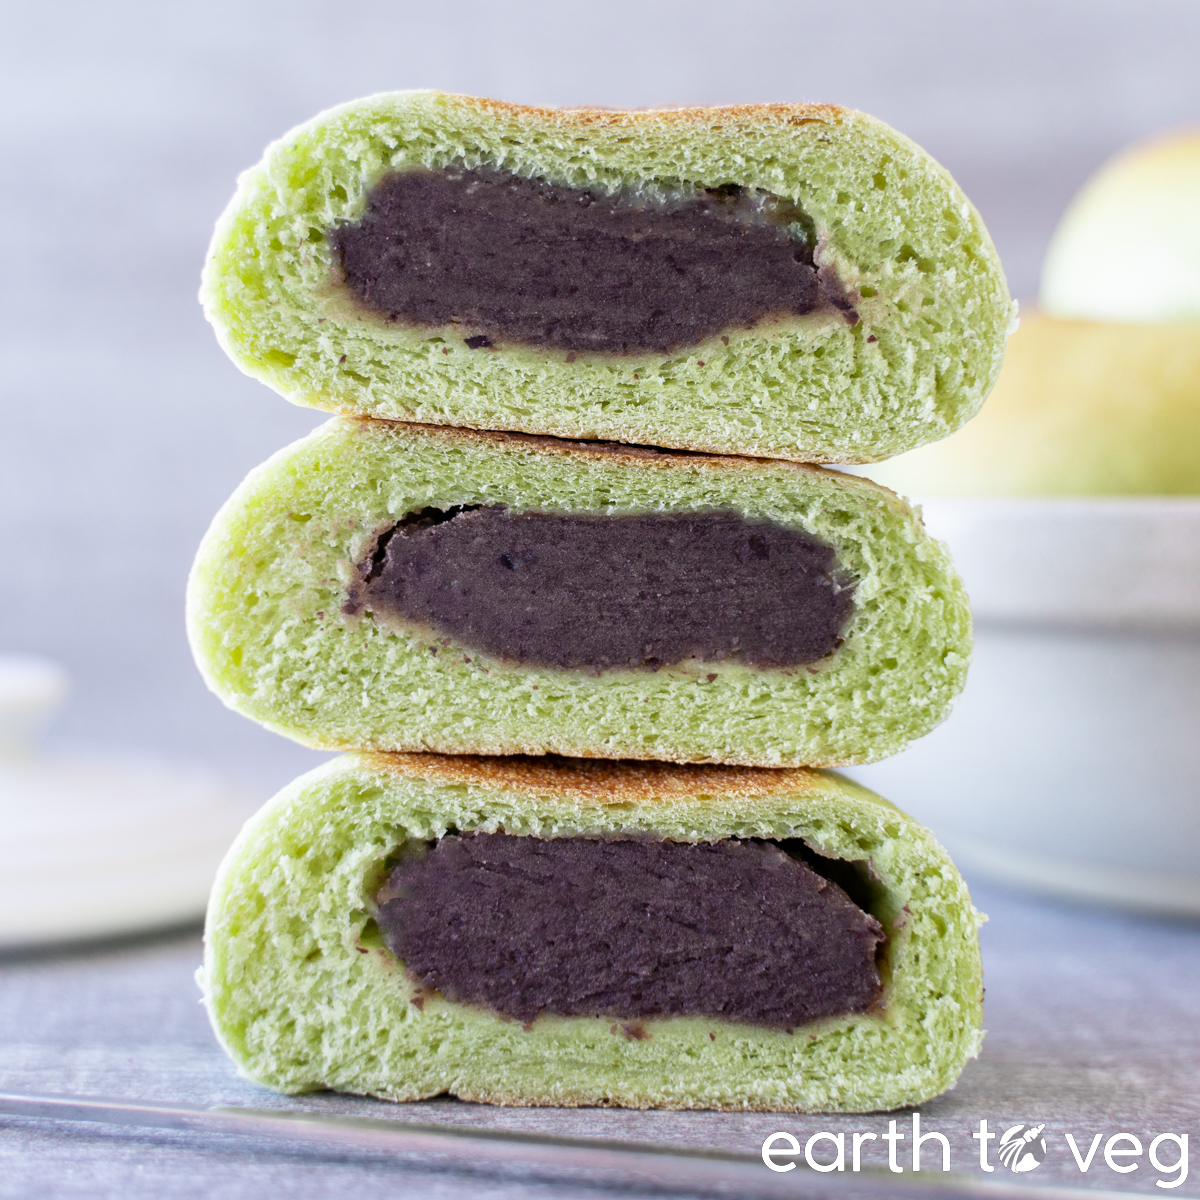
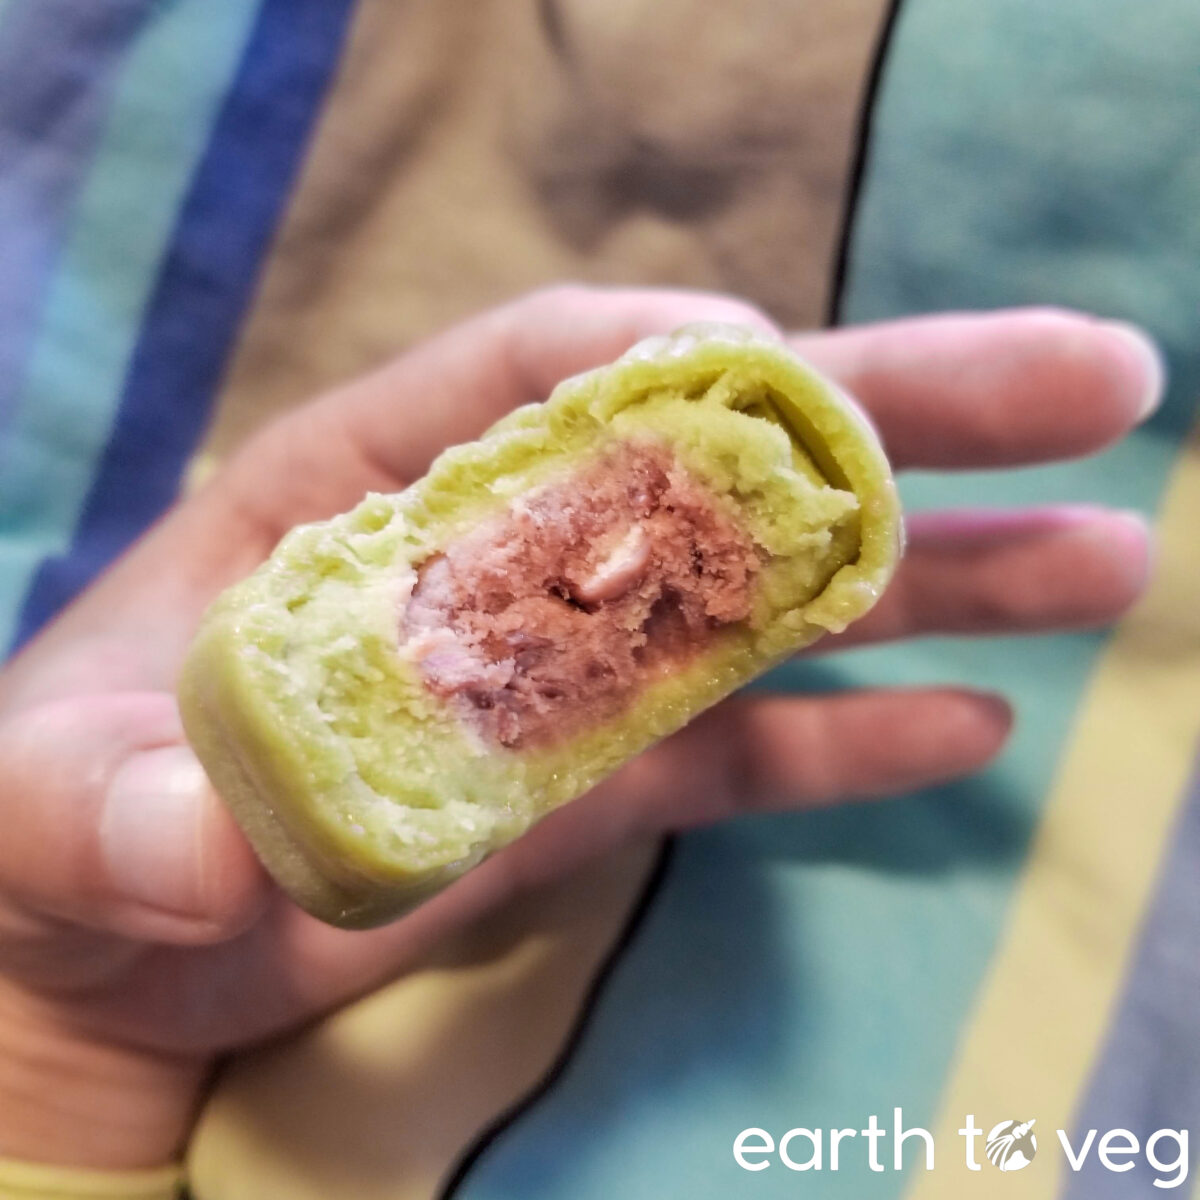
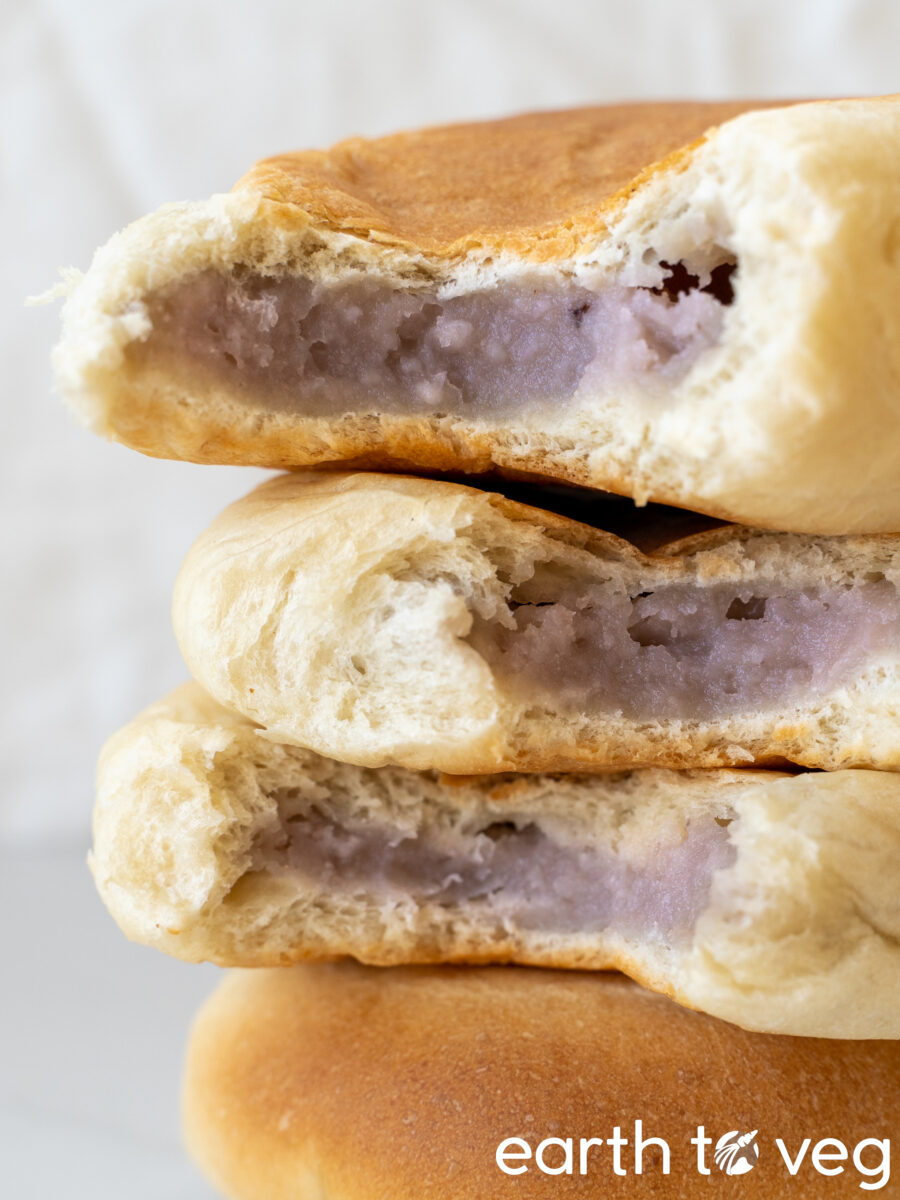
And, of course, there is taro paste! If you’ve ever been to a Chinese bakery, you’re sure to have seen (or smelled) those delicious soft milk buns with crumbly golden topping, stuffed to the seams with delicious mashed taro…
Those breads are my favourite Chinese bakery item of all time. Good luck finding a vegan version anywhere, though. That’s why I’m on a mission to make my own, starting with the insanely addictive taro filling. I am still in the progress of perfecting the taro bun recipe, but I thought I would share the recipe for the taro paste itself first. After all, this paste is so versatile, it can be used for way more than a simple pastry filling.
Uses For Taro Paste
In the recipe card below, I give instructions for making both thick and thin taro paste.
Thin Paste
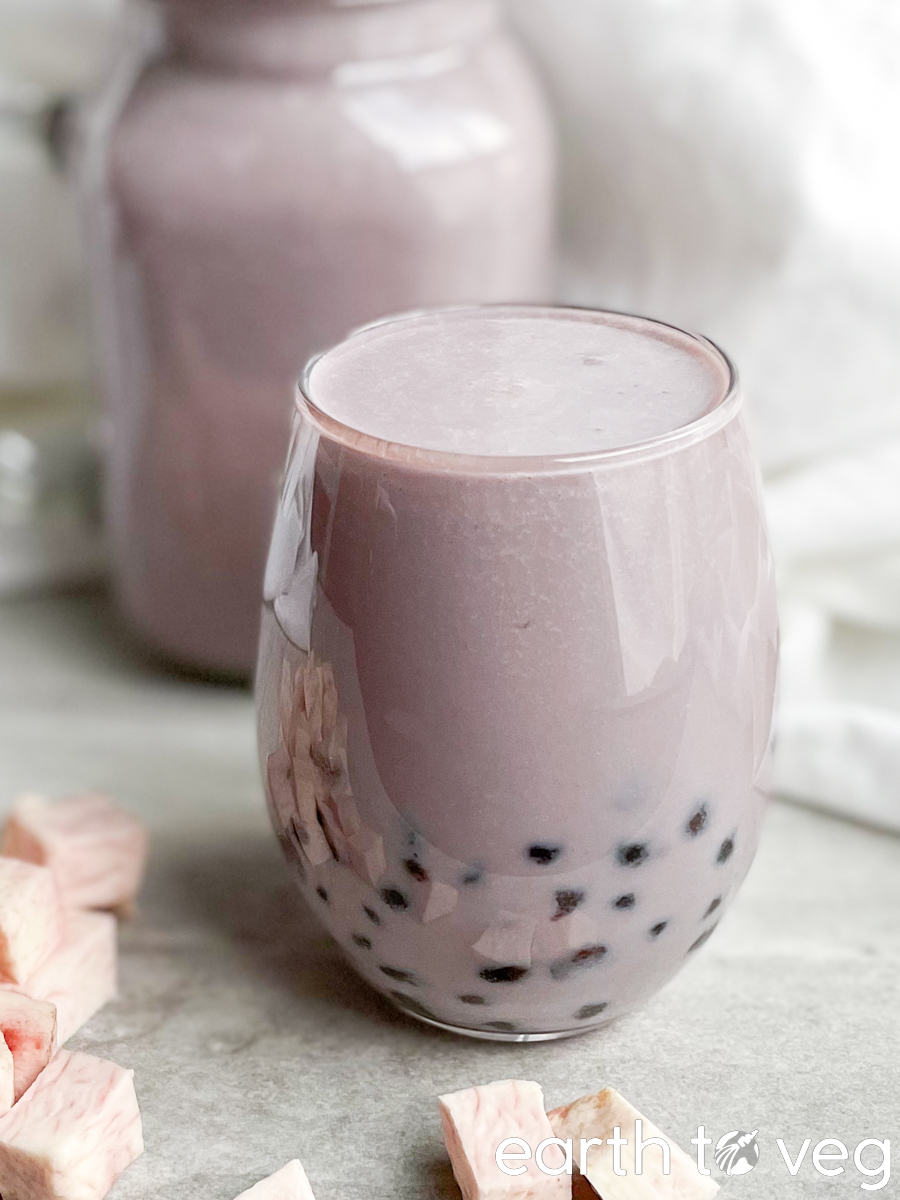
You can use the “thin” taro paste to flavour drinks:
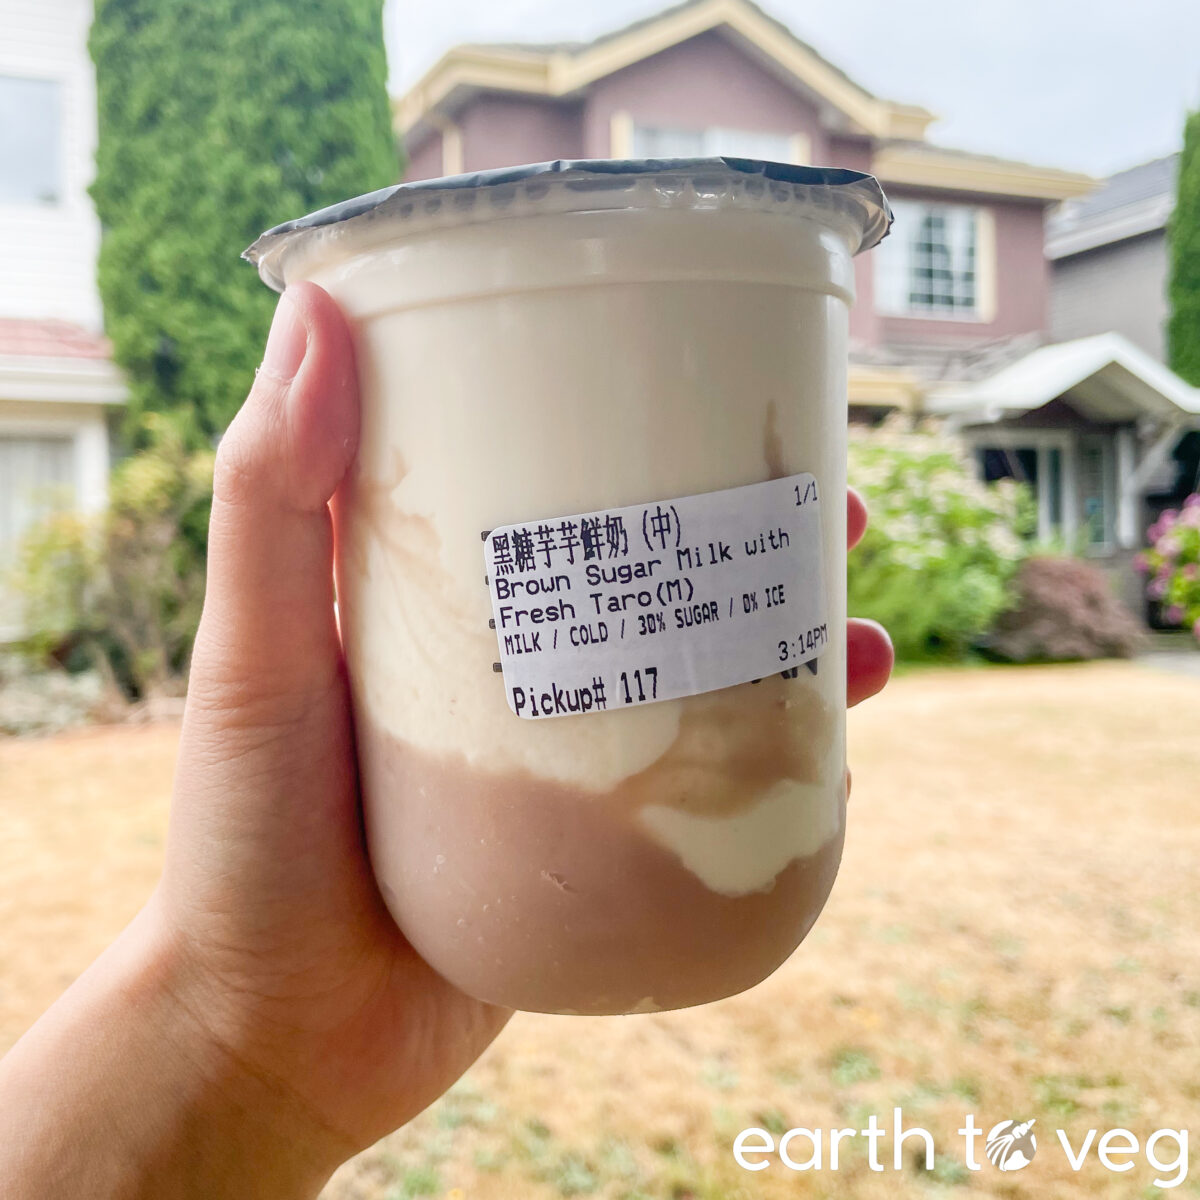
- Taro milk
- Taro Bubble Tea
Or add it to other cold desserts:
- Taro pudding
- Taro ice cream
Or use it as a delicious creamy spread on your toast!
Thick Paste
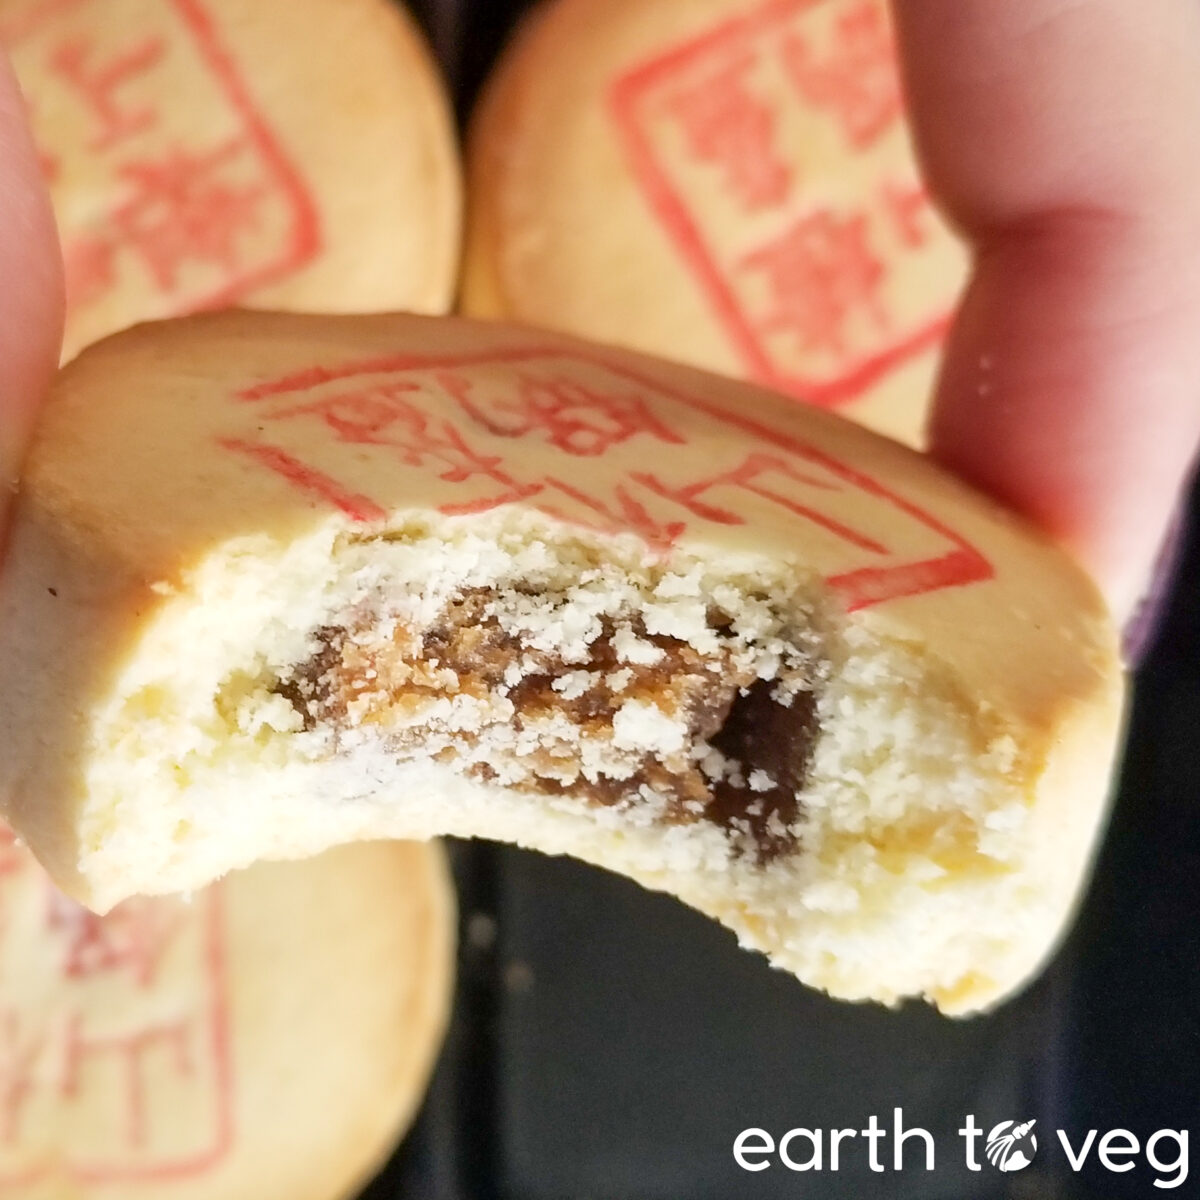
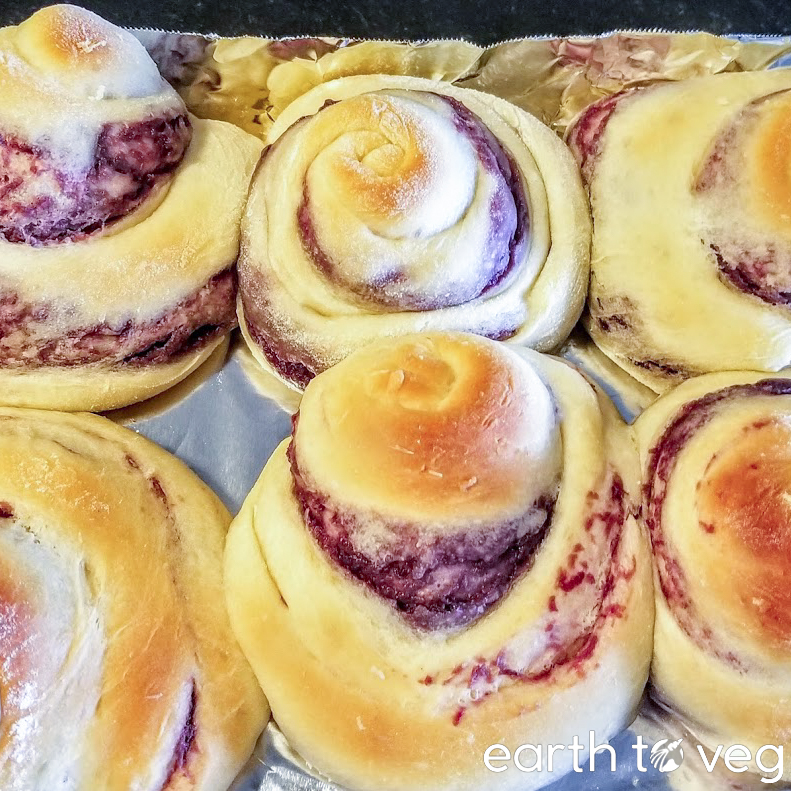
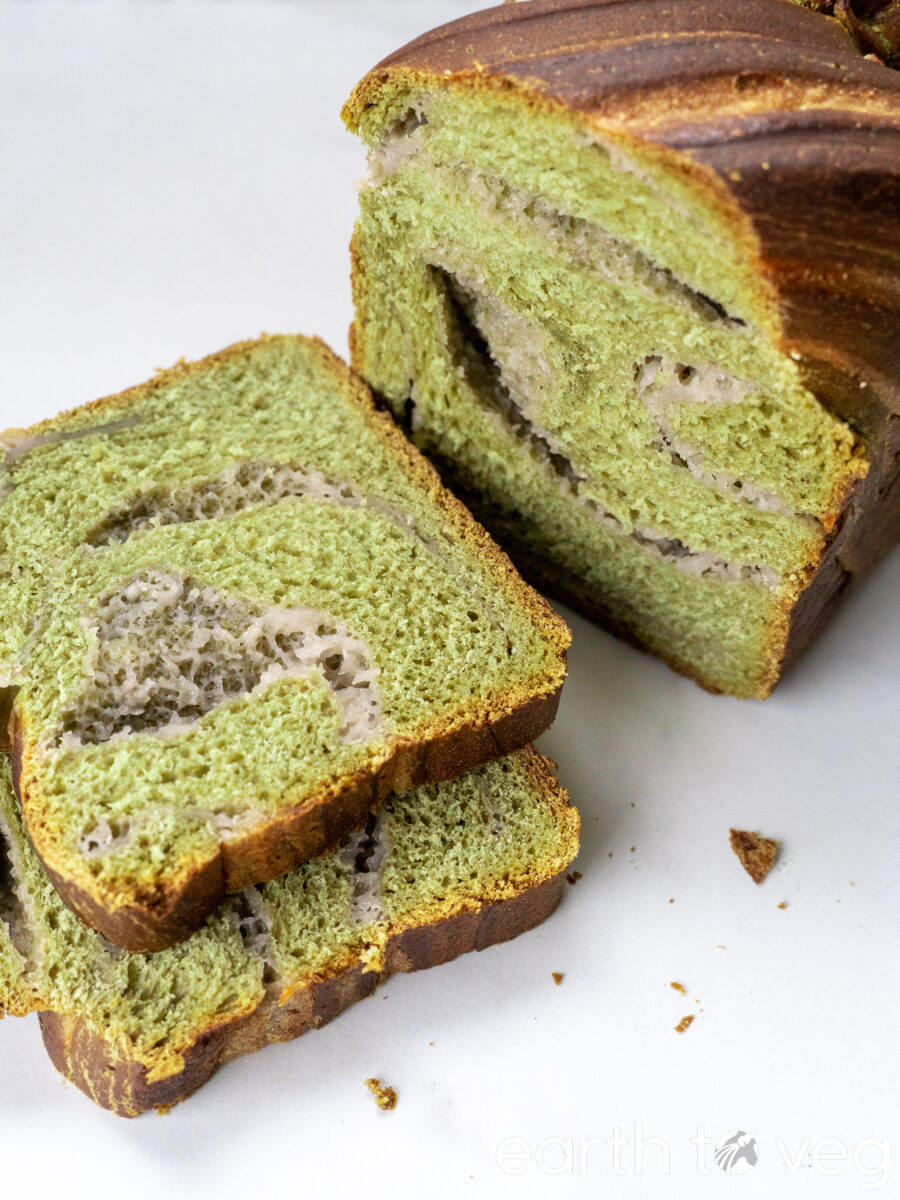
For use as a bread or pastry stuffing, I recommend making the thickened version of the paste. Thick taro paste is ideally used for:
- Taro mochi
- Taro buns
- Taro-stuffed shaobing
- Taro mantou
- Anpan (usually made with anko or red bean paste, but I’m planning to try a taro version)
- Taro mochi waffles (recipe coming soon!)
- Ensaymada (usually filled with ube halaya, but I like using taro paste instead because I prefer the taste of taro over ube)
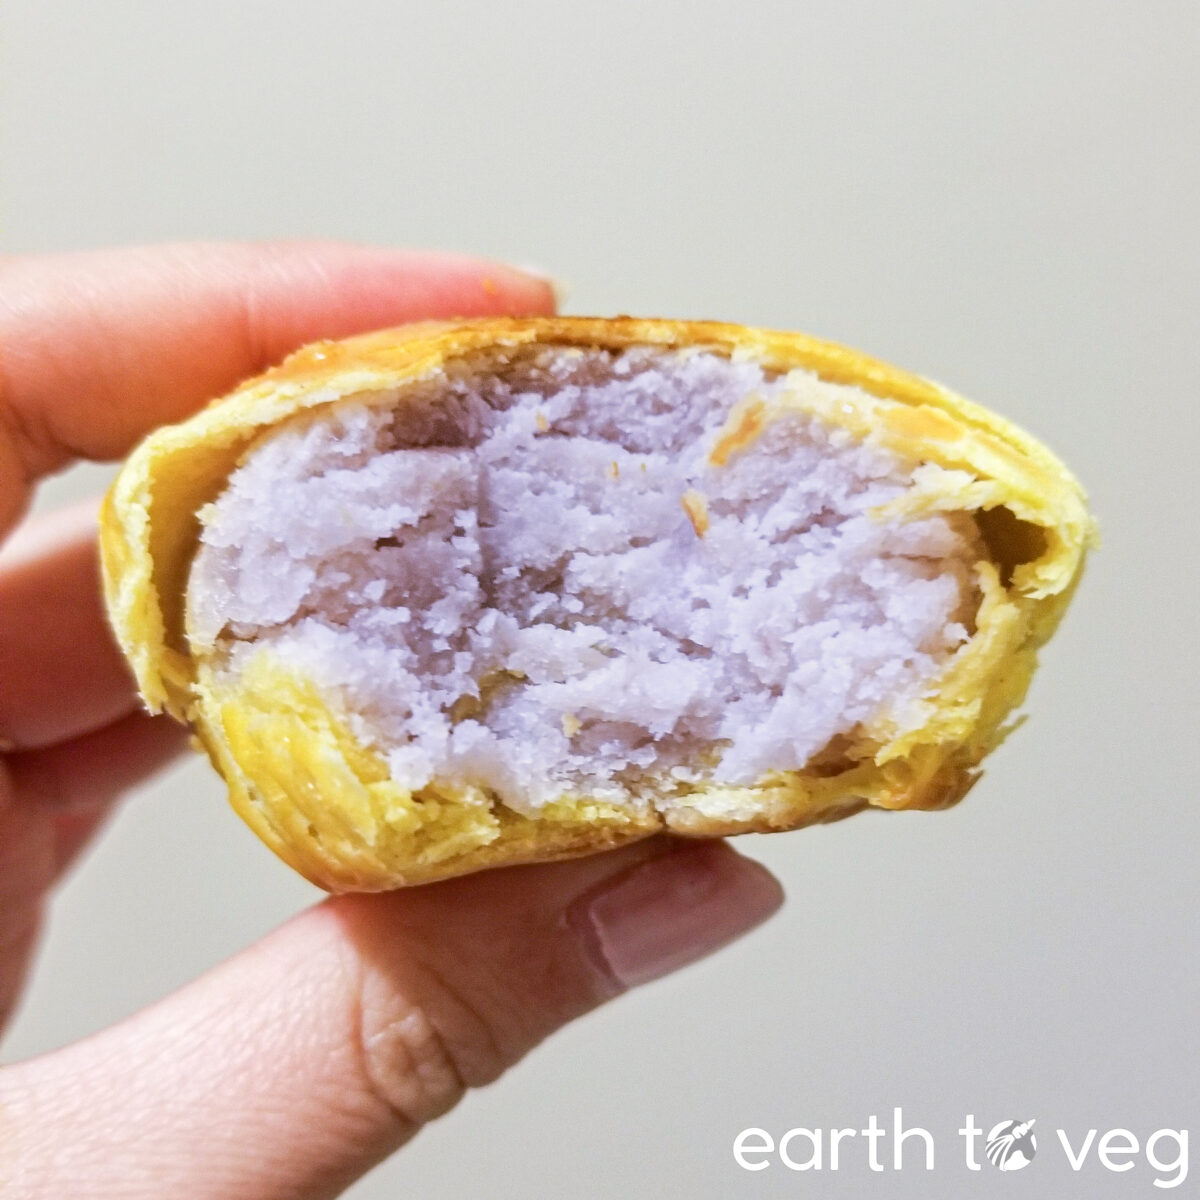
- Mooncake filling (snow skin style or Teochew style)
What You’ll Need
Canned coconut milk makes this taro paste super rich and creamy. Taro and coconut are two flavours that are just meant to be paired together. You can replace it with any milk of your choice for a lighter-tasting version.
A sweetener is essential to bring out the earthiness of the taro. You may think 1 cup of sugar is a lot, but keep in mind this recipe makes a f*&k ton of taro paste. Also, taro paste is not really meant to be eaten alone! It’s like jam. It tastes super sweet on its own, but the whole point is to combine it with something more bland. Believe me, I have tried reducing the sugar to 3/4 cup, but it’s just not sweet enough to use as a pastry filling anymore. Luckily, you can use a zero-calorie or low-calorie sweetener to make it a little healthier. I initially tested this recipe using regular white sugar, but now I make it with whatever sugar alternative I have on hand. I’ve had success with:
- Truvia Sweet Complete Granulated All-Purpose Sweetener
- Lakanto Classic Monkfruit 1:1 Sugar Substitute
- Volupta Zero Calorie Sweetener
So I think any sweetener should work. For natural options, you could use agave syrup, maple syrup, or a mild-flavoured pekmez like mulberry pekmez.
While food colouring is not essential for this recipe, it will help you achieve the look of storebought taro pastes. By itself, taro is a pale pinkish colour. But if you’ve ever had a taro pastry or bubble tea, you’ll have noticed it’s more of a lavender colour. I have one of those cheap 4-pack food colouring vials you’ll find in the baking aisle of every Canadian grocery store. 4 drops of red + 8 drops of blue gets me a gorgeous purple taro paste.
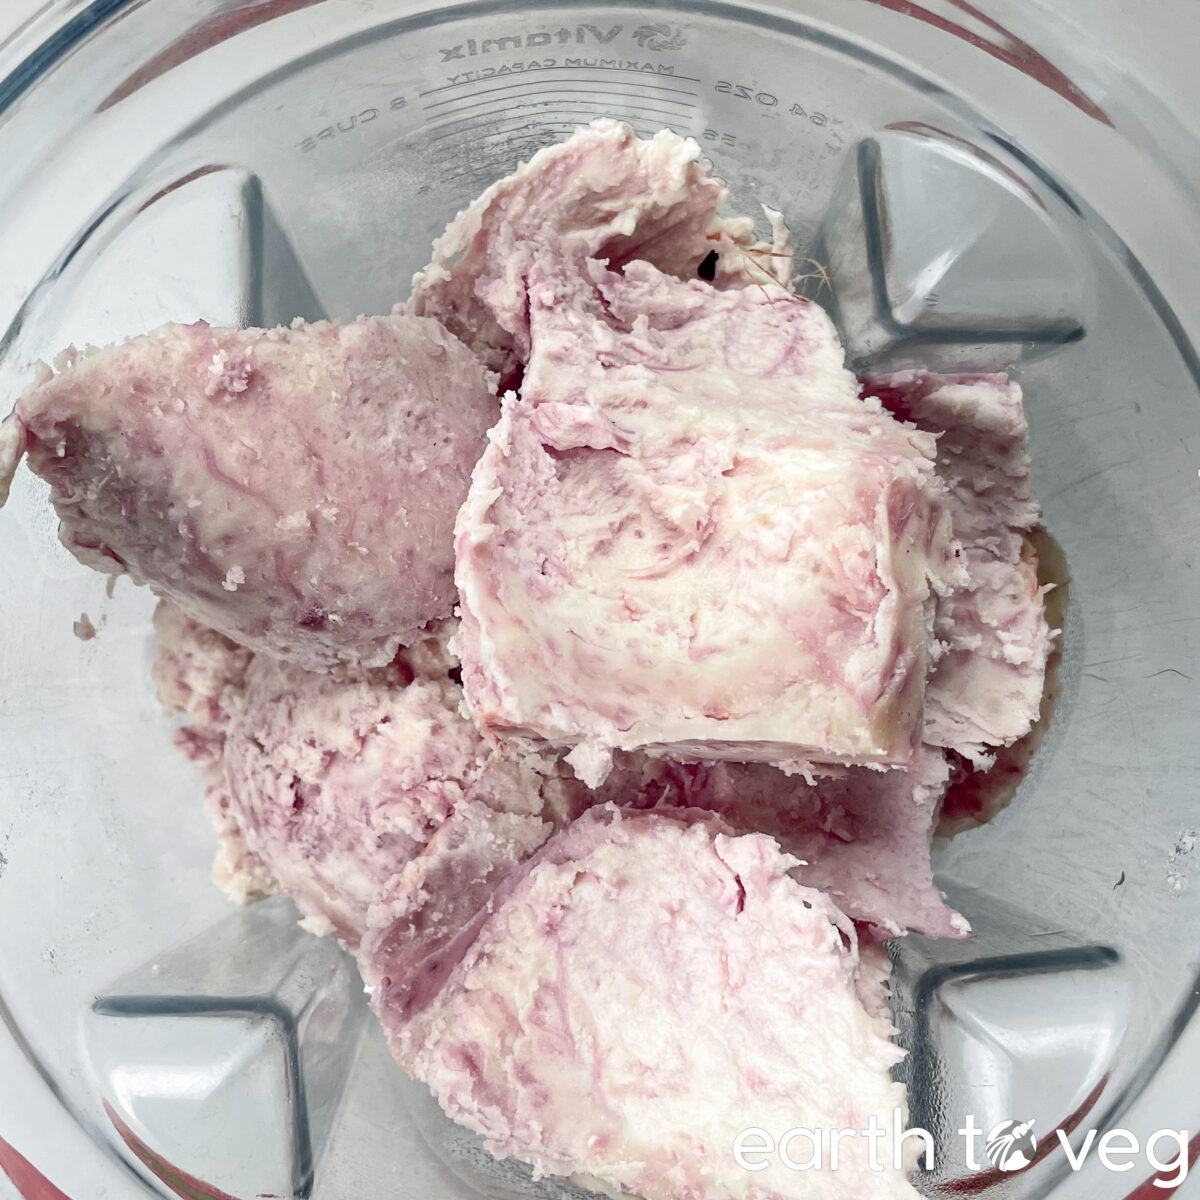
And finally, the key ingredient of course, the one you can’t substitute because it provides the main flavour of the paste: TARO!
For a full list of ingredients and quantities, refer to the recipe card at the bottom of this post.
Diet Substitutions
If you’re following a specific diet or need to be aware of allergies, here are a few ways you can modify this recipe:
- Low fat: Substitute coconut milk with a low-fat option like rice milk or oat milk.
- Whole foods plant based: Use a WFPB-compliant milk like Homemade Soy Milk or almond milk, and substitute a whole food sweetener, like date syrup.
If you made this recipe with a successful substitution, please let me know! Post a comment describing what you did so I can add it to this section and help future readers. (Leave your name blank if you don’t want to be credited.)
How to Cook Taro
You can cook taro for this recipe on the stove or in a pressure cooker.
Stovetop Method
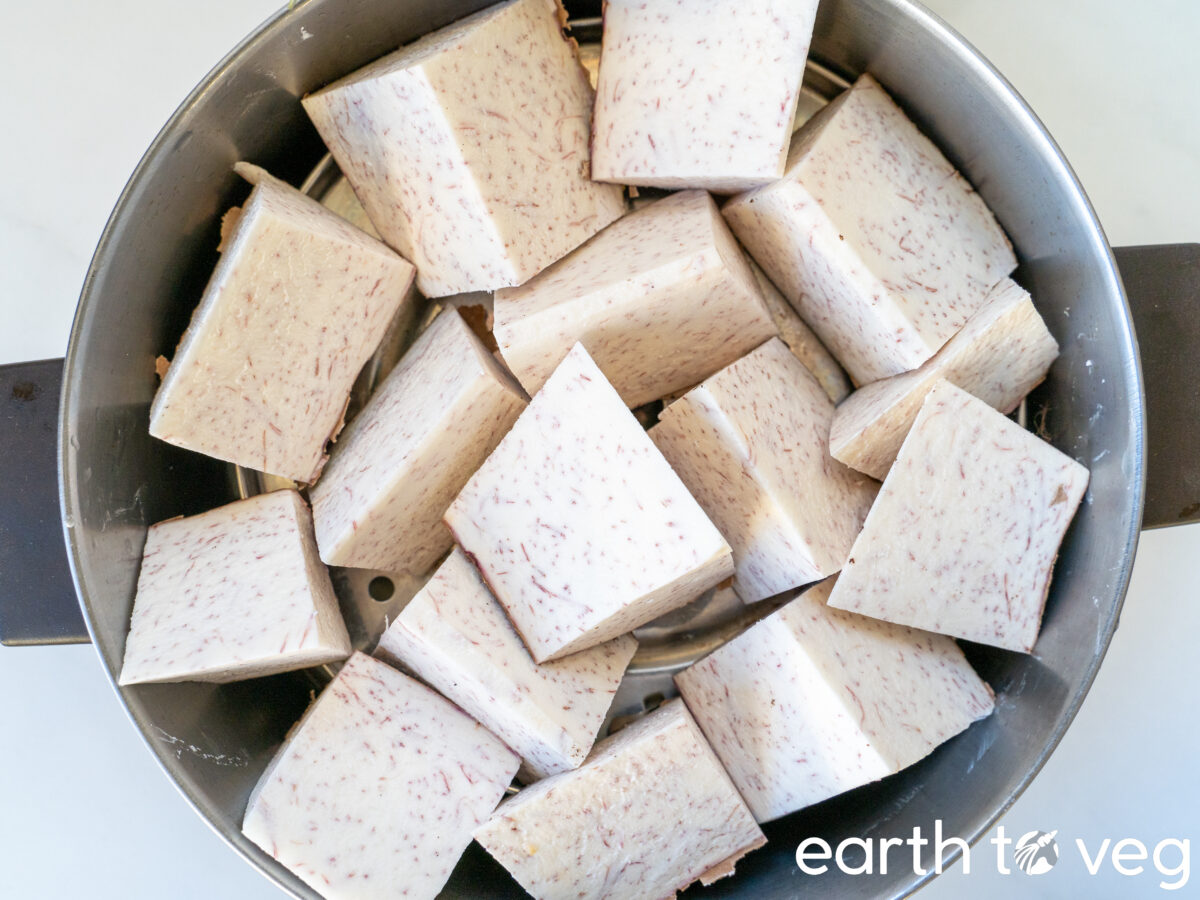
- Fill a deep stockpot with 1 inch of water. Place a steamer rack inside. (You can also use a double boiler.)
- Peel taro. Cut it into large cubes and place the pieces on the steamer rack (or top compartment of double boiler).
- Bring to a boil, then reduce heat to medium and steam for 30 minutes.
- Let cool slightly before proceeding with the taro paste recipe.
Instant Pot Method
- Fill Instant Pot with 1 cup of water.
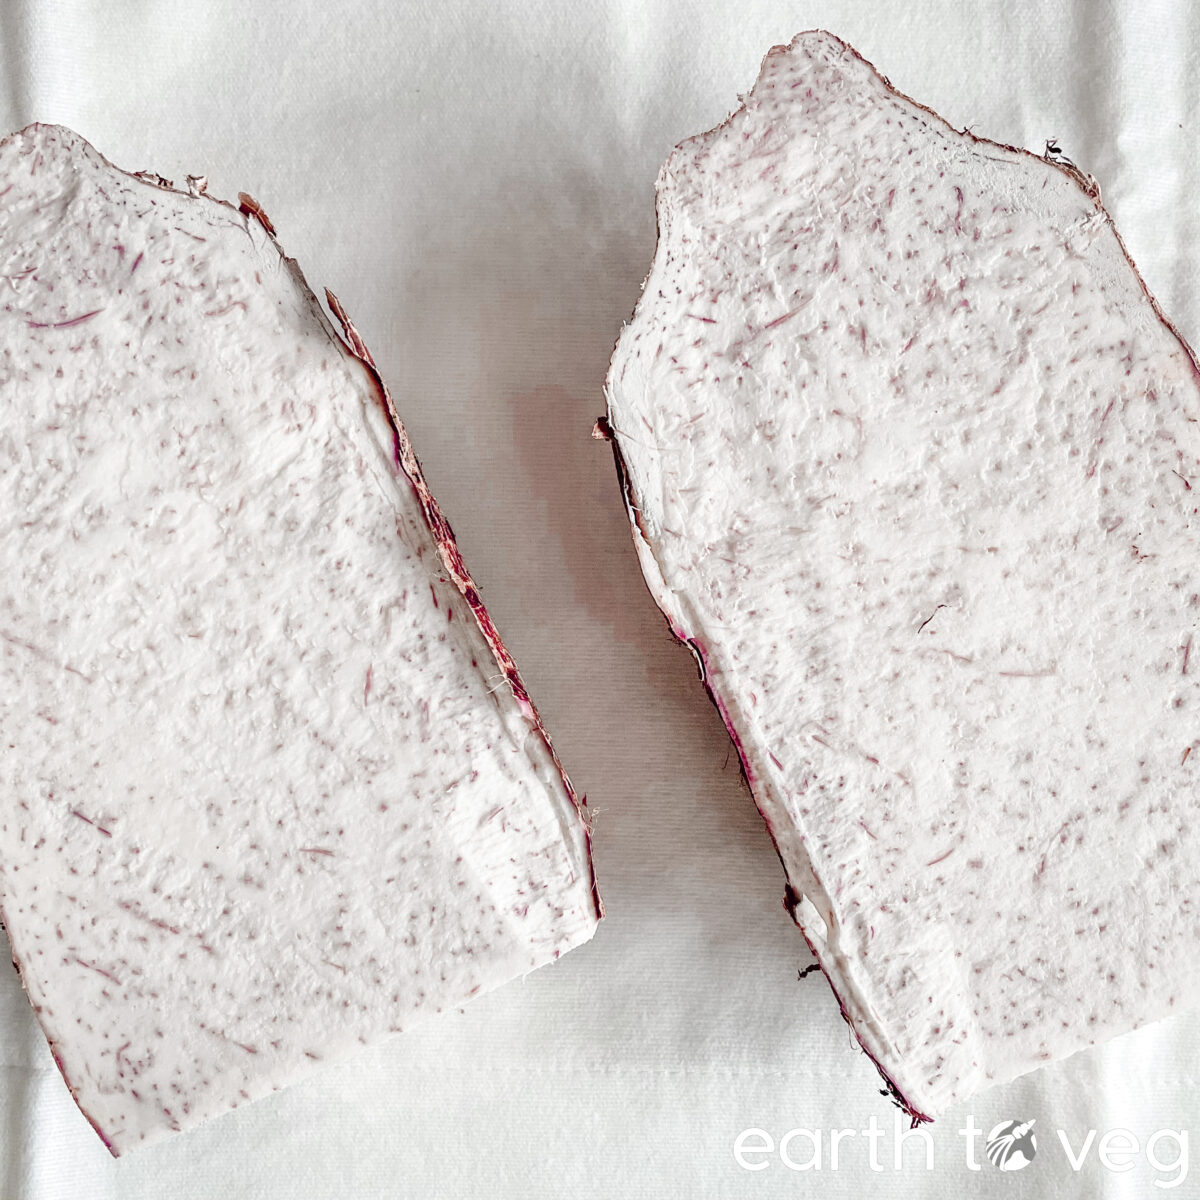
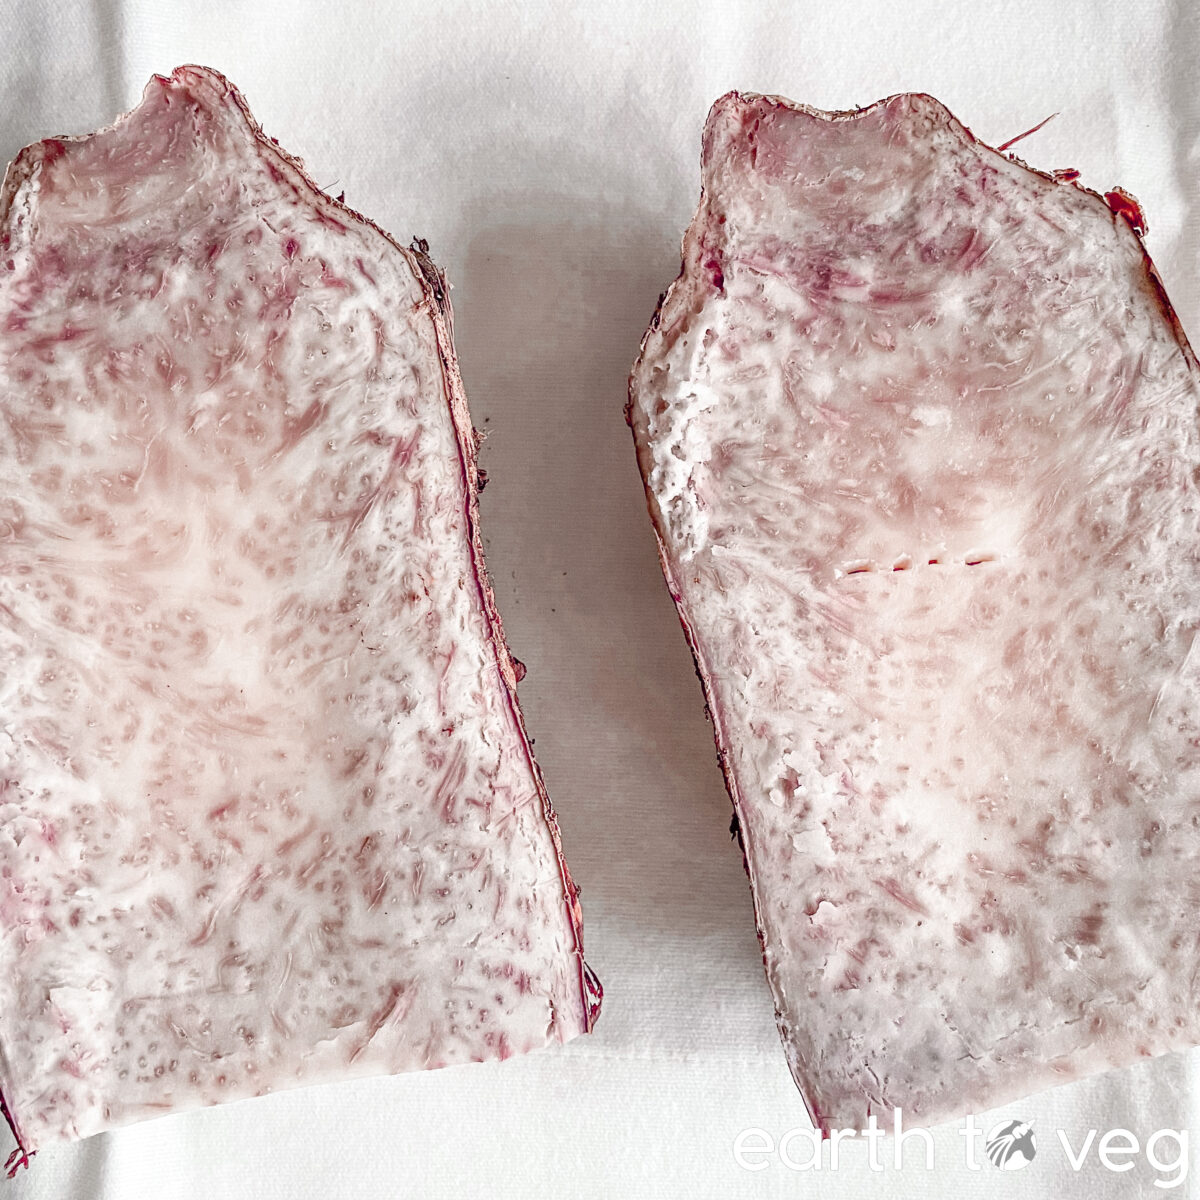
- Slice taro in half lengthwise. (No need to peel.) Place on an Instant Pot steamer rack.
- Cook using the Steam function for 15 minutes on High Pressure. Allow pressure to naturally release before opening the lid.
- Once cool enough to handle, scoop out the taro flesh with a spoon. Proceed to taro paste recipe.
Step-by-Step Process
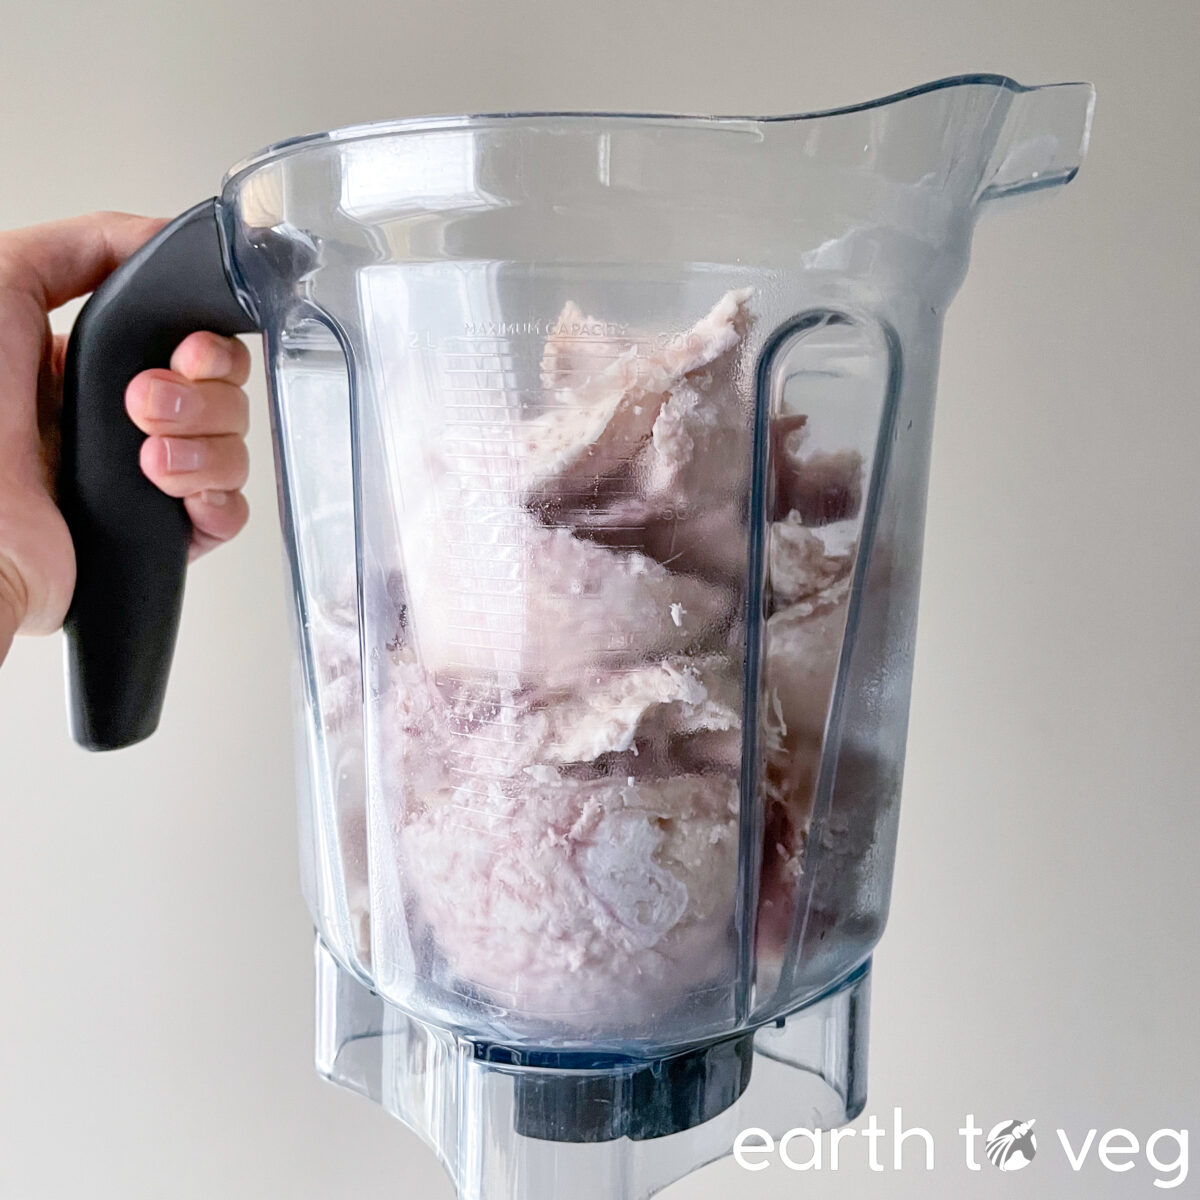
Step 1: Making this paste is super simple. First, throw everything into a powerful blender (see Blender Notes below about what type of blender works for this). Add food colouring at this point too, if you want.
Step 2: Put the lid on and start blending on medium speed. Every 10 seconds, stop the blender and give the contents a scrape and stir, and to give your blender a bit of cool down time because this paste is one THICC boy.
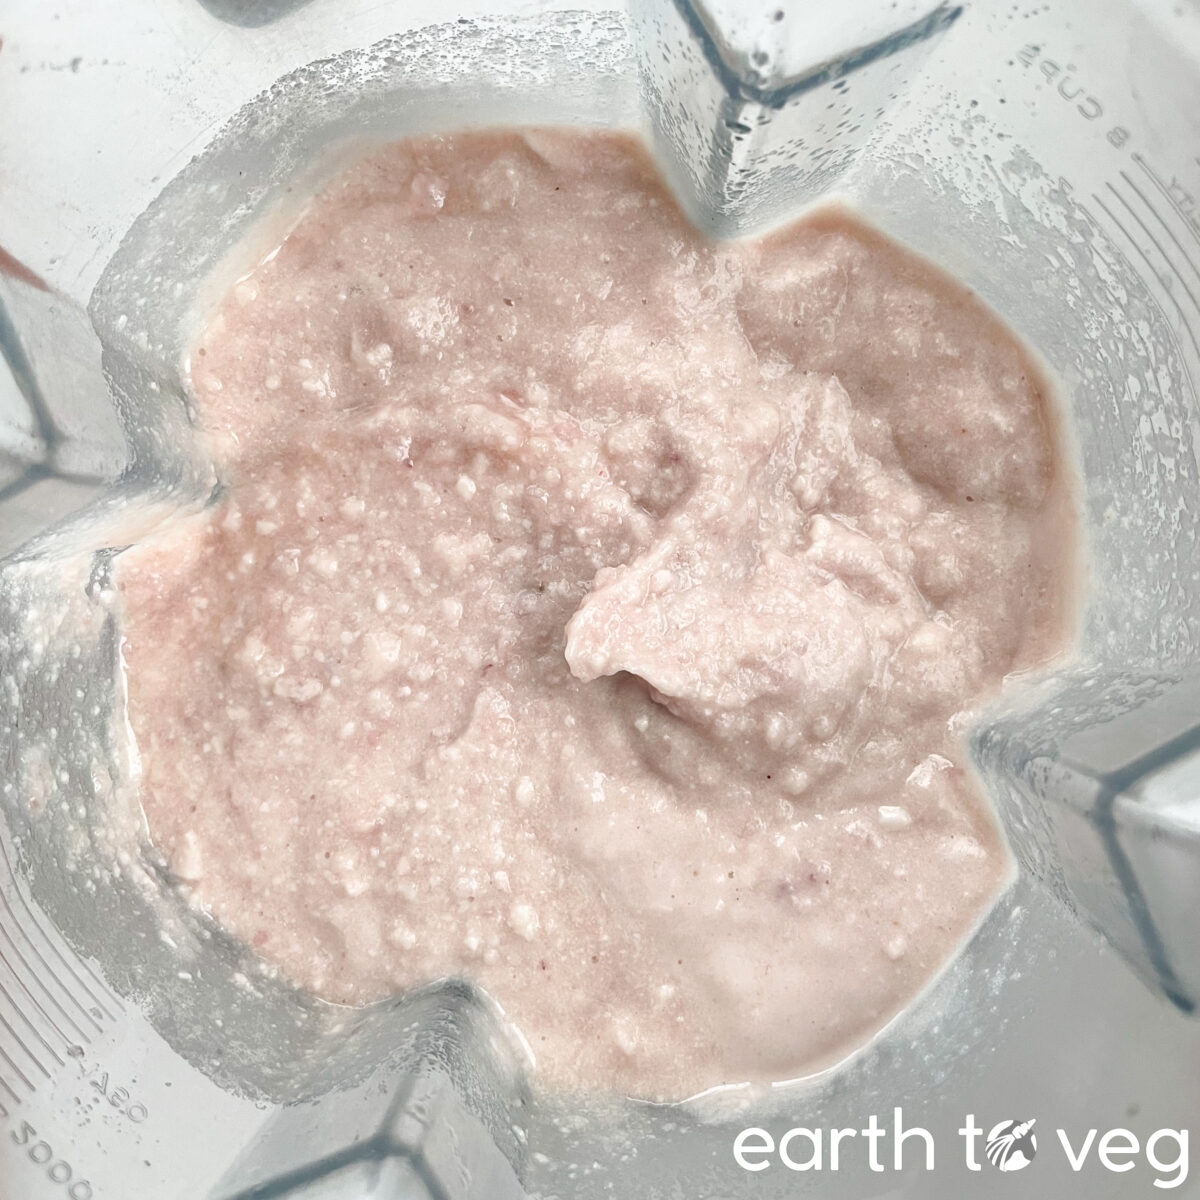
Step 3: Once the paste is pretty smooth (there might be some lumps, that’s okay, small lumps are fine), you’re done with the blender. You can use this taro paste right away, for example mix it into Homemade Taro Boba.
You can stop here if you want what I call “thin” taro paste—quite runny and perfect for drinks or puddings. But if you’re planning to use it as a filling for bread or pastries or mooncakes or whatever, you’ll want to follow the rest of these steps to thicken it up.
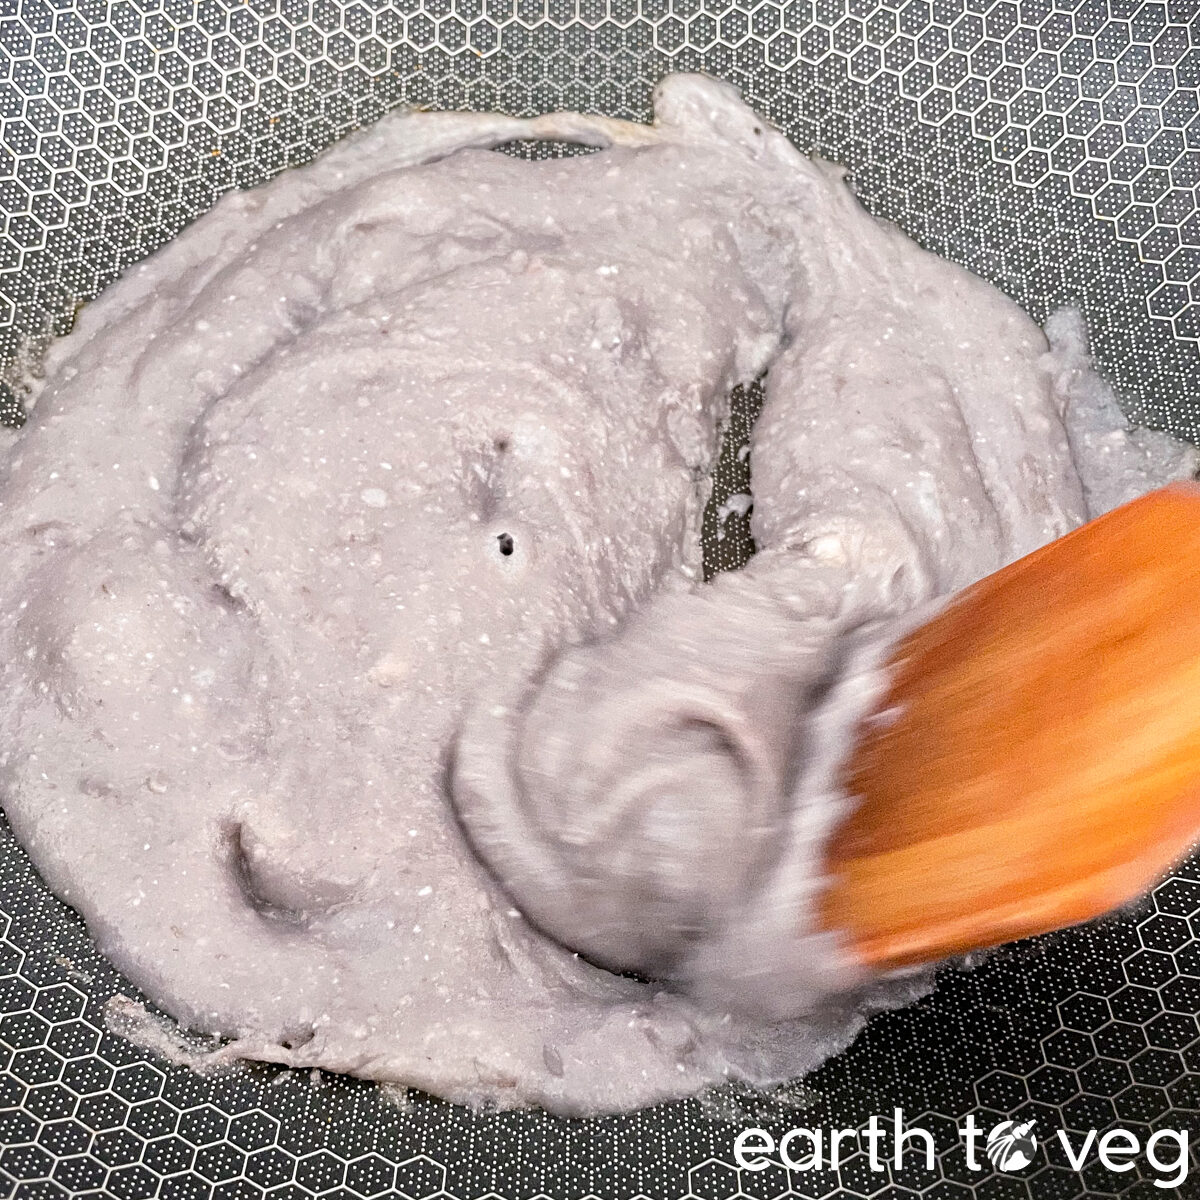
Step 4: Scrape the blended taro mixture into a non-stick pan. Make sure you use a non-stick pan, seriously, or else you’re in for a sticky mess. I also recommend adding 1 tbsp of coconut oil, or vegan butter, or whatever oil you got really, to prevent sticking.
Step 5: While the pan heats up, stir frequently to incorporate the oil. It takes around 20 minutes for the taro paste to reach a thick, shapeable consistency, and to begin lifting off the pan in a blobby mass. It will also darken in colour.
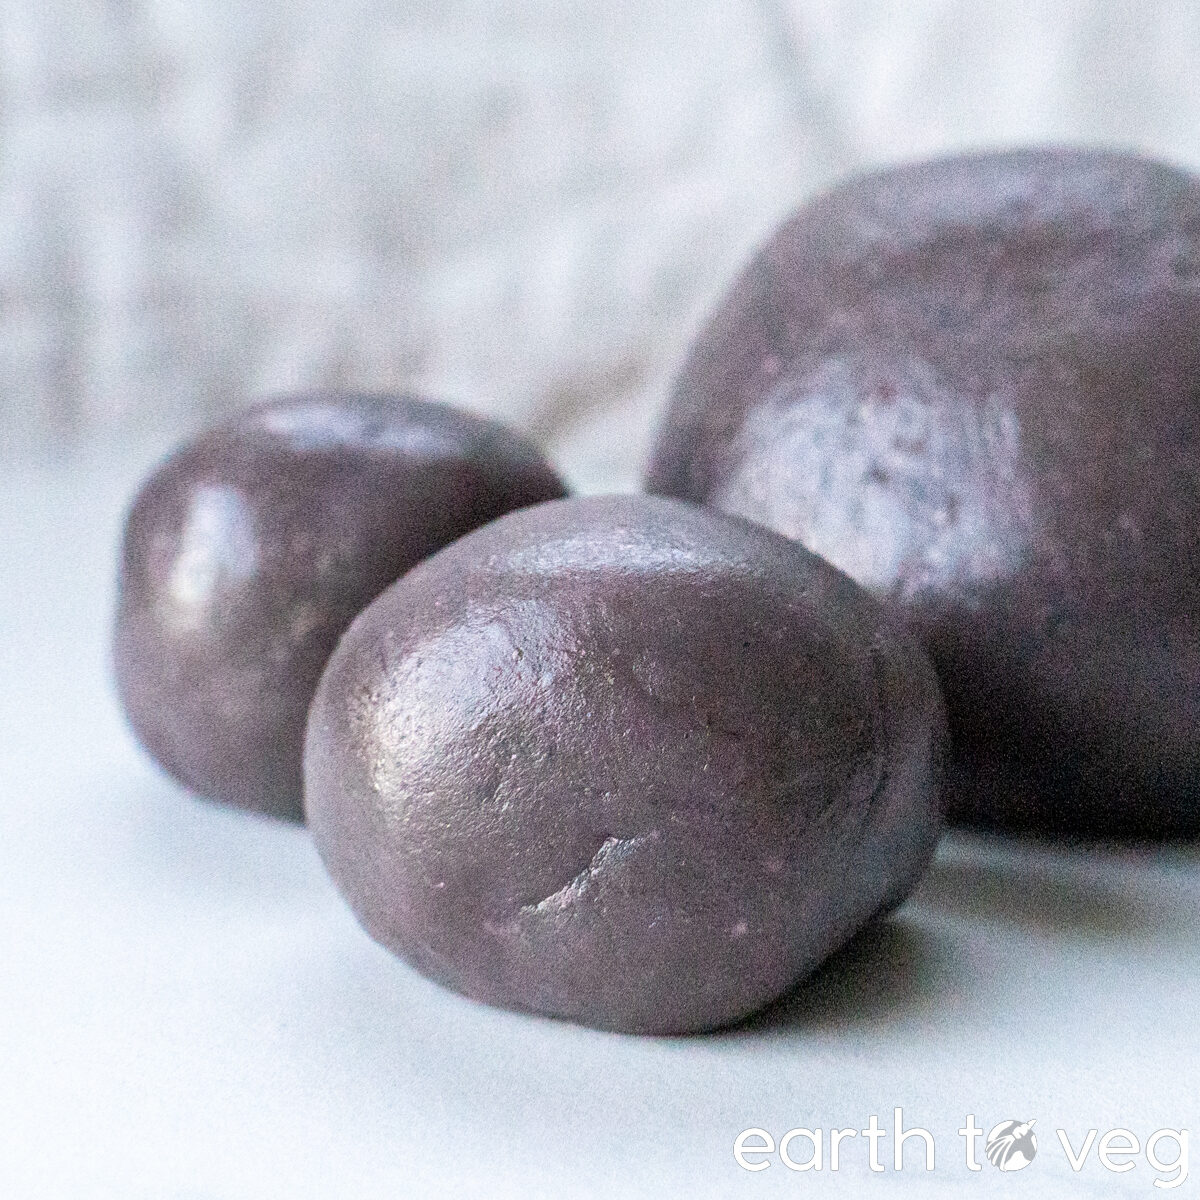
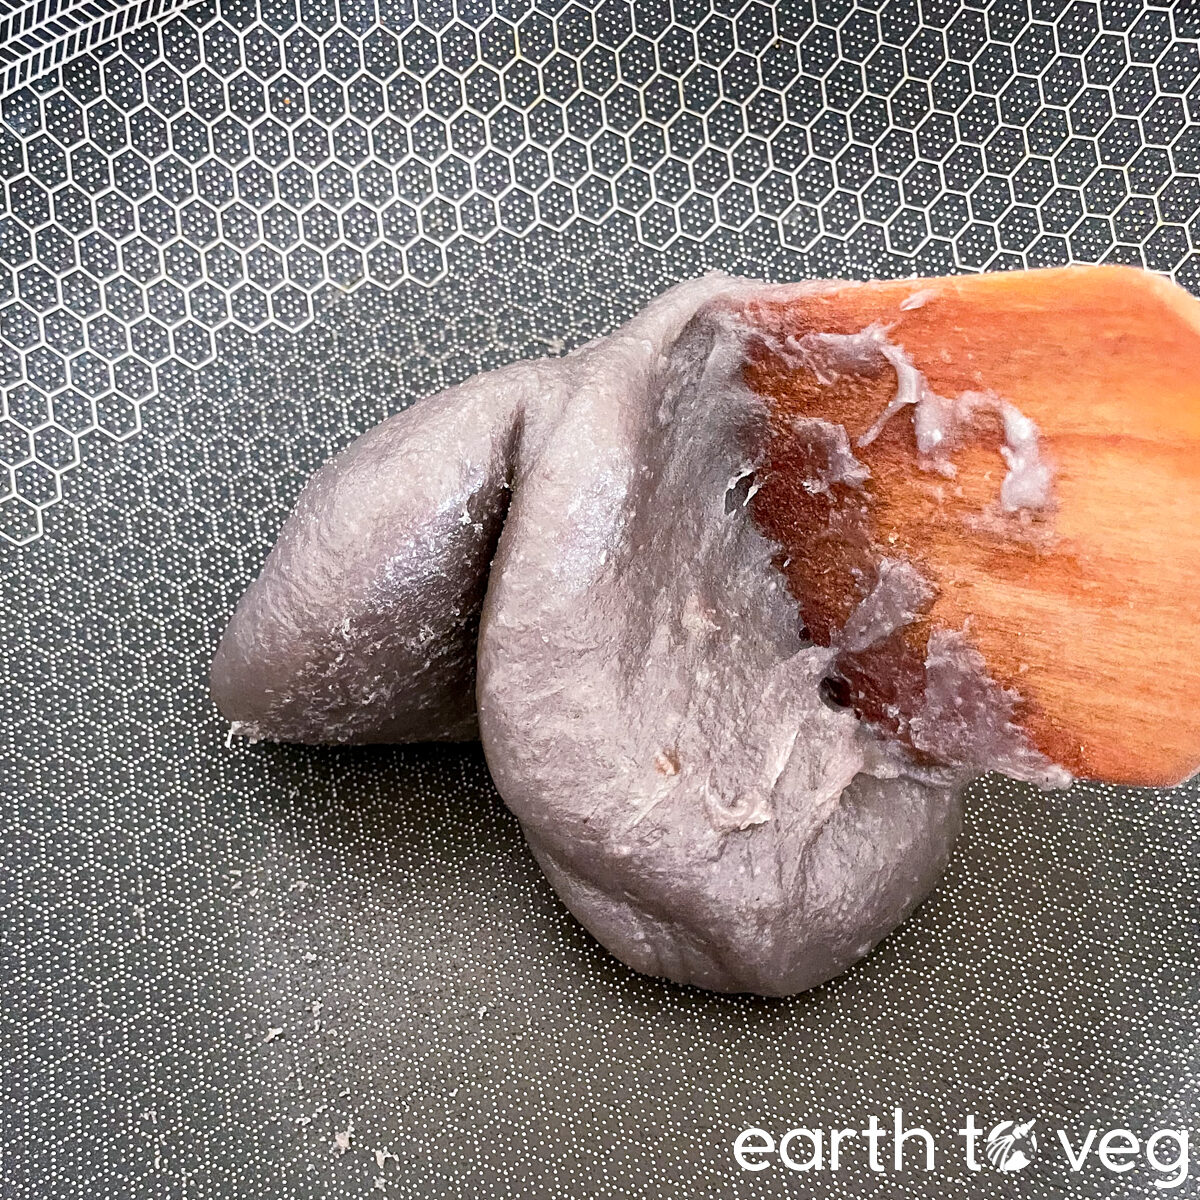
Step 6: When the taro paste is sufficiently thickened, it will have a glistening sheen and be a much darker colour. Roll it into balls (or whatever shape you want) while it’s still warm and malleable, before letting it cool down for storage.
Blender Notes
This paste is one thick mf so you need a very powerful blender for this recipe. The only two brands I know of for home cooking are Vitamix and Blendtec. I’ve tested this in my Blendtec and my parents’ Vitamix, both work. Even then you’ll still need to scrape down the sides a few times due to the thickness of the mixture causing cavitation.
I can’t vouch for other blenders or food processors, but I think an immersion blender might be up for the task. Please be careful about burning out the motor on a less powerful machine. If you had success using something that isn’t a Vitamix or Blendtec please comment and let me know!
Don’t Have a Blender?
You can do the mixing by hand, but it’ll take more time and elbow grease:
- First, I recommend doubling the cook time for the taro so it gets really mushy and soft. This will make it easier for you to mash it. It’s also be easier to mash the taro when it is still warm.
- Put the taro and all the other ingredients in a large bowl.
- Go to town on it with a potato masher. You don’t have to get it super ultra smooth, in fact, some chunkiness might be nice depending on what you plan on using it for. (I personally enjoy some taro chunks in my taro soy milk.) It’s like Peanut Butter, I guess. Some like it chunky, some like it smooth.

Make Ahead & Storage Tips
This taro paste can be refrigerated, covered, for up to a week. (Confession: I’ve left it in my fridge for nearly three weeks before and eaten it right out of the container with no issues. But it would be irresponsible for me to recommend doing that! 🤫)
Recipe FAQs
Taro paste, also known as taro filling or taro puree, is a sweet paste used as a filling in various Asian desserts and pastries. It is made from just three ingredients: taro root, sugar, and coconut milk, all mashed together until smooth. Sometimes food colouring is added to enhance its characteristic purple colour.
Yes! It freezes wonderfully. Make sure to store it in an airtight container. Take it out and defrost in the fridge the night before you plan to use it.
Both taro and ube are root vegetables, and they’re both used in purple desserts. But whereas ube (also known as purple sweet potato) is sweet, taro is not naturally sweet. Ube tastes very similar to any other variety of yam or sweet potato, but taro tastes closer to a regular potato. It’s got its own unique earthy flavour that is unlike either ube or potato, though. Also, colour-wise, ube is much more vibrant. If you mix ube into any recipe, it’ll probably turn the whole thing purple. Taro is more of an off-white colour flecked with pink-purple specks. So if you want to make your taro recipe (including this taro paste) take on a purple hue, you’ll need to use some food colouring.
Taro paste is called yùtou ní (芋头泥) or shortened to yùní (芋泥) in Mandarin Chinese. Yùtou means taro, while ní refers to any mashed food.
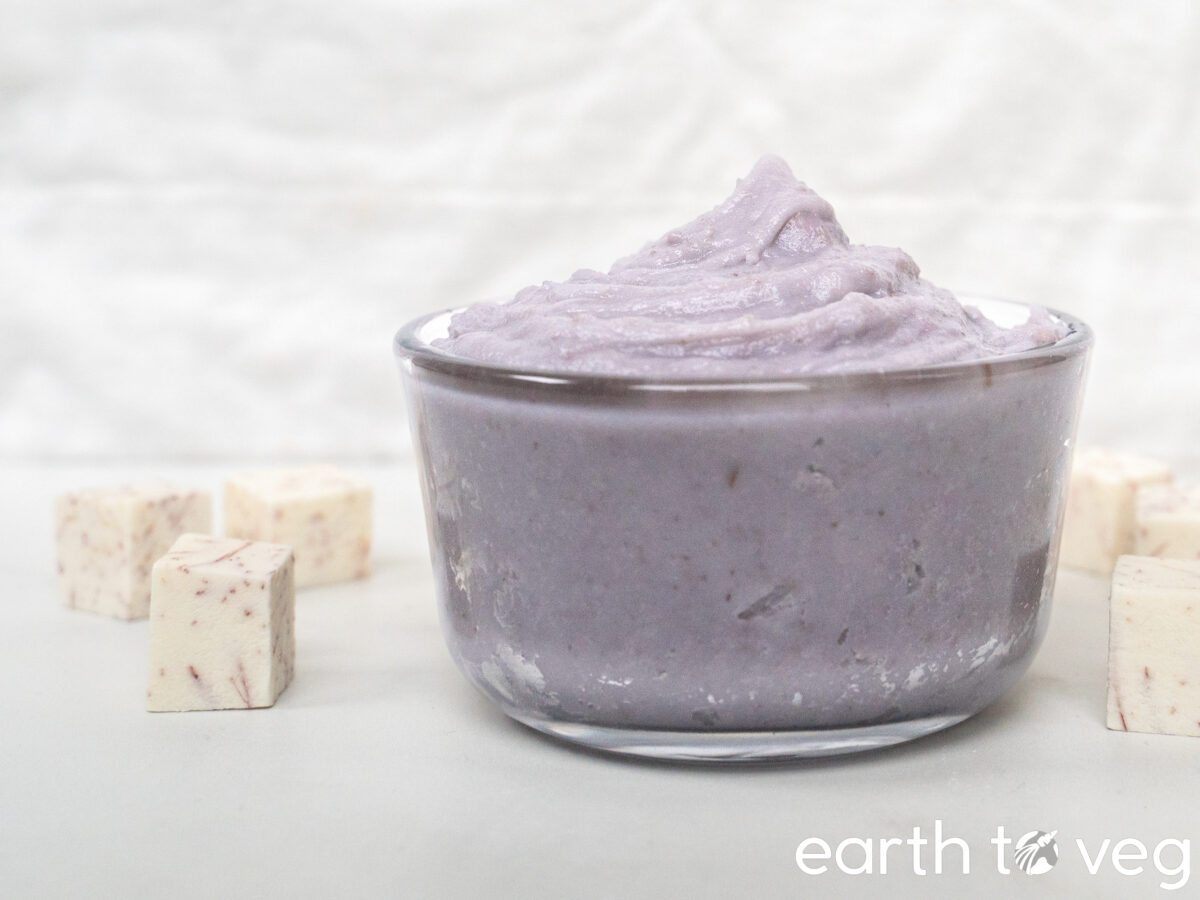
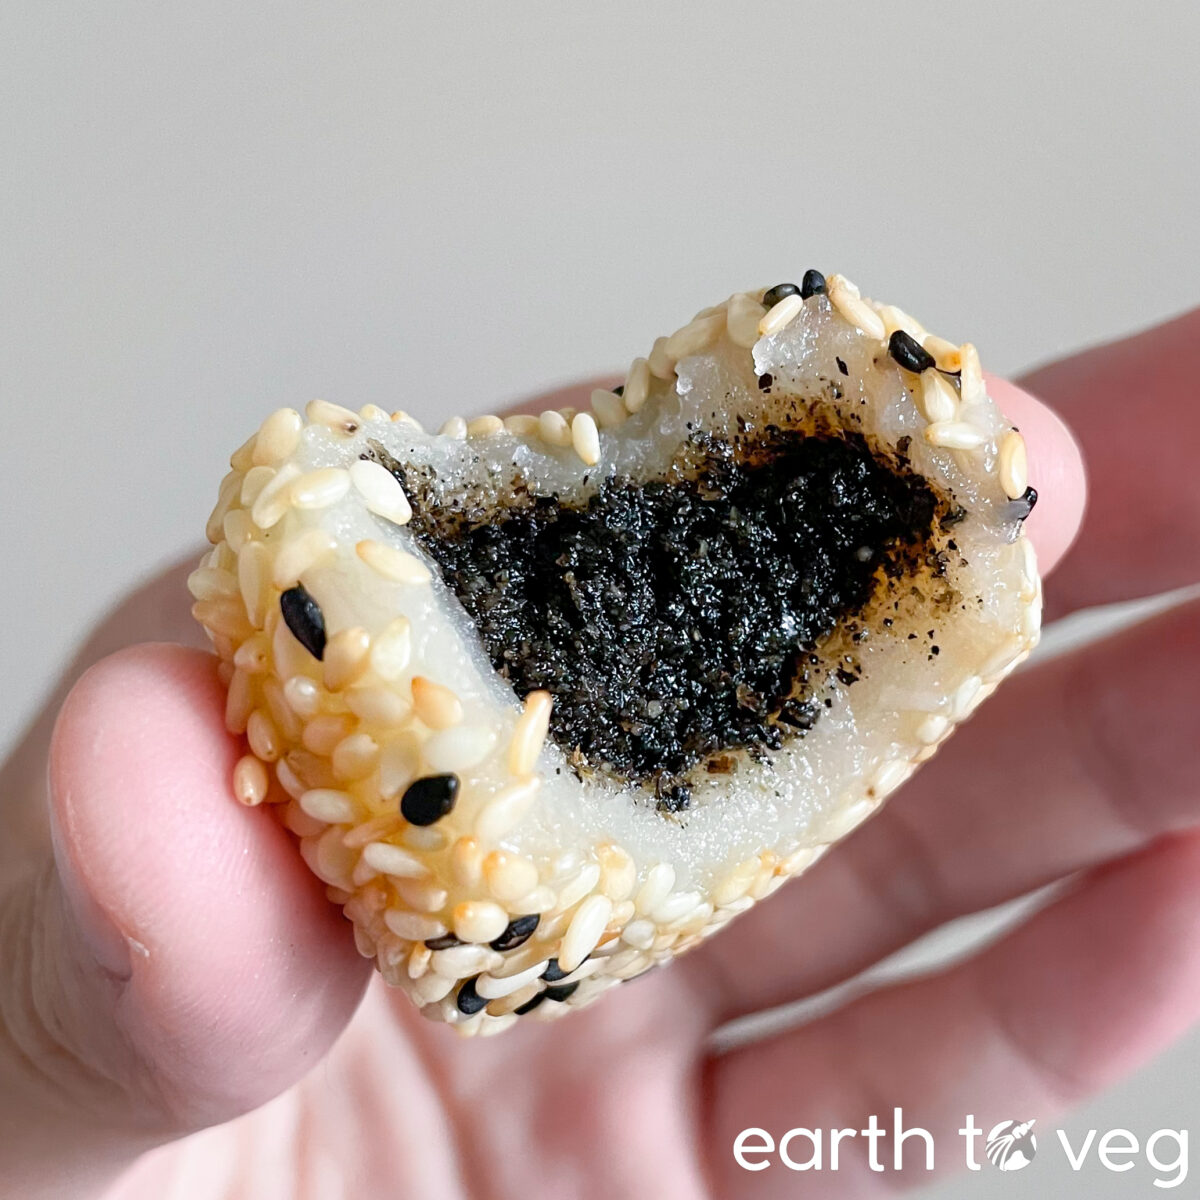
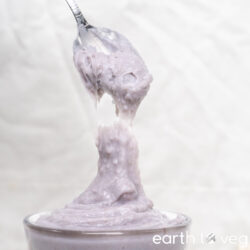
Thin taro paste is not reduced, therefore, it has a runnier consistency. It’s suitable for adding to smoothies, puddings, and other drinks/cold desserts. Thick taro paste, on the other hand is thickened to evaporate off most of the water content. As you can see in this picture, thick taro paste can be rolled into smooth balls, making them perfect for using in baked goods or mooncakes. Thin taro paste contains too much moisture to be used successfully in baking.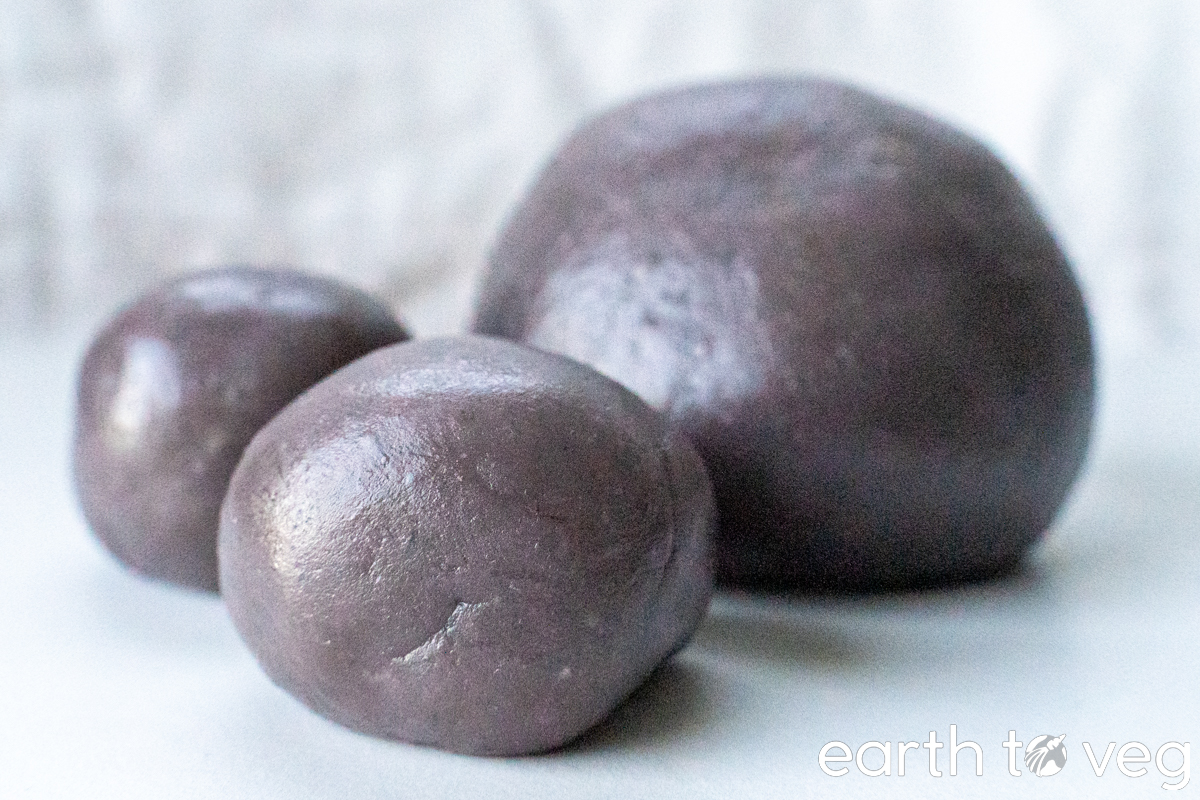
More Asian Dessert Recipes

Recipe Card
Did you make this recipe? Please consider leaving a rating below to let me know how you liked it. You can also take a picture and tag me on Instagram @earthtoveg, I will shout you out in my Stories!
Easy Blender Taro Paste
Equipment
- Powerful blender (such as Vitamix or Blendtec)
Ingredients
Switch between volume vs weight measurements:
- 2 lb peeled cooked taro
- 1 cup coconut milk *can sub with milk of your choice
- 1 cup sugar *can sub with sweetener of choice
- few drops purple food colouring *optional
Instructions
- Add cooked taro, coconut milk, and sugar to a blender or food processor.
- Optional: Add a few drops of purple food colouring to enhance the colour.
- Blend at medium speed in ten-second increments until a smooth paste forms. The mixture is very thick so you will need to scrape down the sides and give it a stir every time you stop.
- For thin taro paste: Stop right here. You're all done! (I call this "thin" but it's actually got a consistency like glue. Thin taro paste is perfect making taro milk or
taro boba , puddings, waffle batter, and more… but if you'd like to use the taro paste as a filling in a baked recipe, I recommend following the steps to make thickened taro paste below.) - For thickened taro paste: Pour taro mixture into a non-stick saucepan on low heat. (Optional, but recommended to add 1 tbsp oil or vegan butter to prevent it from sticking and make it easier to handle.) Stir frequently for 20 minutes. Let cool to room temperature before storing in the fridge. The paste will thicken up further as it chills.
If you want to be viewed as a professional avoid swearing in your article. In sweetener section “f*&k”
it’s not that deep anon
Actually I really like the fact she swore in it. It’s refreshing to see someone being normal and candid and not telling a long story to the point where I just want to skip everything.
Recipe looks great and simple to make. Your website looks great and directions are very clear to understand.
I’ll definitely try it out! = )
Thanks Nickel!! I’m glad you find the instructions helpful. It’s definitely a simpler and more hands-off method than the traditional process of mashing by hand.
This turned out quite easy in my Vitamix!!
Yes! So happy to hear that
I’ve just read your website. This is a good one. This was a good read for me. You should keep going. you are a best writer your site is very useful and informative thanks for sharing!