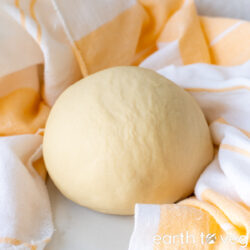
The name of “sweet dough” is rather misleading because it doesn’t actually mean a dough with lots of sugar. Rather, sweet dough is a rich, buttery dough with a hint of sweetness that works well for both savoury and sweet bakes. After dozens of experiments, I’ve come up with an easy and effective Vegan Master Sweet Dough recipe that can be used for all your enriched baking needs, from cinnamon rolls to garlic bread, from babkas to burger buns, and even for plain old sandwich bread. Yes, it works for everything!
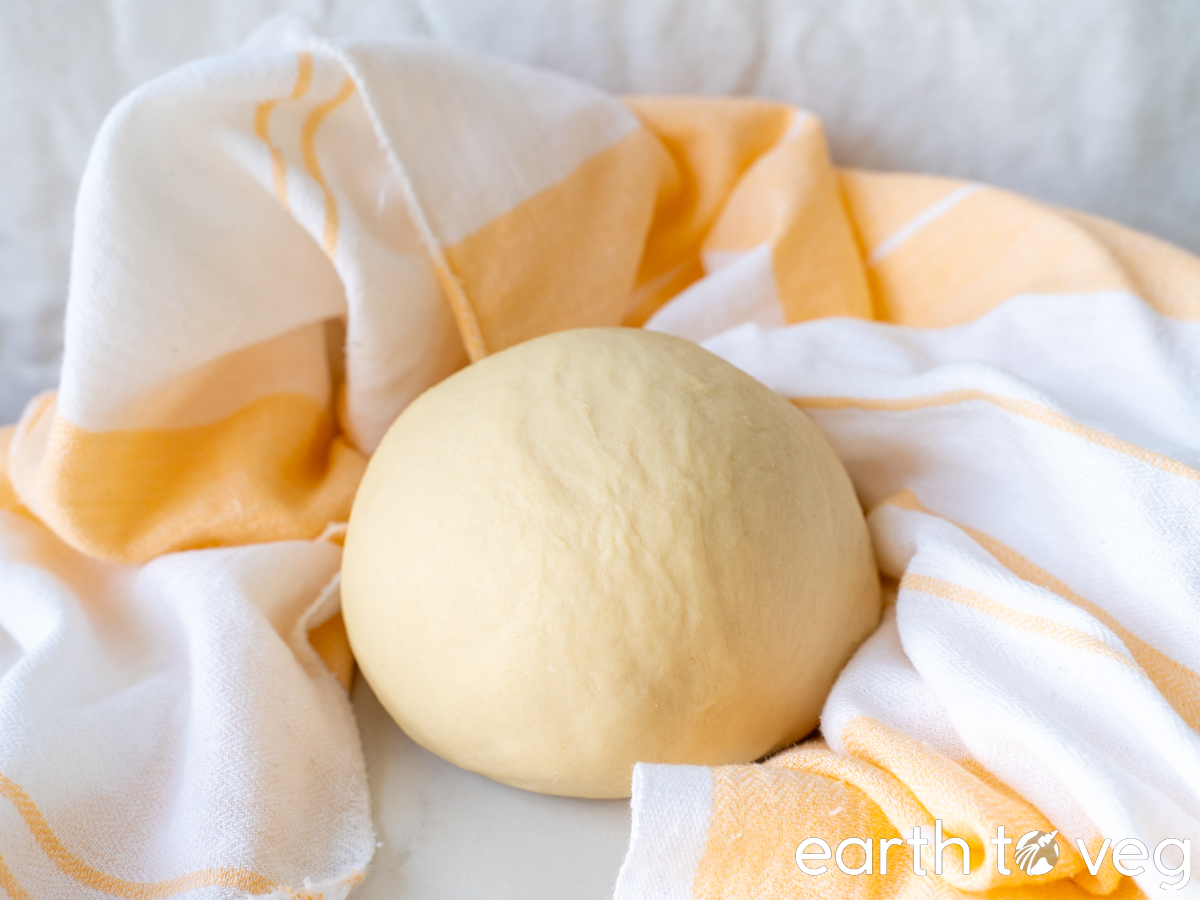
This egg-free and dairy-free dough is sumptuous to work with, won’t stick to your hands, and whether you bake with it right away or store it in the fridge for a while, the final result is always mouthwatering. In other words: FOOLPROOF!
Basics of Bread
I am starting off the New Year with some basic foundational recipes that many of my other recipes will build on. Bread is my favourite thing to bake, and a lot of my bread recipes rely on this sweet yeasted dough. You know the saying, “cooking is an art, baking is a science?” Don’t let that intimidate you, because it’s not even fully true anyway: there is a lot of room for imprecision in bread baking.
Making good bread is never completely formulaic. No matter how specific I am in writing a recipe, there will be variables that are outside my control or yours.
– Ken Forkish, Flour Water Salt Yeast
There are so many factors that create variability in bread baking. Some examples:
- The ambient room temperature
- The humidity of your environment
- Protein content of your flour
- How the flour was processed
- Fat content of your butter
- Age of your yeast
- Whether it’s kneaded by hand or machine
- How long the dough rises
But my goal here was to develop a foolproof recipe that doesn’t use gadgets like thermometers or specialty proofing drawers, and doesn’t require babysitting the dough. My Experiment Results have shown that this recipe turns out great results in a wide range of conditions.
In short, whether your dough temperature is a few degrees higher or lower than mine, whether you proof for an extra 15 minutes more or less, and no matter which brands of ingredients you use, you’ll end up with soft, carby, homemade goodness.
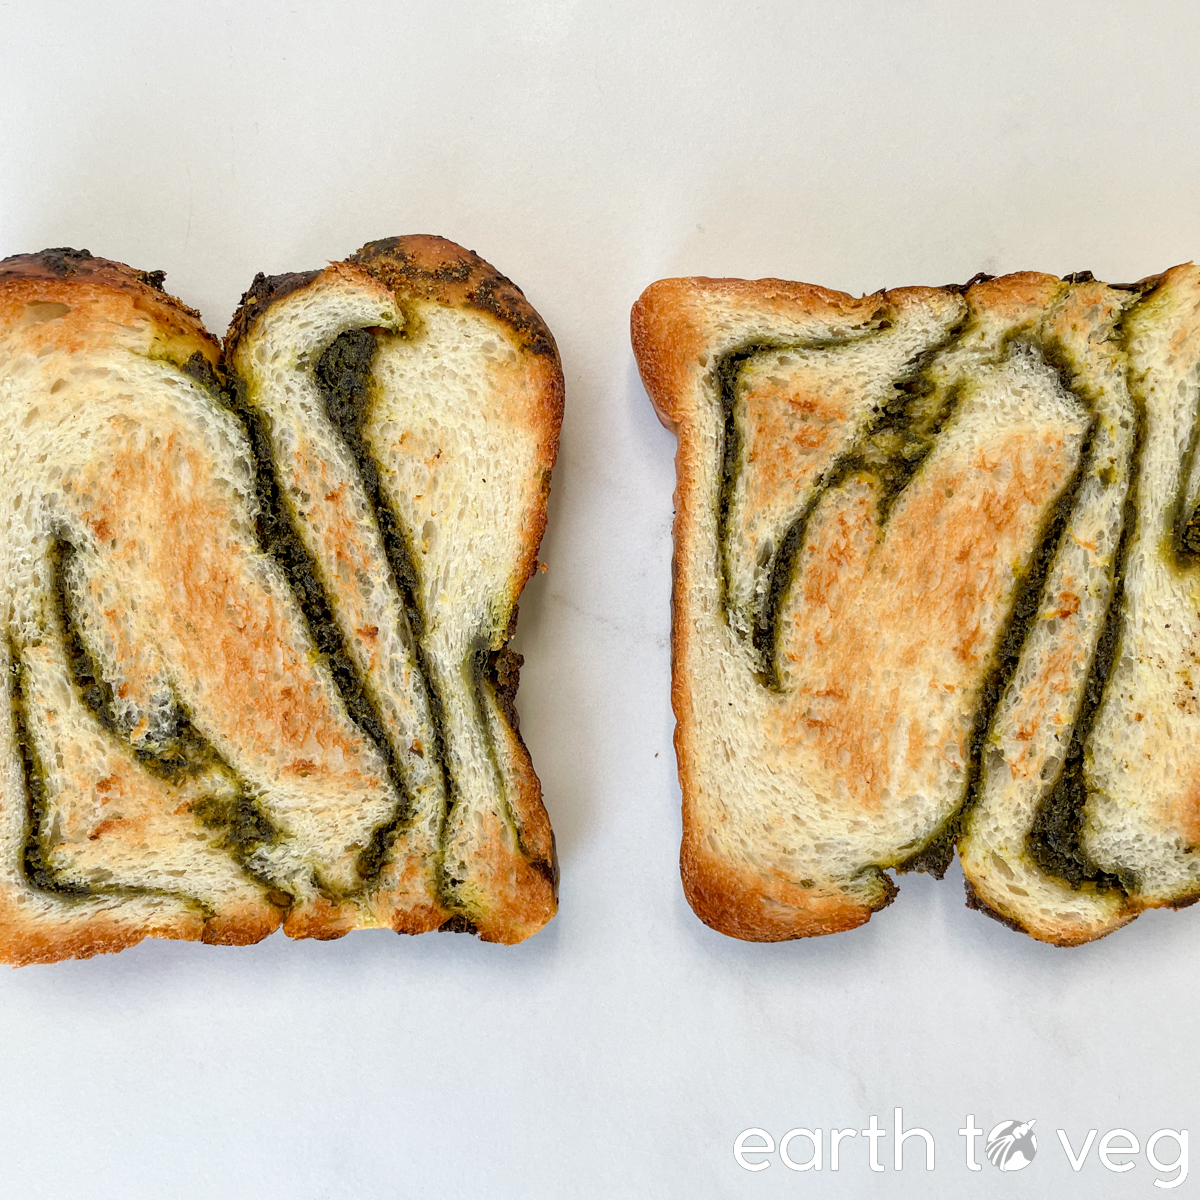
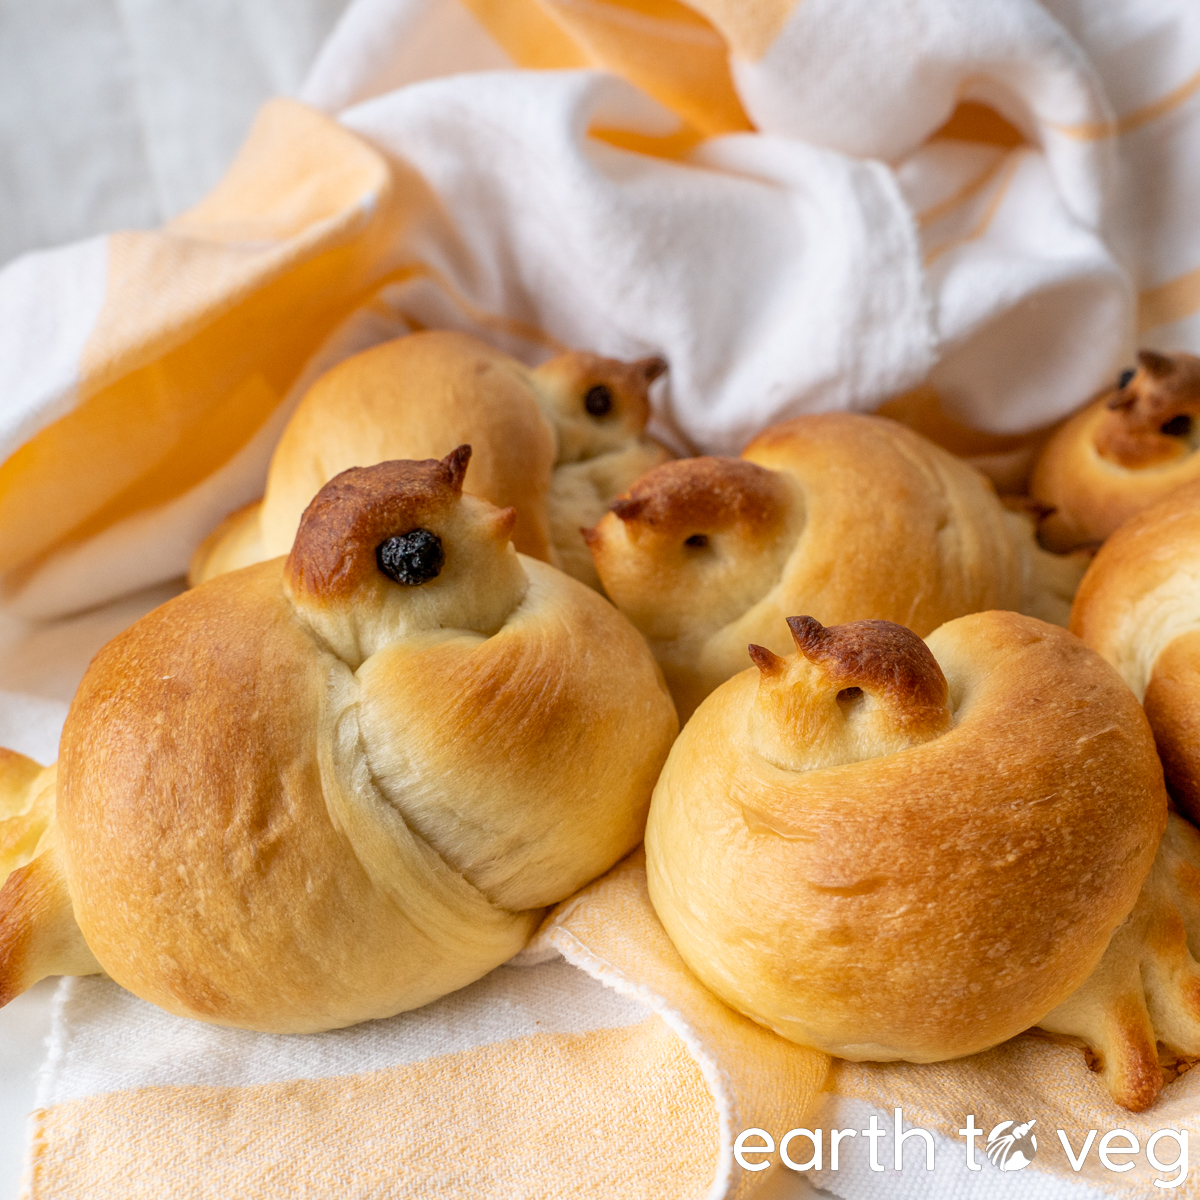
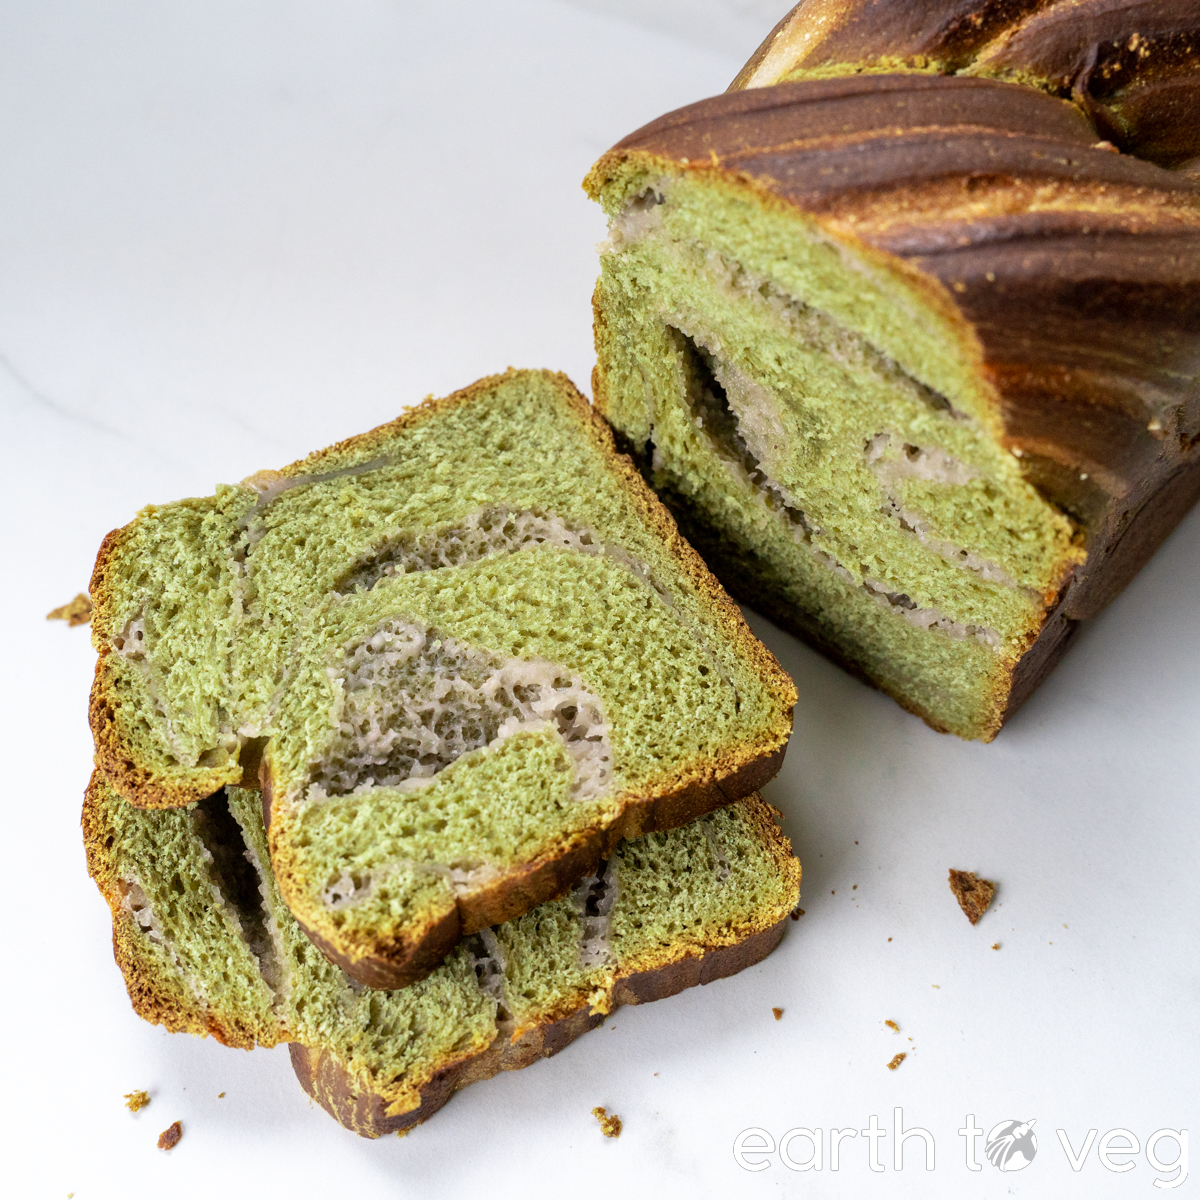
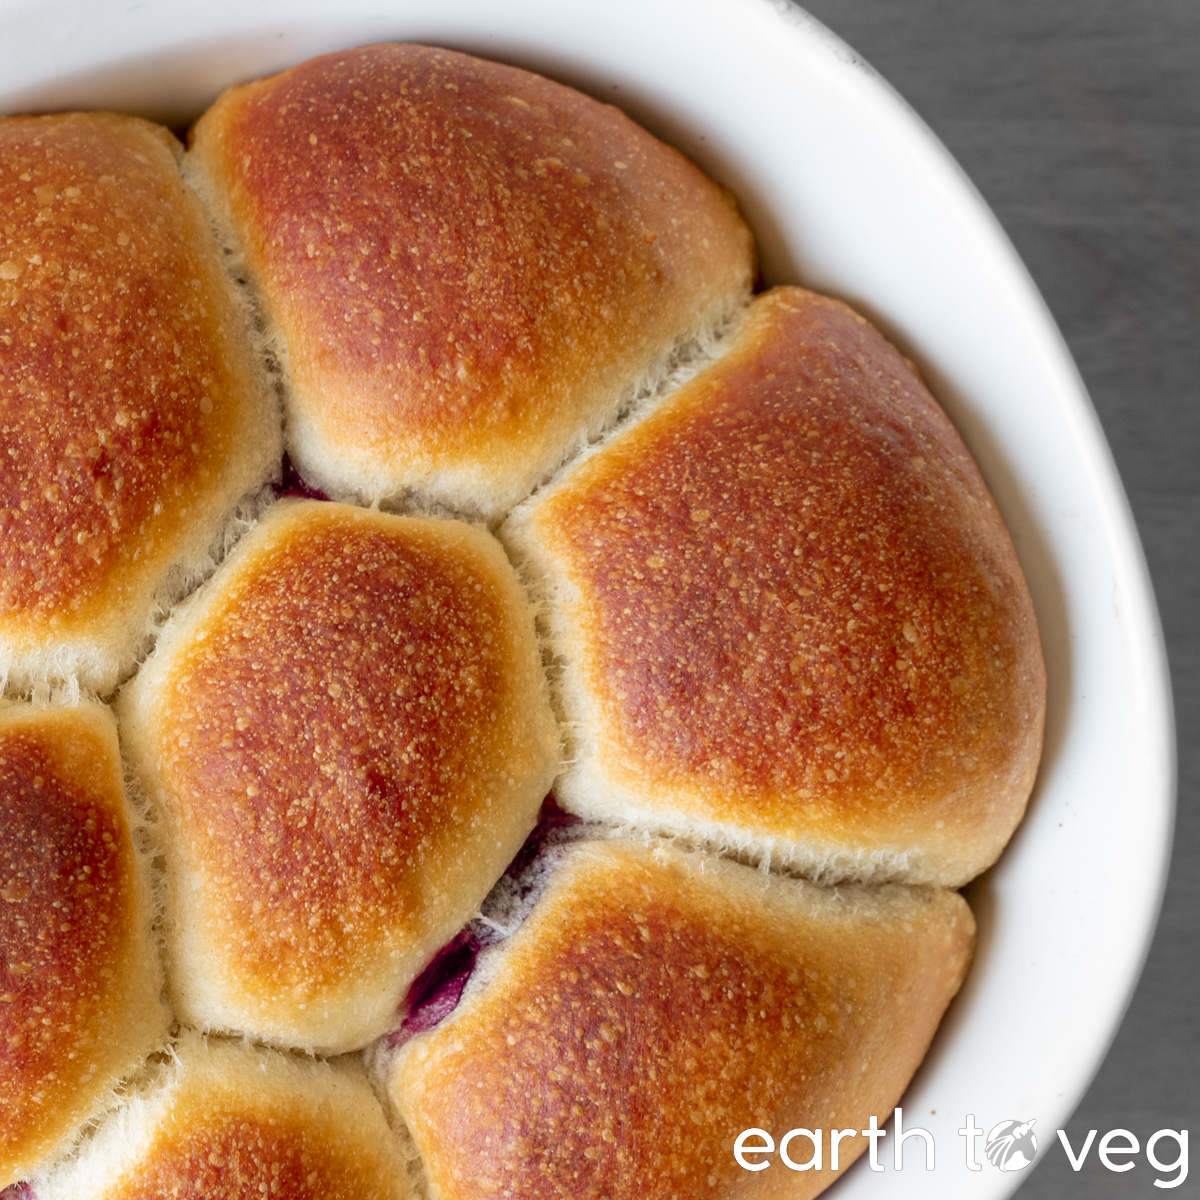
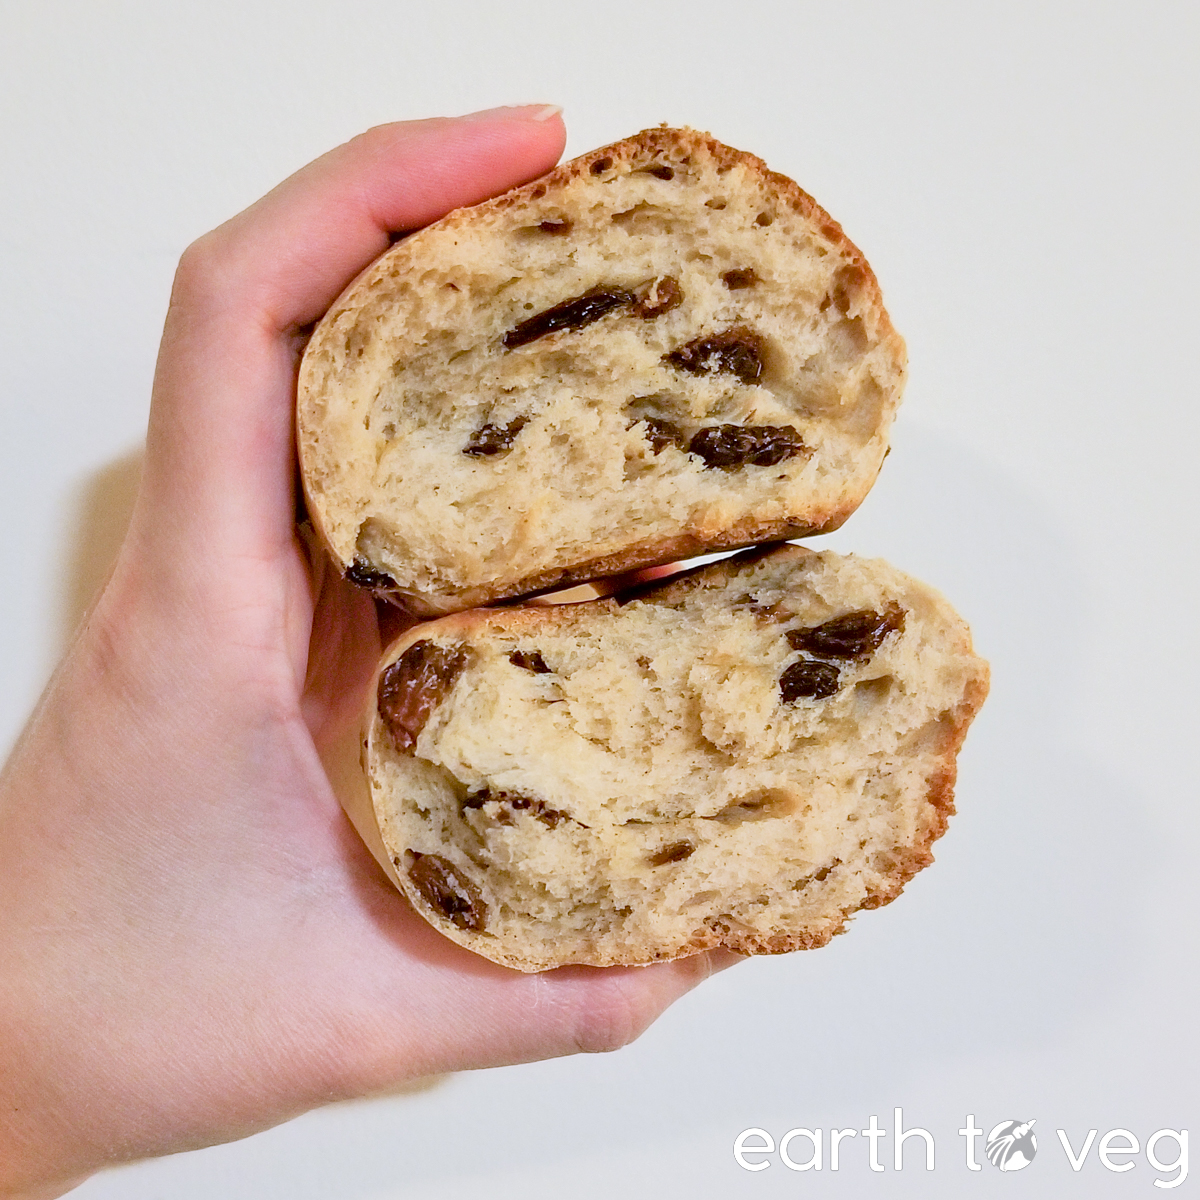
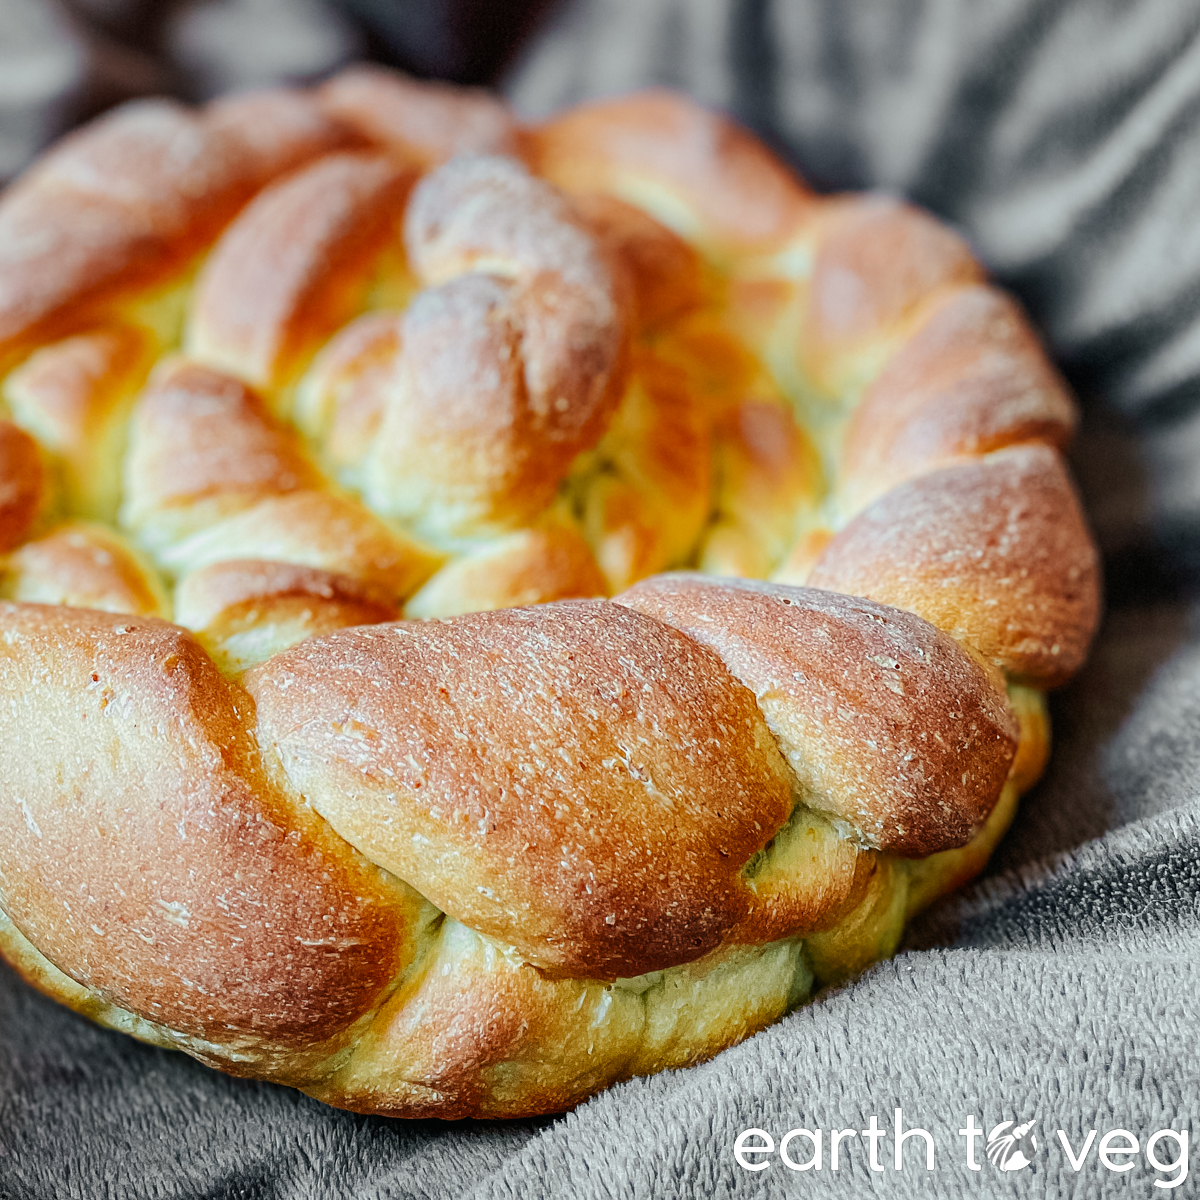
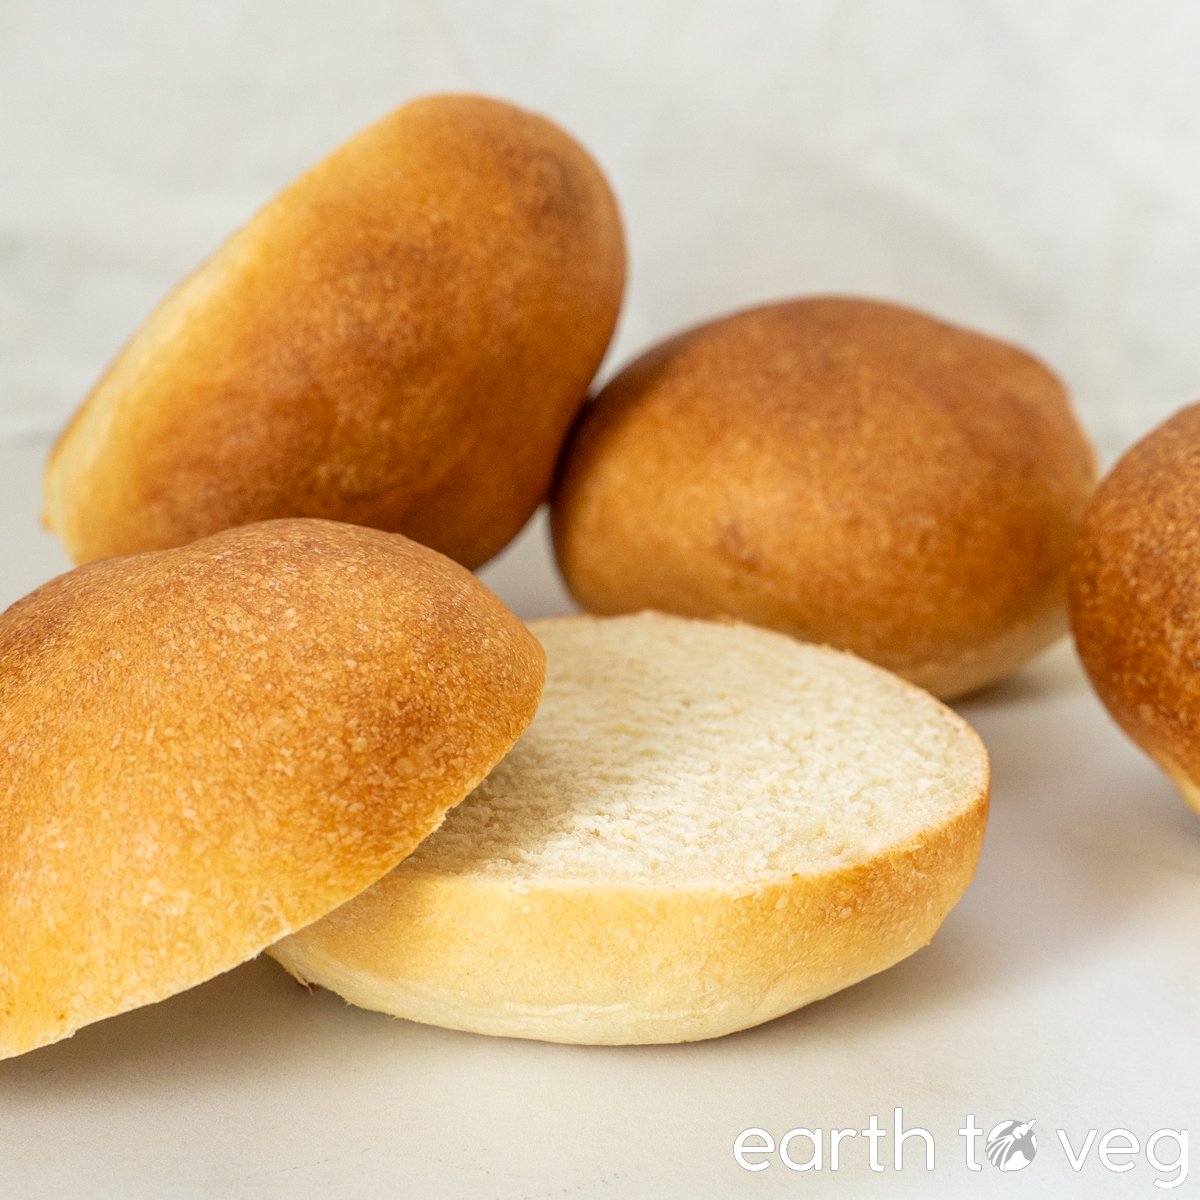
Recipes That Use Master Sweet Dough
Here are some of the internationally-inspired breads and pastries I’ve baked using this dough.

Experiment Results
I tested this master sweet dough recipe many, many times using different ingredients and under different environmental conditions because I know bread can be finnicky. I will continue experimenting and documenting my findings in the table below. But I’m pretty confident that as long as you follow the instructions in my recipe, your bread will turn out amazing!
| Trial | Findings |
| 1 | Used 160g soy milk, 3g active dry yeast, 260g all purpose flour, 50g sugar, 3g salt, and 60g vegan butter. Kneaded for 16 minutes. The dough was kind of limp and floppy during shaping, it felt like there wasn’t enough gluten development. Made a great sandwich loaf though. |
| 2 | Same as Experiment 1 but with a 20-minute knead and with bread flour instead of all purpose. Even after 20 minutes of machine kneading, the dough couldn’t build up quite enough strength, still felt slack. I think it’s because of the high butter content, since fat inhibits gluten formation. But very happy with the taste. |
| 3 | Decided to see if it was possible to sub oil for butter. Used 50g grapeseed oil instead of butter. Baked into a loaf at 350 °F for 35 minutes. The dough felt a bit more greasy than the ones made with butter, but still nice to work with and tasted great. |
| 4 | Doubled the yeast to 6g, and used olive oil. Rolled up a raisin cinnamon sugar filling. First rise 1 hour, second rise 40 minutes, which turned out to be too long, it deflated slightly in the oven. Baked as a loaf at 375 °F for 35 min, seemed slightly under baked but perhaps that was because it felt dense from being overproofed.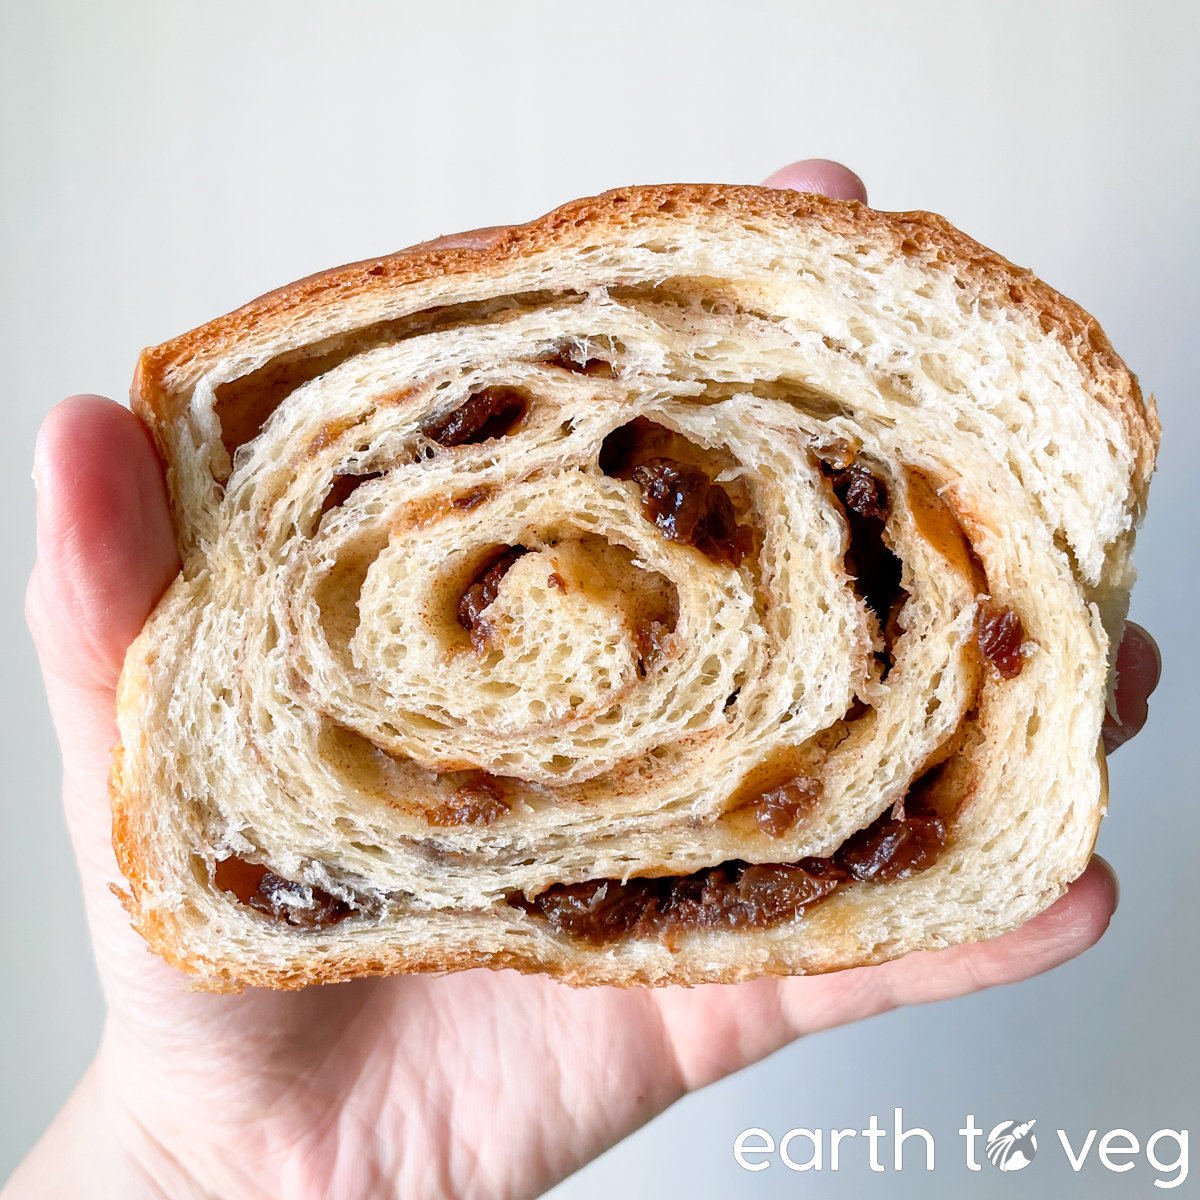 |
| 5 | Once again, used grapeseed oil. With a raisin cinnamon sugar filling again. Went back to using 3g yeast. First rise 2 hours, second rise 1 hour 10 minutes. Baked 350 for 45 min. Very happy with this one, it was tasty.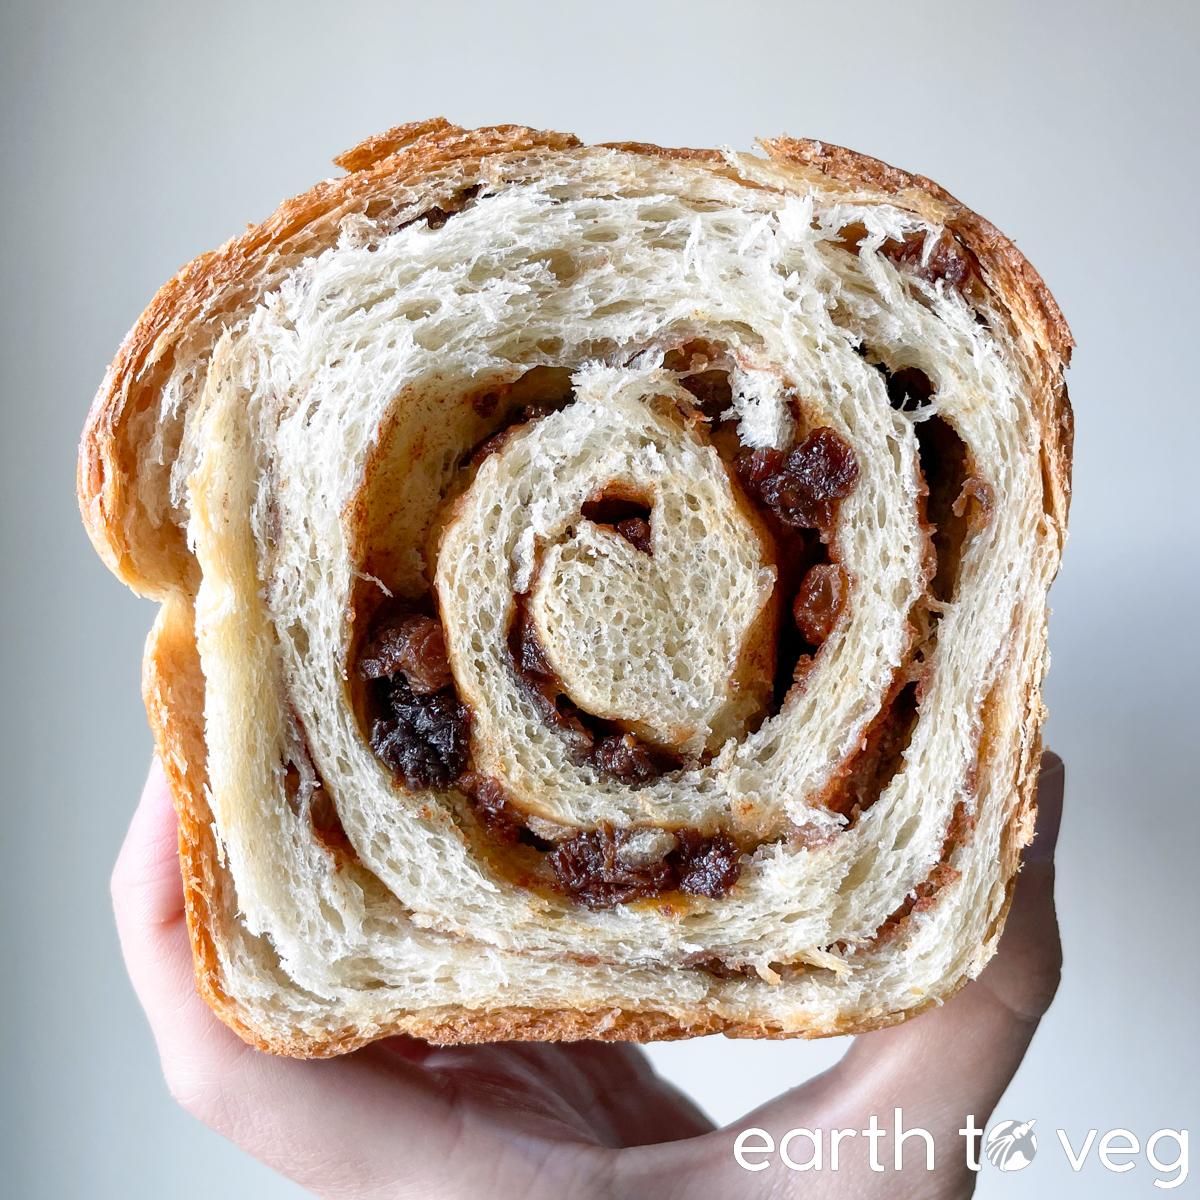 |
| 6 | Used homemade soy yogurt instead of soy milk. Made Buchteln (Czech/Austrian jam-stuffed sweet rolls). Wouldn’t make the yogurt substitution again; the baked bread had a slightly sour smell and not in a good way (more like milk that had gone off). Also, the dough is still too slack and soft. It has been okay for making loaves but for stuff that requires more handling (like Buchteln) it shows its weakness.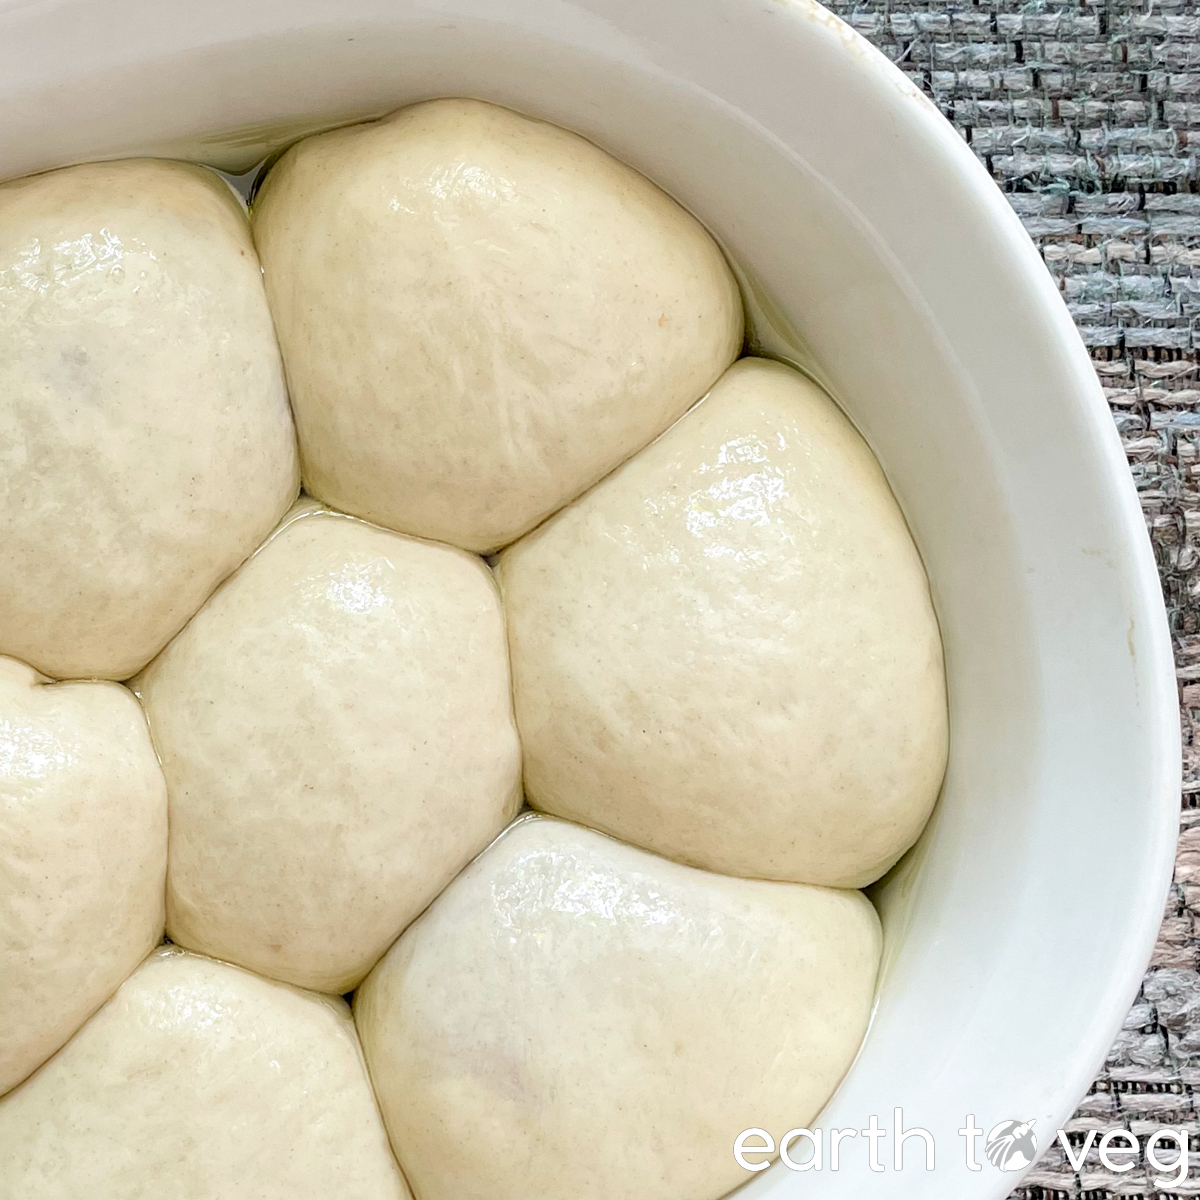 |
| 7 | Reduced the soy milk to 120g. Dough was way too stiff, had to add a few more tablespoons of soy milk. Rolled into 6 chocolate buns (1 tbsp chocolate chips per bun). Baked for 18 minutes at 350 °F, weighed down with another baking sheet to give them a flat shape. They tasted incredible!!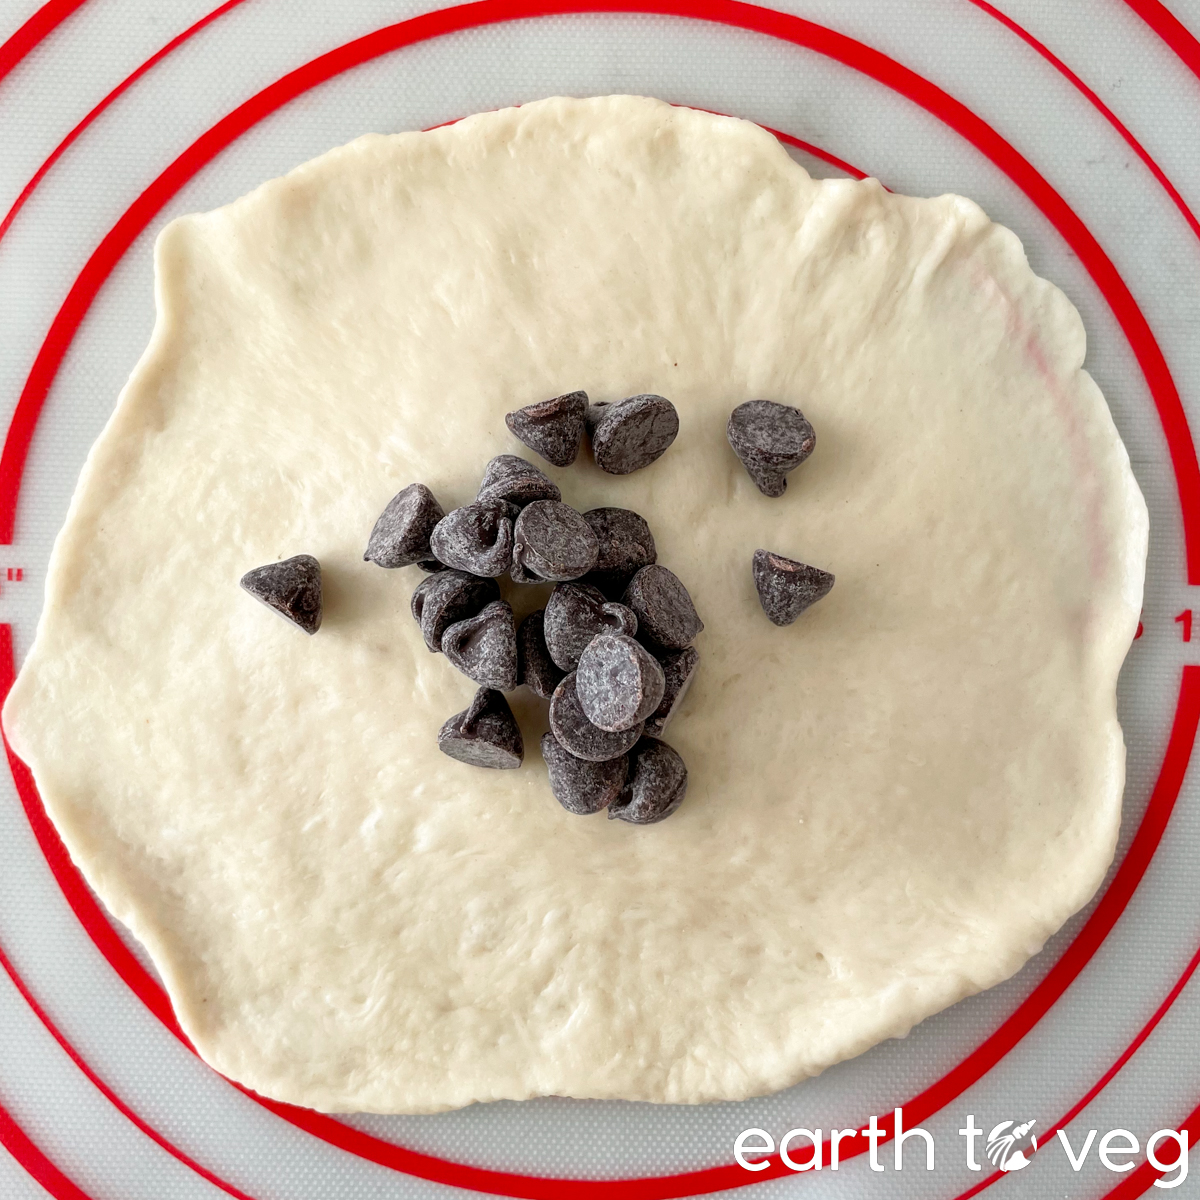 |
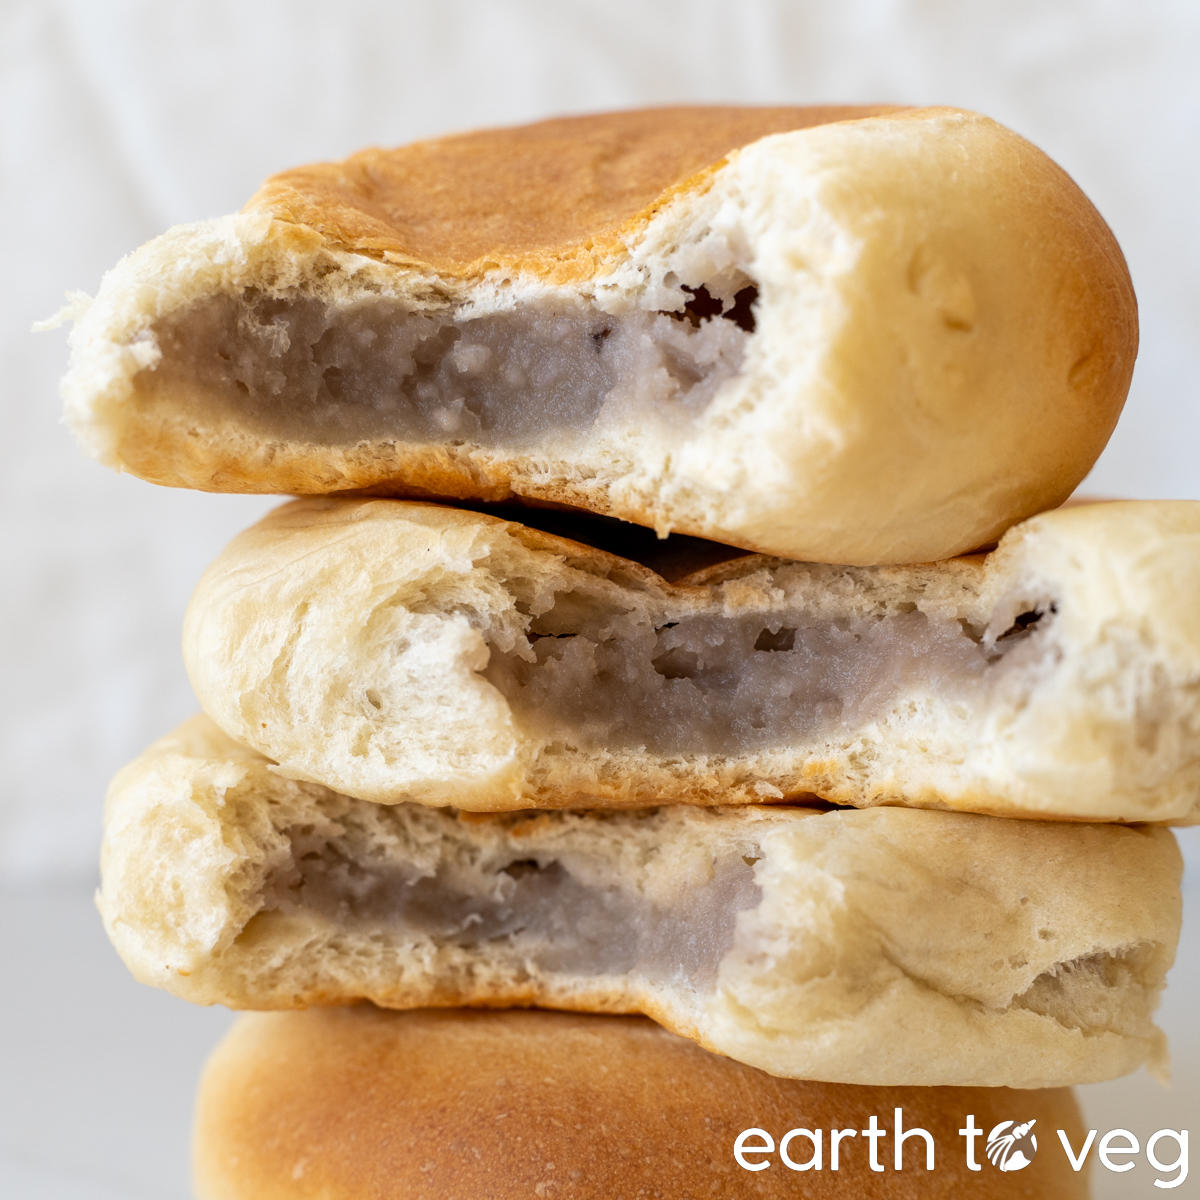
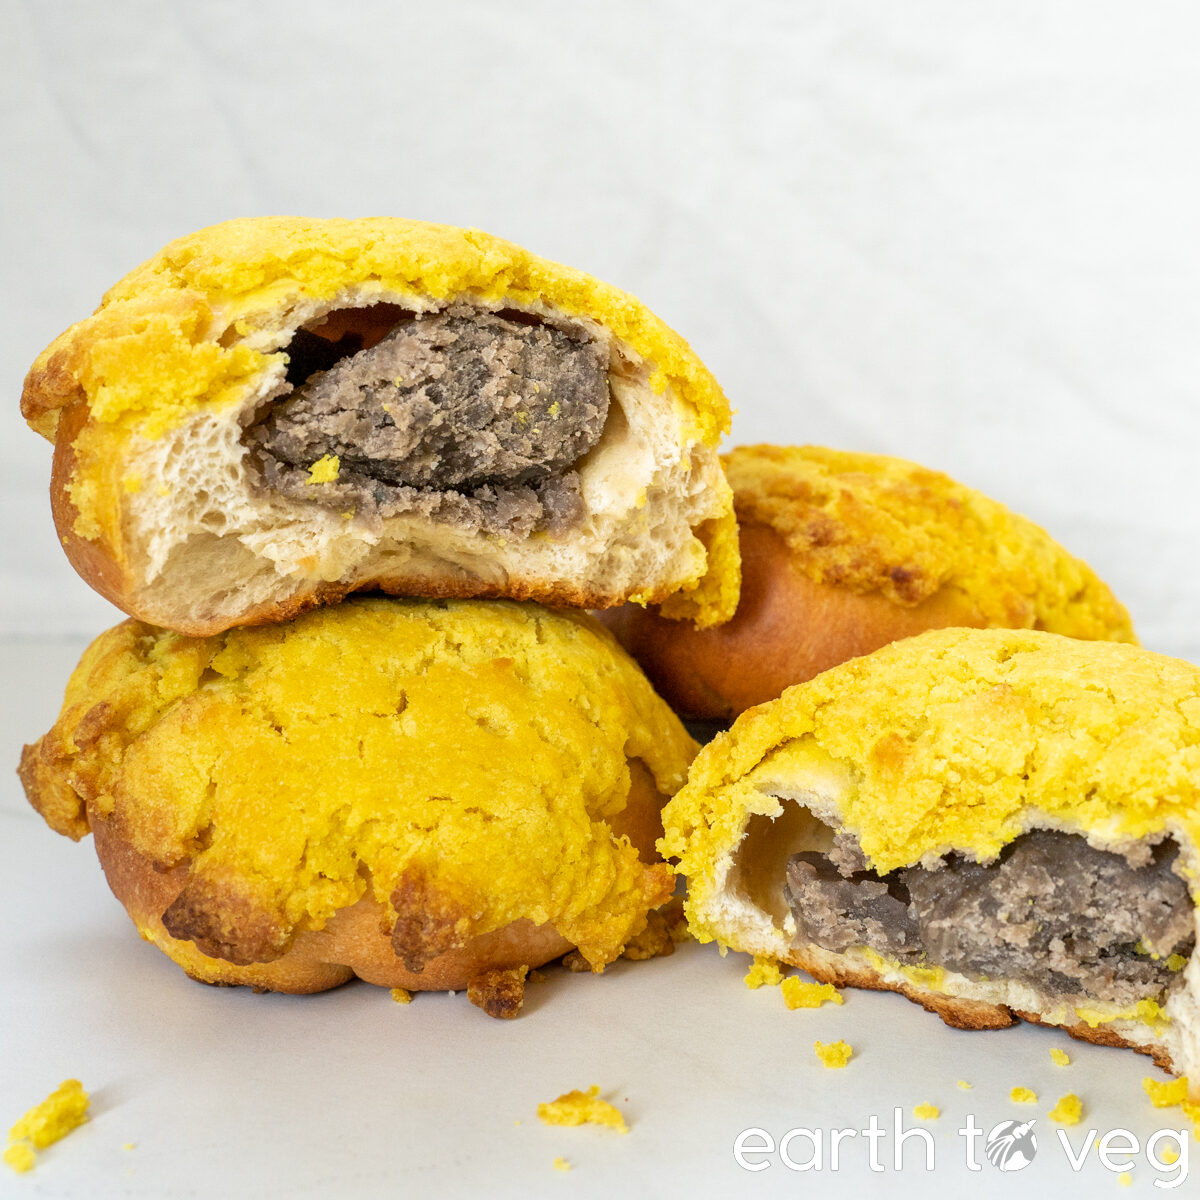
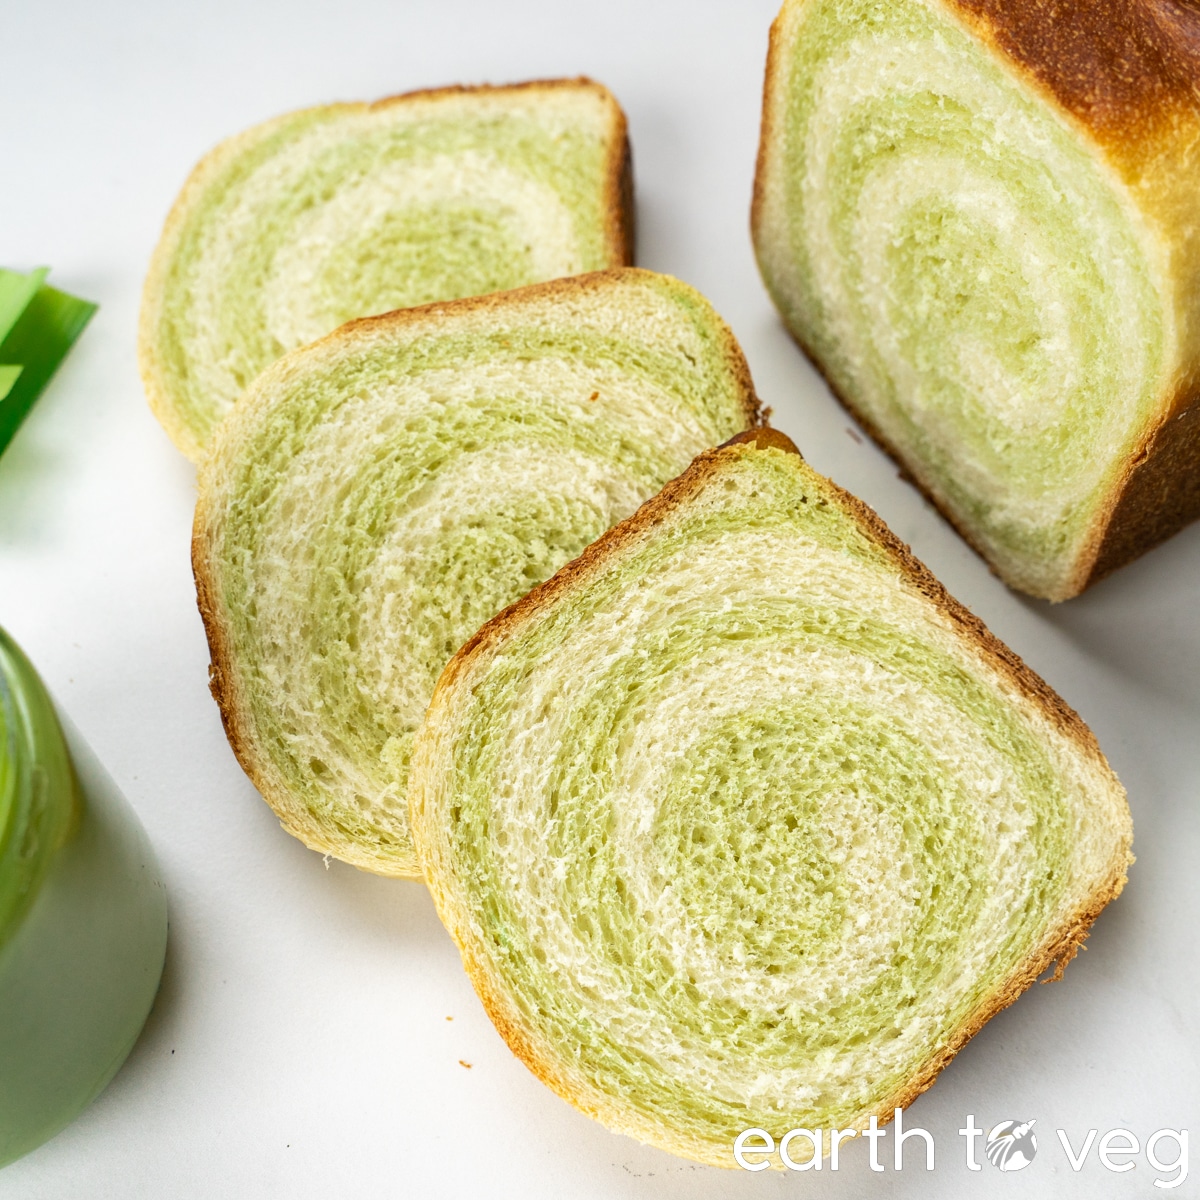
| 8 | Decided to increase the proportions of the dough. Upped the soy milk to 240g, flour to 390g. Everything else was kept the same from Experiment 1. Added 18g matcha powder to the dough and kneaded for 15 minutes. Beautiful muted green colour. First rise 1½ hours. Added 140g taro paste as a filling, shaped into a braided loaf. Dough has noticeably better gluten development compared to Experiments 1–6. Second rise 1 hour. Baked 50 minutes at 350 °F, was a little dark on the outside, I think 45 minutes would have been enough. The loaf was wonderfully tall and sturdy. Dough was slightly dry, but that’s likely due to the slight overbaking and the addition of matcha powder which absorbed some moisture. I think the hydration and fat level here may finally be just right. |
| 9 | Used Truvia instead of sugar and grapeseed oil instead of butter. The dough weighed around 730g. Split into 10 pieces which weighed 73g each. Filled each one with 2–3 tbsp (35-52g) of taro filling. I was also testing my taro paste recipe here, so half were filled with thick taro paste and the other half with thin taro paste. The thinner taro paste leaked out a bit. Thick filling was great. 3 tbsp was too much, 2 is just a bit too low. Also I would try 60g dough pieces next time with 2 tbsp filling. |
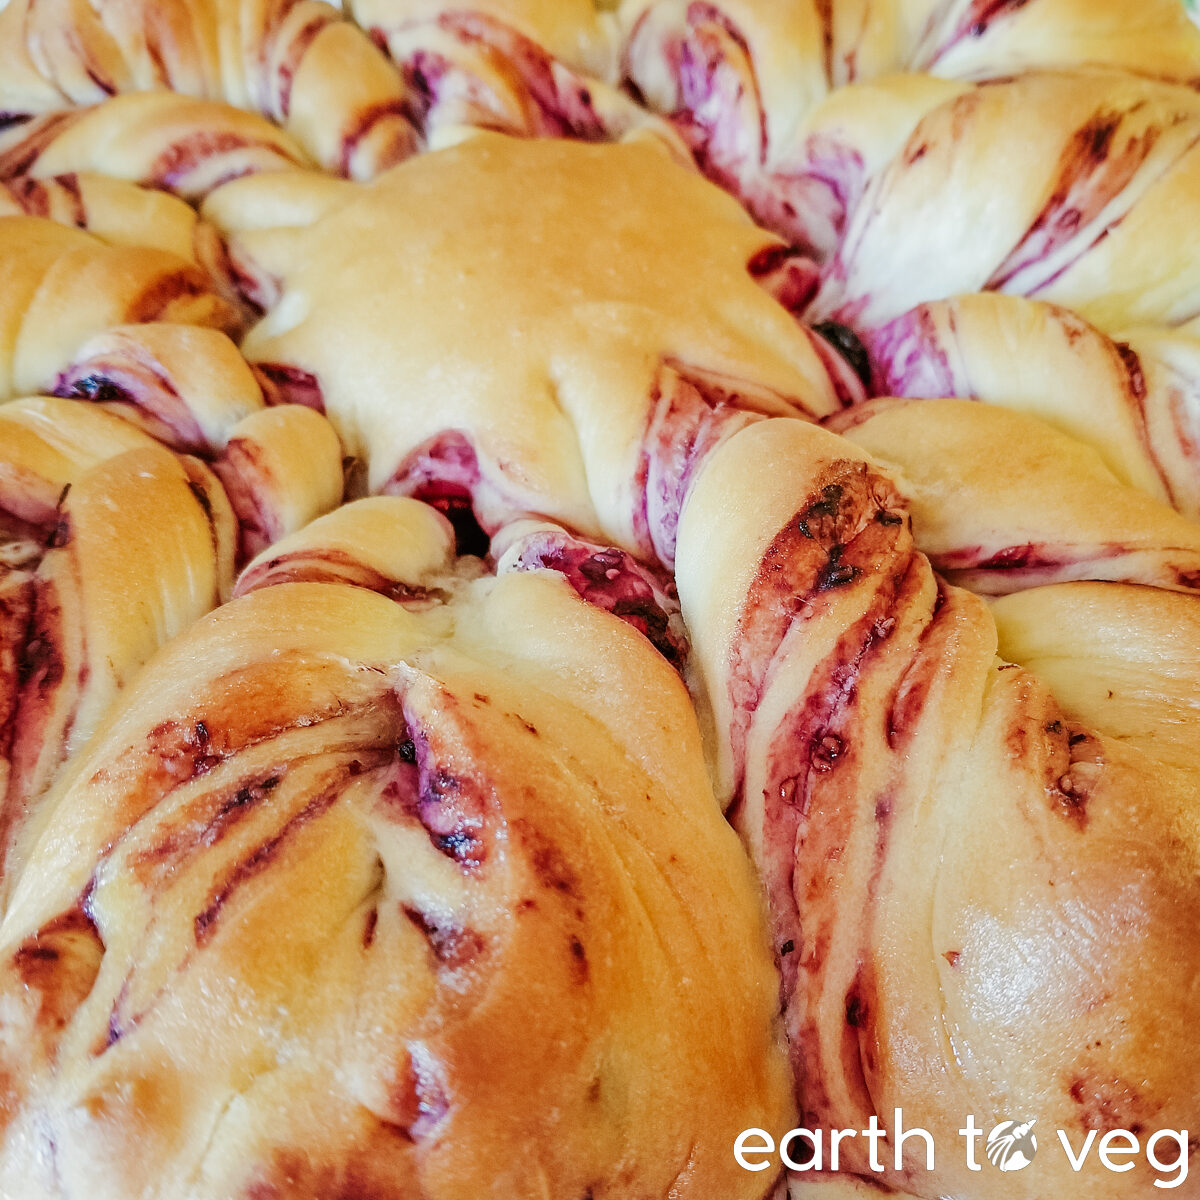
| 10 | Used Truvia instead of sugar and grapeseed oil instead of butter. Filled with 200g homemade dandelion pesto and shaped into a braided loaf. This was the first savoury bake I tried, and I realized the dough was a tad too sweet. Will try reducing sugar by 1 tbsp next time. |
| 11 | Made a tangzhong with 120g water and 25g flour. Mixed it up with all the other ingredients and “autolysed” for 1 hour, idk why. I think I got distracted with something else. The dough was super sticky, had to add another 100g of flour. I put something like 780g of the dough into the Pullman loaf pan with the lid on, it fucking EXPLODED in the oven. Thank God, neither pan nor lid seemed to have been warped by the experience. Lesson learned: 780g is way too much dough for the small-sized Pullman pan.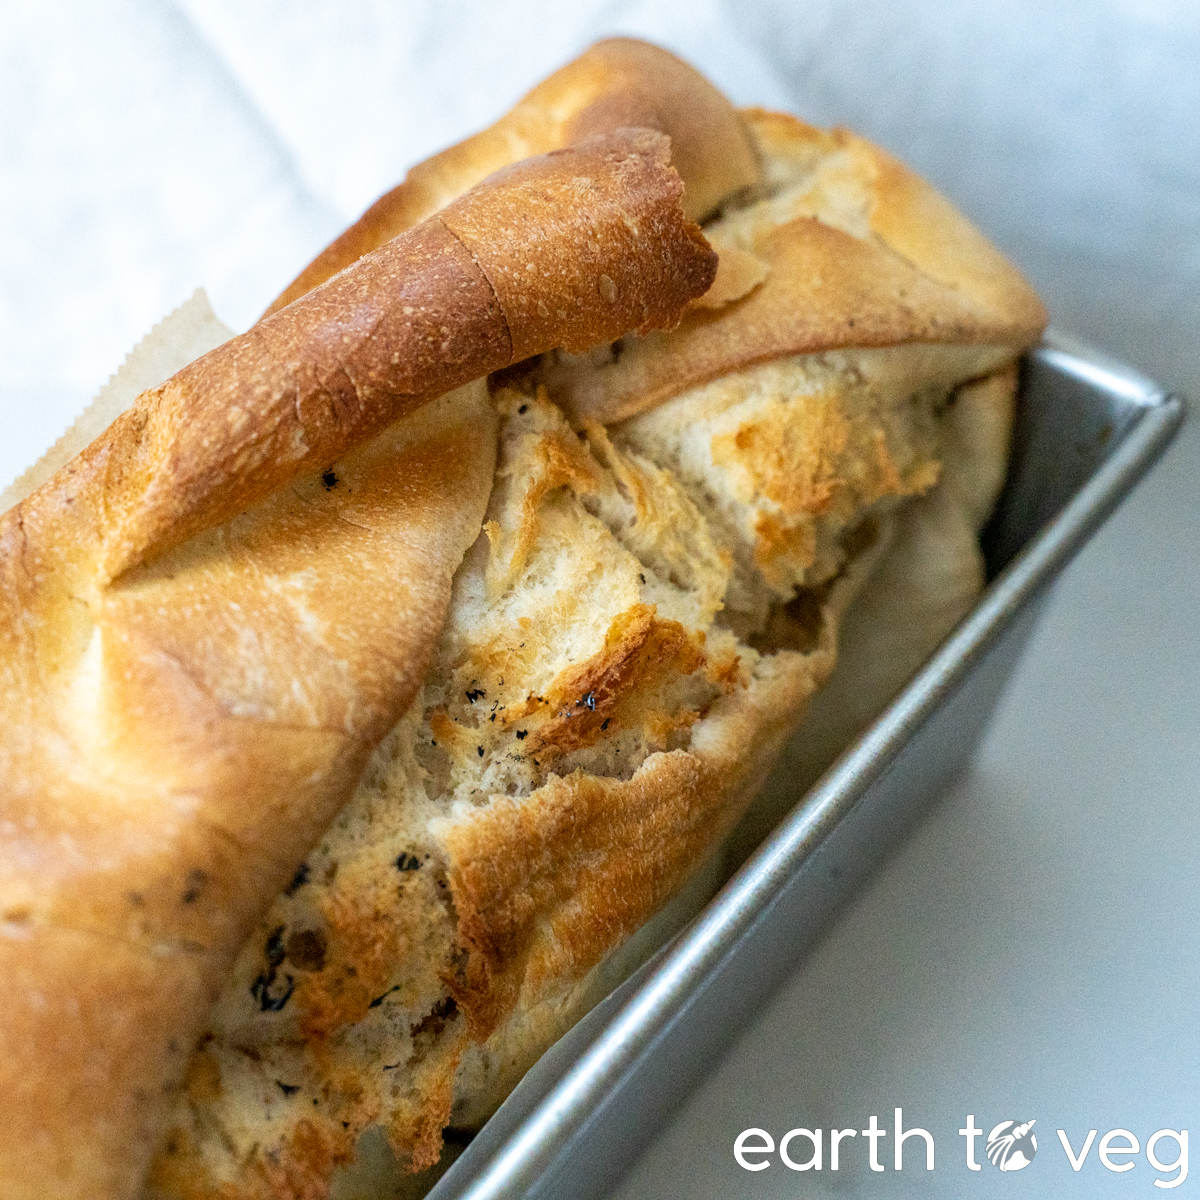 |
| 12 | Made another tangzhong dough, same as Experiment 11 but without the autolyse. Made rolls weighing 20g, 50g, and 70g. Experimented with some stovetop buns by preheating a cast iron on the stove on medium-low (heat setting 2 out of ), then putting in some of the proofed buns for 15 minutes on the first side, turned heat down to 1, and 15 minutes on the second side. Although the middle sections of the buns were hella pale, they were totally cooked through. Pretty successful! Also made some pandesal and taro buns.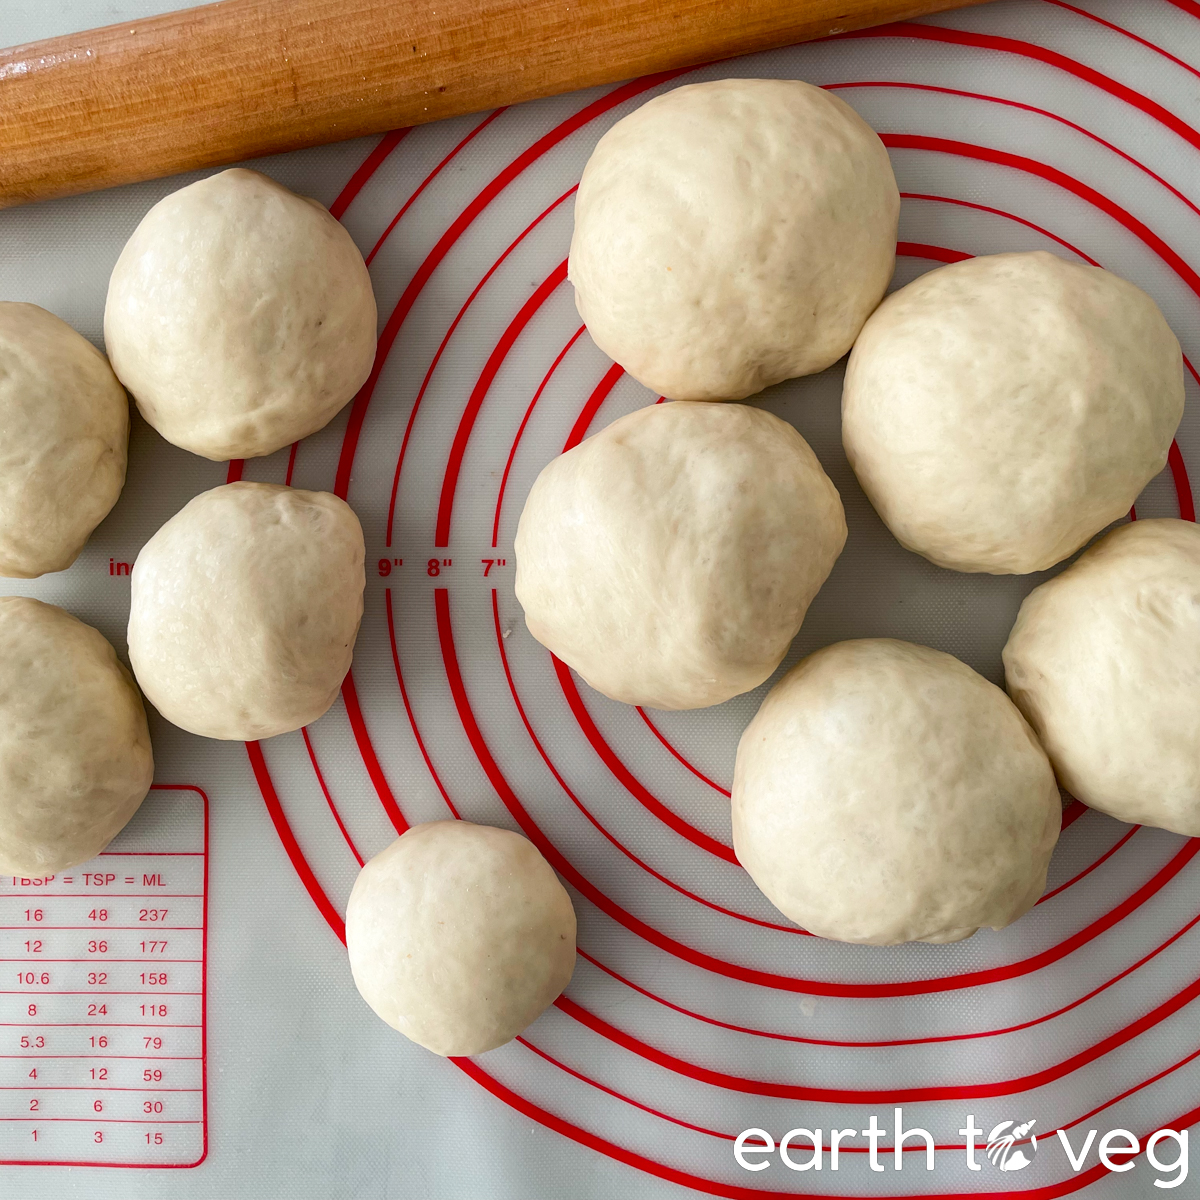 |
| 13 | Made a plain loaf, same ingredients as Experiment 8 but no matcha or taro filling this time. For funsies, decided to try adding yeast and salt on opposite sides of the bowl, as many online sources recommend. Just to see if it would make a difference. Narrator: it didn’t. |
| 14 | Tangzhong method again (same as Experiment 11). Froze the dough. Defrosted in the fridge, after 12 hours it was still semi-firm in the core. After 3 more days, it hadn’t risen at all. Set it out at room temperature, and it finally reached around 1.5× its size after 7 hours. Second rise took 1½ hours. Baked into anpan (50g dough pieces each with 30g shiroan filling) at 360°F for 25 min. |
| 15 | Same as Experiment 14, but didn’t freeze it. Put the dough into the Instant Pot on the Keep Warm function, this was way too hot, killed most of the yeast. Result was an inedible, underproofed bread (you can see the dense spots in the picture which are the surface layer that got too hot and drenched in condensation). I guess I was moving without a brain that day because I should have known the Keep Warm function is too hot for bread. It’s the Yogurt function that should be used for proofing dough.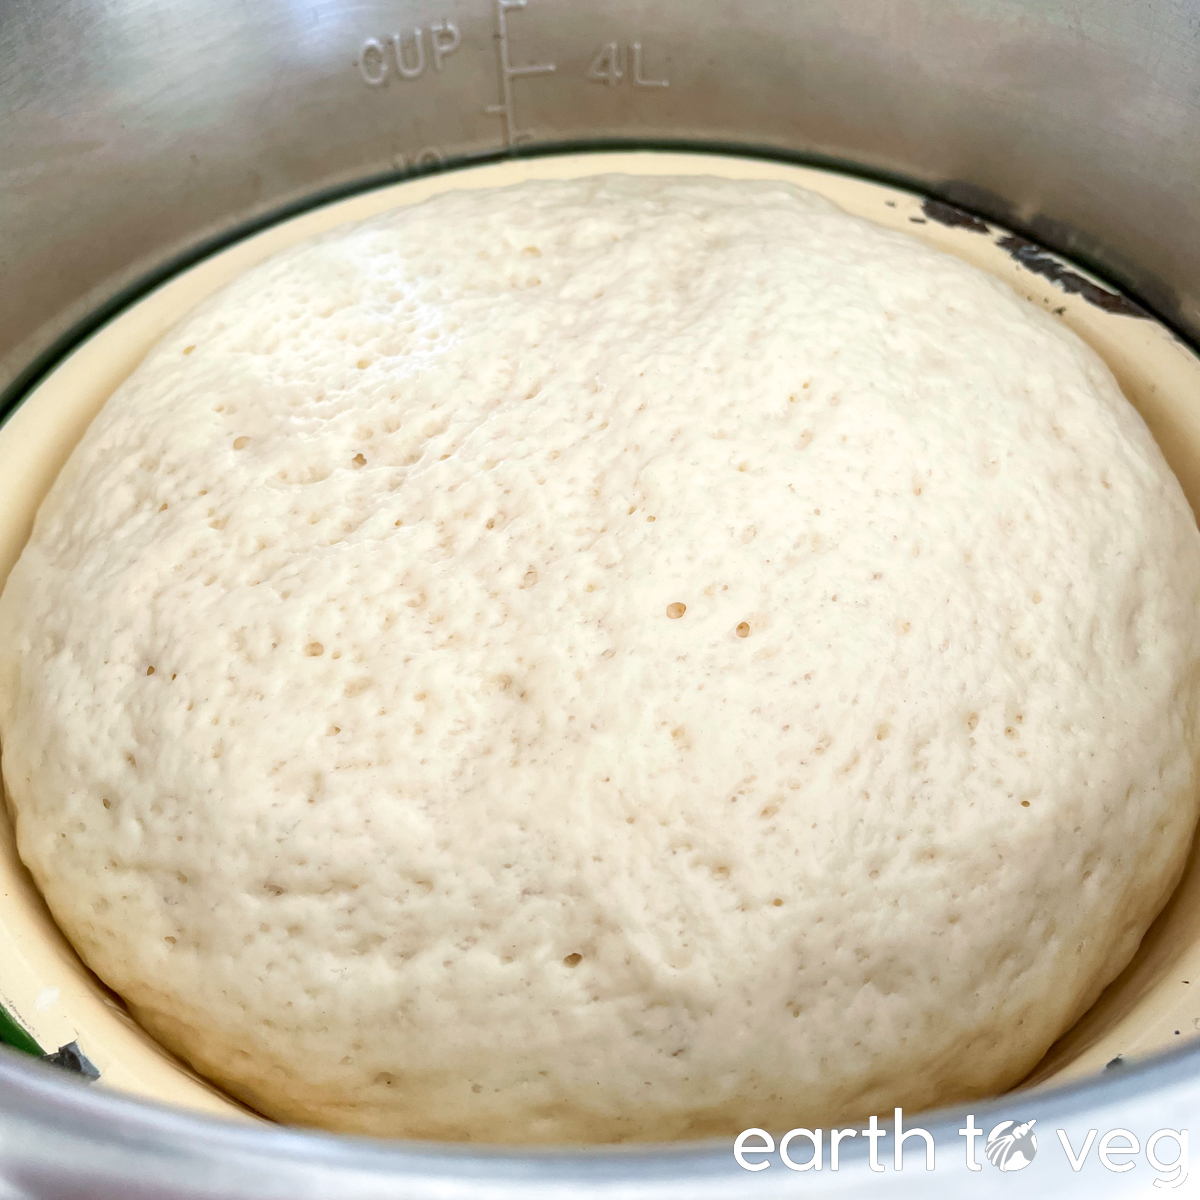 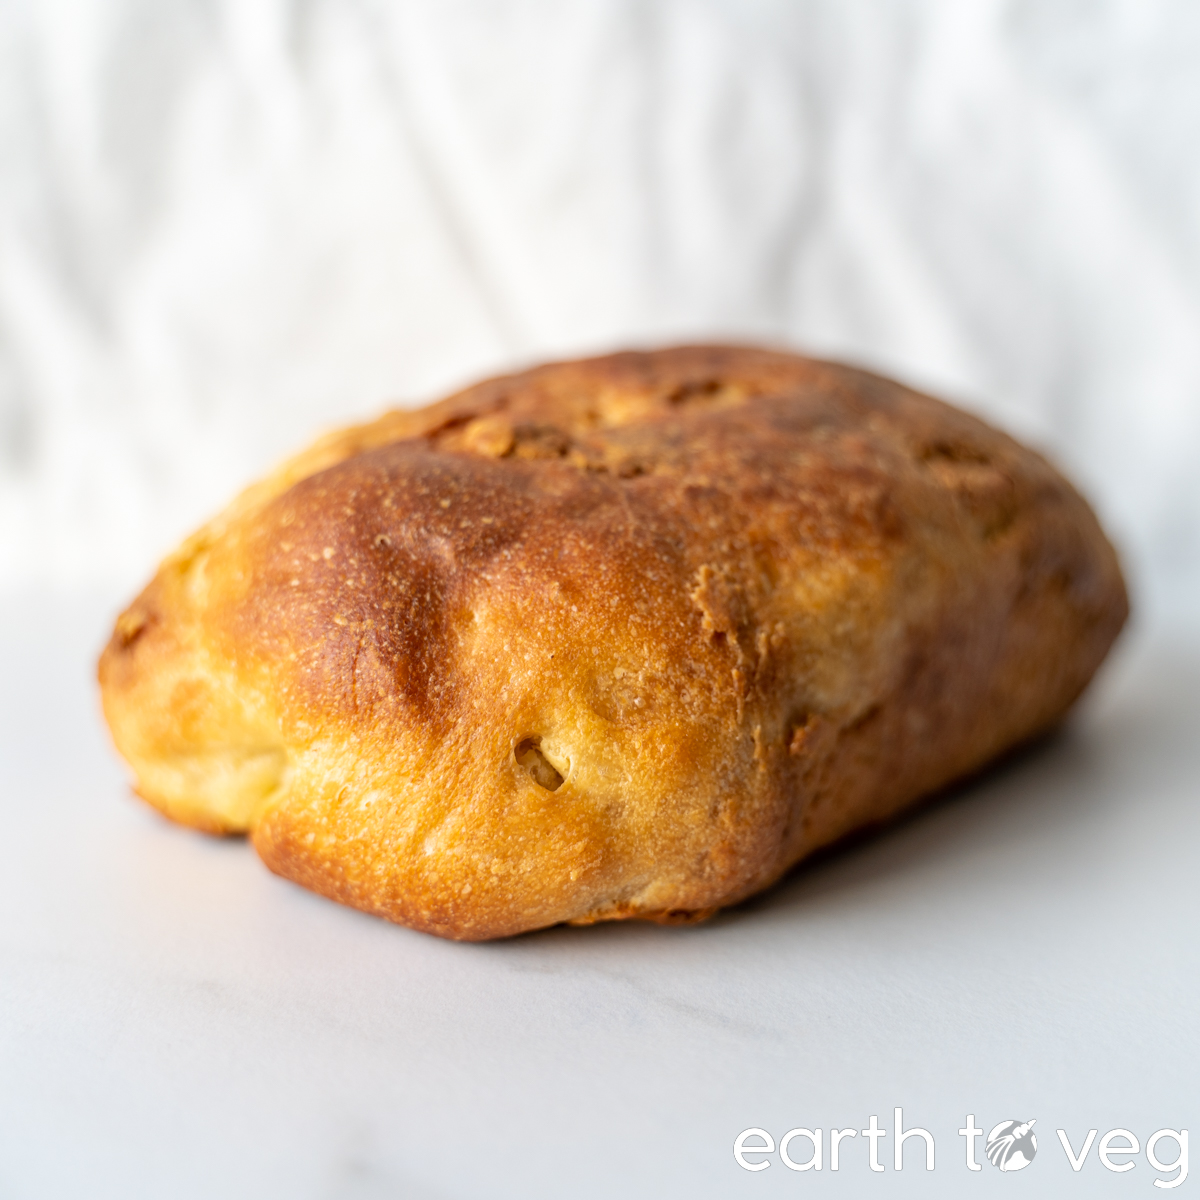 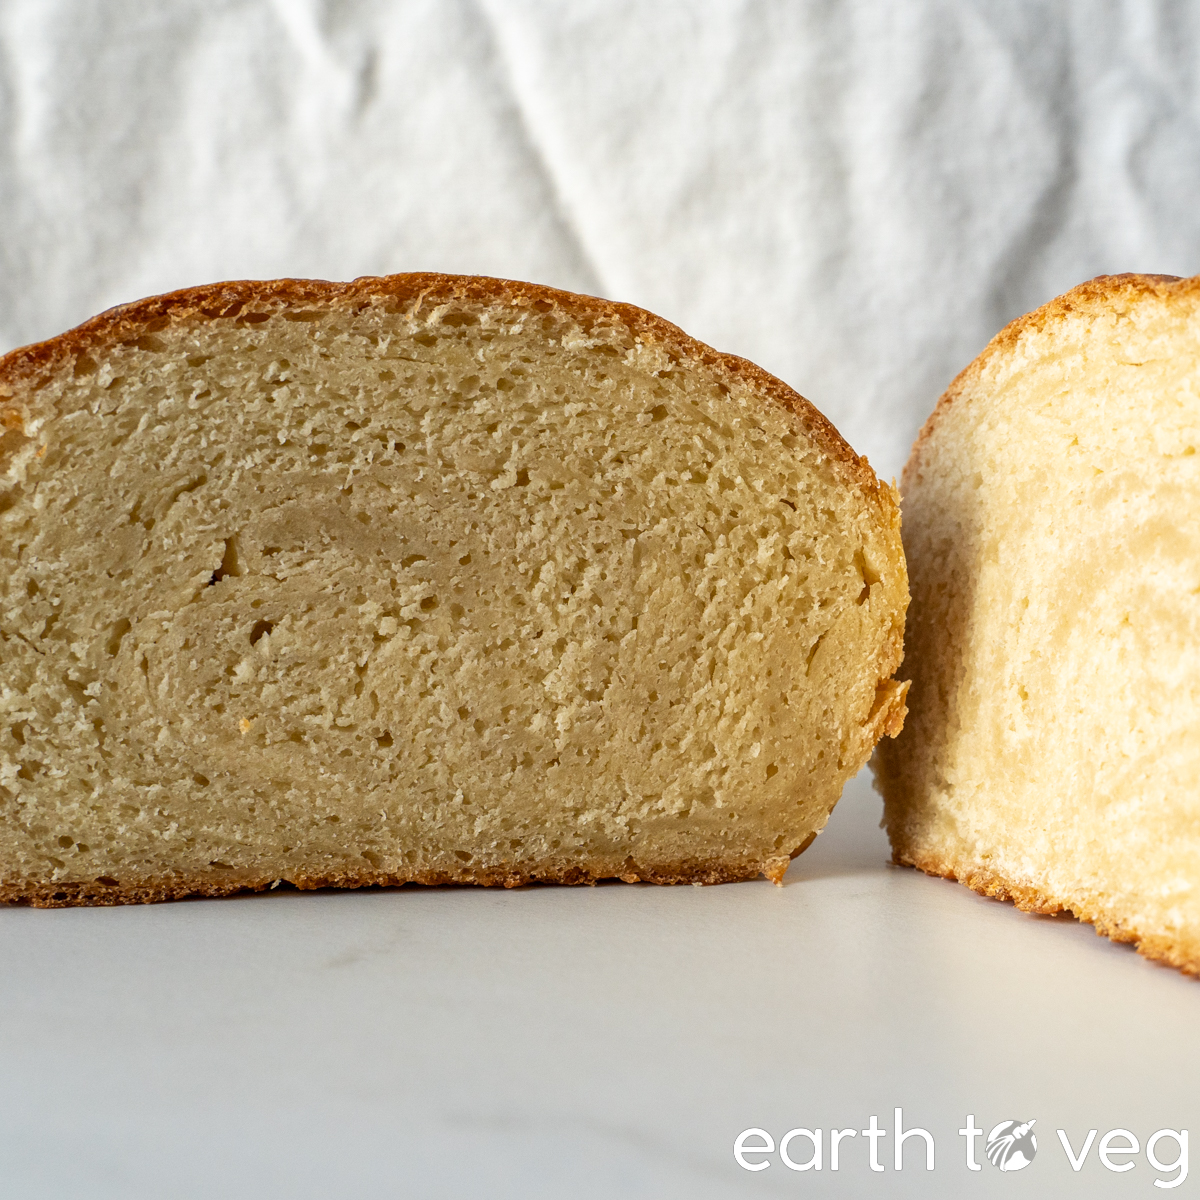 |
| 16 | Ingredients the same as Experiment 12, but used unfiltered soy milk (with the okara sediment still inside). Surprisingly good! Only thing is the dough was stiffer, I guess one would need to add more soy milk to compensate for the fact that part of the “soy milk” mixture contains solid okara instead of being wholly liquid. Good starting off point for future okara bread experiments 🙂 |
| 17 | Did tangzhong method again, with 100g extra flour as usual. At room temperature, it took 2 hours for the first rise, 1 hour for the second rise. Baked most of the dough into a loaf in the Pullman tin (lid off this time) for 40 minutes. Shaped remaining dough into a small loaf in my ceramic mini loaf pan, which was baked for 35 min. I guess the small dough would’ve baked through faster but I wanted it to get golden brown on top. It didn’t seem dry in the center, probably due to the magic of the tangzhong. |
| 18 | Did another experiment with salt and yeast, this time by dissolving both together in the warm soy milk. The yeast still bubbled up and foamed happily, leading to my conclusion that the amount of salt used in this recipe will not be able to hurt the yeast in any meaningful way. I also decided to try something I’ve seen with brioche baking recipes, where you mix together all the ingredients sans butter, then add the butter gradually in little cubes. This is supposed to save kneading time because butter inhibits gluten formation. But guess what? The dough made using this method was extremely frustrating to work with. The vegan butter basically refused to be incorporated. Fucked up the gluten network too (check the picture). I had to run the mixer for 30 MINUTES!! to get a proper dough formed.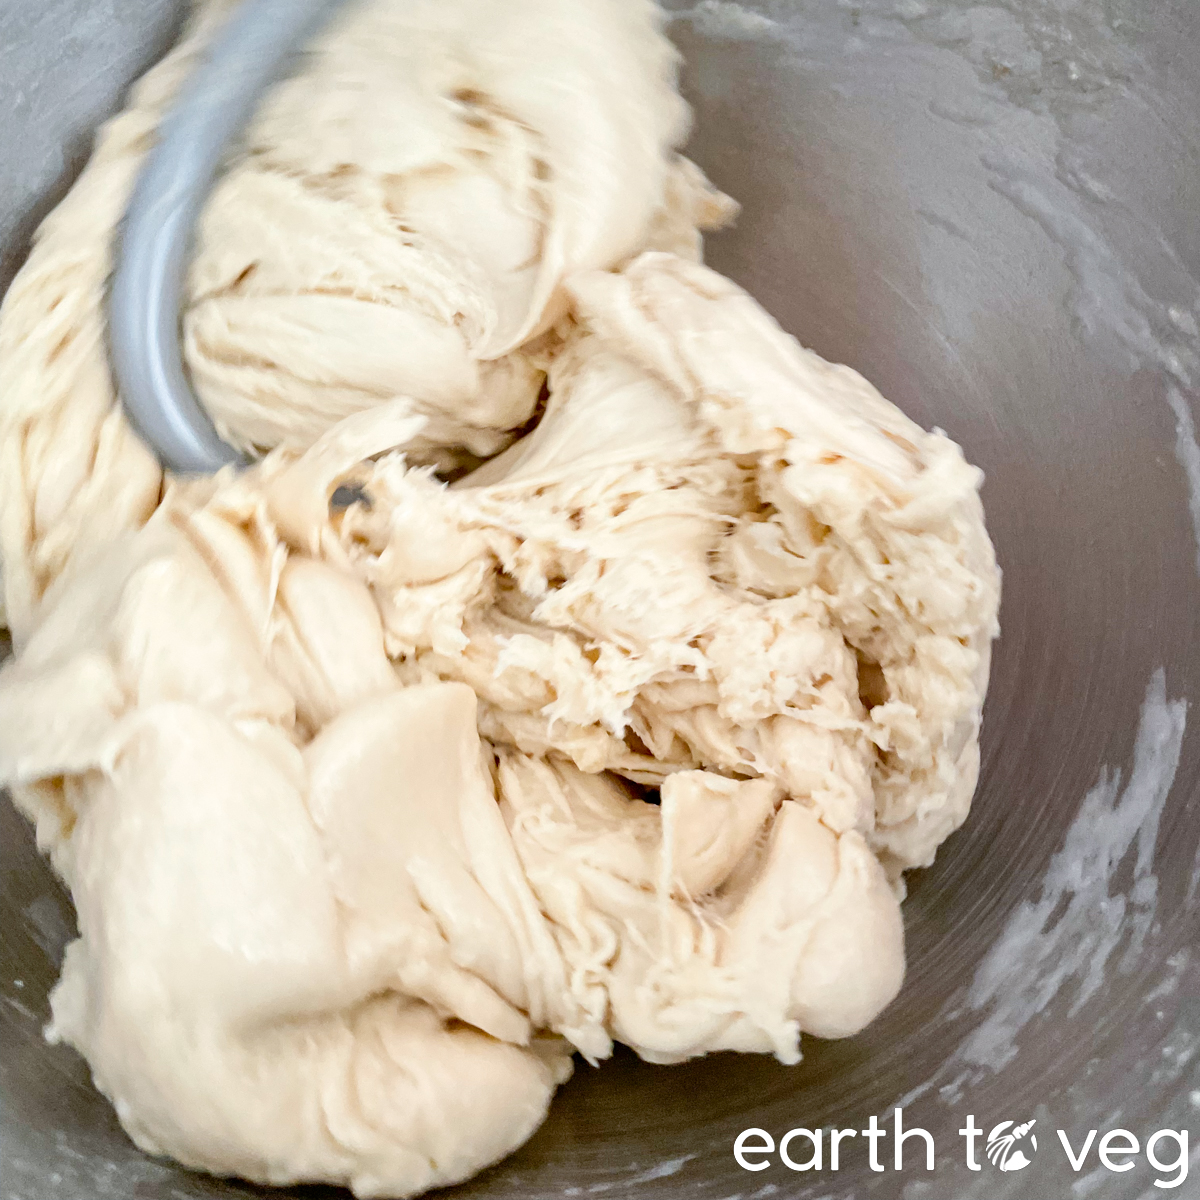 |
| 19 | I tried running Experiment 18 again, except that I let the unbuttered mixture sit (covered) for about thirty minutes for a quick autolyse before adding the butter. Same result. The moment the butter was added, the gluten network became really stringy, and the dough fell apart into a greasy mess. After half an hour of machine kneading, it finally returned to normal form. I left this dough in the fridge for seven days, just to test if that would result in any flavour changes. Interestingly, after retarding for seven days, the resulting baked bread had almost no sweet taste!! Tasted much more salty than sweet. I guess this shows that the yeast are still working in the fridge, using up the sugar, albeit much more slowly than at room temp. |
| 20 | Decided to hand knead a batch of sweet dough for the first time! I kneaded by hand for about 12 minutes. Looking back, I don’t think it needs to be kneaded that long and I probably damaged the dough a bit by being too rough and tearing up the gluten. It was getting really hard to knead already by the five minute mark. I measured the pre-rise volume to be around 2.5 cups, then ended up doing a bulk ferment at room temperature for 3 hours because I went to Costco and forgot to put the dough in the fridge. The dough was pushing 9 cups by the time I got back! Baked into zhavoronki and pandesal. The flavour was a bit blander than previous bakes. This might be due to 1) my rough handling during kneading and 2) the overproofing at the bulk ferment stage. Still made decent bread though. |
| 21 | Finally trying a different plant milk. Made with almond milk. Incorporated tangzhong method into the original ingredients of the recipe (plus 1/4 cup additional water). So, used 30g flour for tangzhong + 360g flour for rest of the dough and 60g almond milk for tangzhong + 180g almond milk for rest of the dough. Proofed in the Instant Pot using the Yogurt function on Low mode. It turned out good, pretty indistinguishable from the breads made with soy milk. |
| 22 | Same as Experiment 17, but tried freezing the dough again. After freezing for 48 hours, it went from freezer directly to Instant Pot to thaw and go through bulk fermentation. It felt a bit stickier than “fresh” (unfrozen) dough, but baked up nicely just like regular sweet dough. |
| 23 | Another freezing experiment: unlike Experiment 22, where the dough was frozen just before bulk ferment, this time I froze it right before the secondary ferment. I shaped my dough into cute lil zhavoronki, and plopped them onto a parchment-lined tray in the freezer. The next day, I put them straight away into a 350 °F oven and baked. This result was a bit of a fail, because the breads barely puffed at all. The taste was okay, but the texture was a bit chewy and dense. Probably because we essentially skipped the second fermentation with this method: the dough didn’t get a chance to fully thaw before the outside was already getting baked firm. |
| 24 | My last experiment before I felt comfortable posting this recipe! For this one, I decided to try something I’ve been too scared to do in all my years of bread-baking: doing a single rise. Typically, bread recipes let the dough rise, then punch it down, then let it rise again before baking. But this time, I threw the sweet dough into a loaf pan immediately after I finished kneading, then let it rest for just over an hour before putting it into the oven. The result? A perfectly acceptable sandwich loaf! I’m interested in doing a side-by-side blind taste test (either Kevin or my parents will be the guinea pigs) to compare the flavour differences between a single-rise and double-rise bread. But for now, if you don’t have an extra hour to spare for the second proof, you can get away with a single rise using this recipe. |
What You’ll Need
When I make this recipe, all the ingredients are at room temperature except the soy milk (lukewarm) and vegan butter (fridge-cold). Temperature plays a big role in how long your dough takes to rise. Yeast is most active around 75–80 °F (24–27 °C). If all of your ingredients are cold, the yeast will work much more slowly, and it could triple or even quadruple the rising time.
Yeast
I like to use just 1 tsp (3g, or roughly half a packet) of yeast in this dough. At room temperature with room temperature ingredients, it takes the dough roughly 2 hours for the first rise and 1 hour for the second rise. If you want it baked really quick, though, you can double the yeast (2 tsp or 6g, or one full packet). With doubled the yeast, the same amount of dough will take less than half the time to rise. However, there will be a stronger “yeast” flavour and there is more risk of overproofing.
A note about active dry yeast vs instant yeast: So instant yeast is pretty self-explanatory, it’s, well, instant. It dissolves quickly into your dough and you don’t need to activate or “bloom” it first in liquid. The only thing to watch out for is certain brands contain additives designed to help the bread rise even faster, which is why, as always, you should take the fermentation times given in recipes with a grain of salt. Your bread may rise faster or slower depending on which brand of yeast you use.
Active dry yeast is another story. Here in Canada, I’ve come across two different types of active dry yeast:
- Fleischmann’s active dry yeast (which you’ll find at most grocery stores). The particles of yeast are quite large, bigger than cornmeal, and they definitely need to be fully dissolved in water before to work effectively. I tried making a pizza dough once without blooming the yeast, and ended up with little packets of clumped yeast in my baked pizza. 🤠
- Red Star active dry yeast. This type of active dry yeast I treat exactly the same as instant yeast. It doesn’t need blooming because the particles are already so small. I just throw it into the mixer at the same time as all the other ingredients.
Soy Milk
I prefer Homemade Soy Milk because it’s high in protein, which is good for bread structure, and because it’s cheap. I have also made this recipe successfully with almond milk. I have not tried other types of milk for this recipe, though I think they will all work fine.
Use lukewarm milk to help the yeast work faster. Just make sure it’s only slightly warm to the touch (no higher 105 °F or 40 °C). Any hotter and you risk killing your yeast. If you use room temperature milk, it will still work, but the bread will take longer to rise. And if you use cold milk, it will take much, much longer to rise.
Sugar
The thing about sweet dough is it isn’t actually super sweet. This makes it perfect for both sweet and savoury applications. The filling is what ultimately decides whether it leans more sweet or salty, not the base dough itself. The recipe as written only contains 3 tbsp of sugar. If you’d like, you can increase this to 4 tbsp (1/4 cup) if you’re baking sweet. But 3 tbsp is enough for all of the recipes on this site that use this dough.
You can use any type of sweetener here, like white sugar, brown sugar, maple syrup, pekmez, etc. Zero-calorie sugar substitutes like stevia, monkfruit also work well in this recipe. I haven’t noticed a difference in the breads baked with regular granulated sugar and the ones baked using an alternative sweetener.
Flour
I prefer using bread flour or all purpose flour in this dough. Bread flour (aka “hard” flour) is higher in protein than all purpose flour, and creates a stronger gluten network. In my experience, breads baked with bread flour are taller than those made with all purpose flour.
Butter
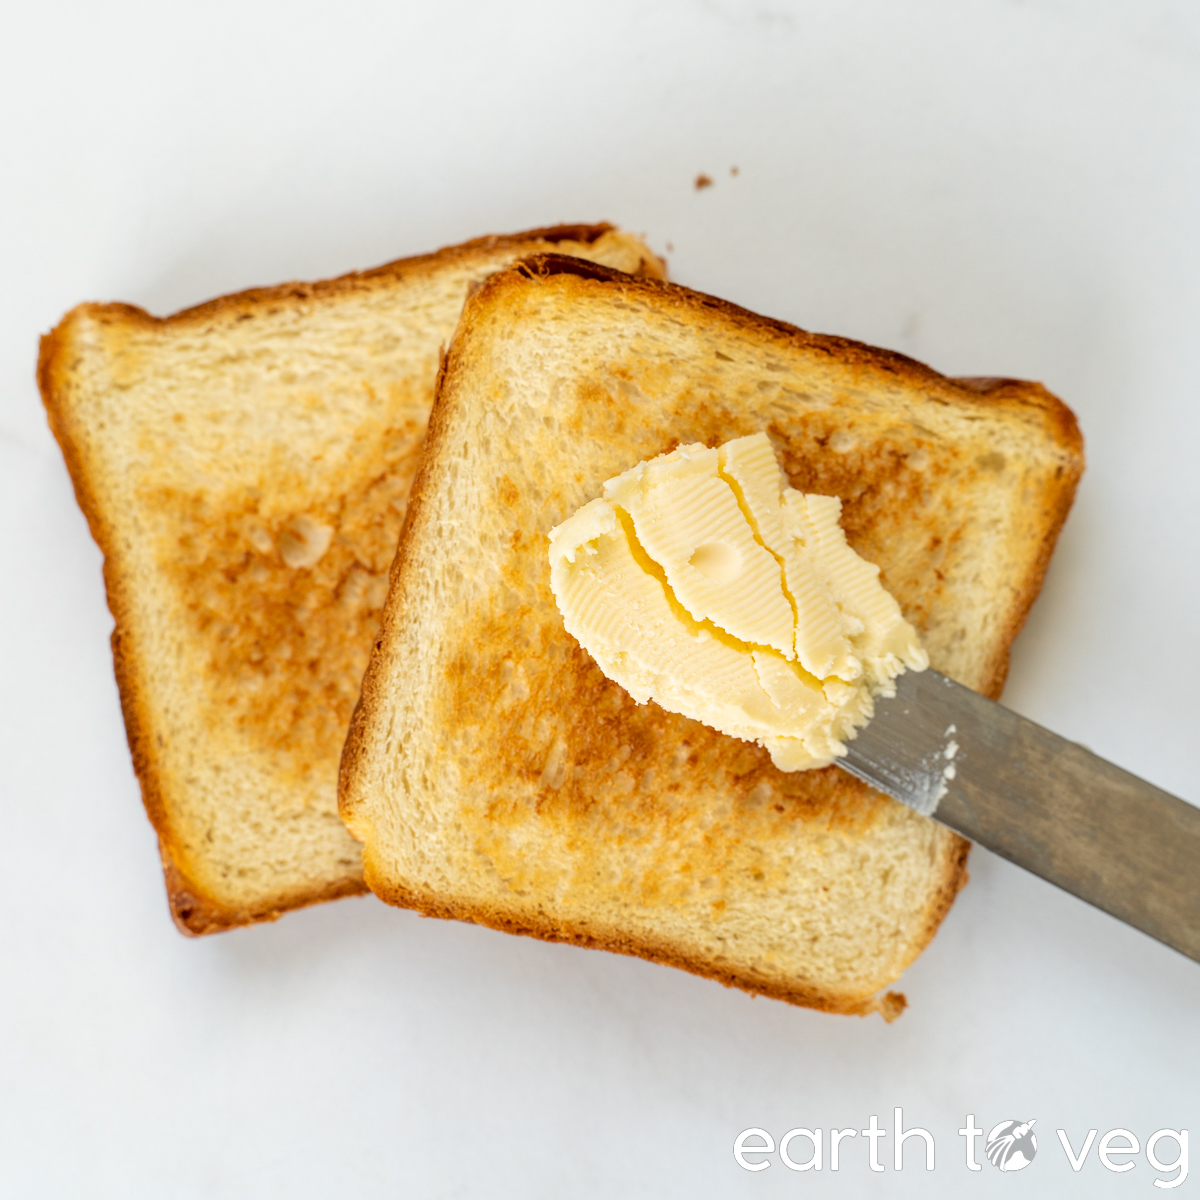
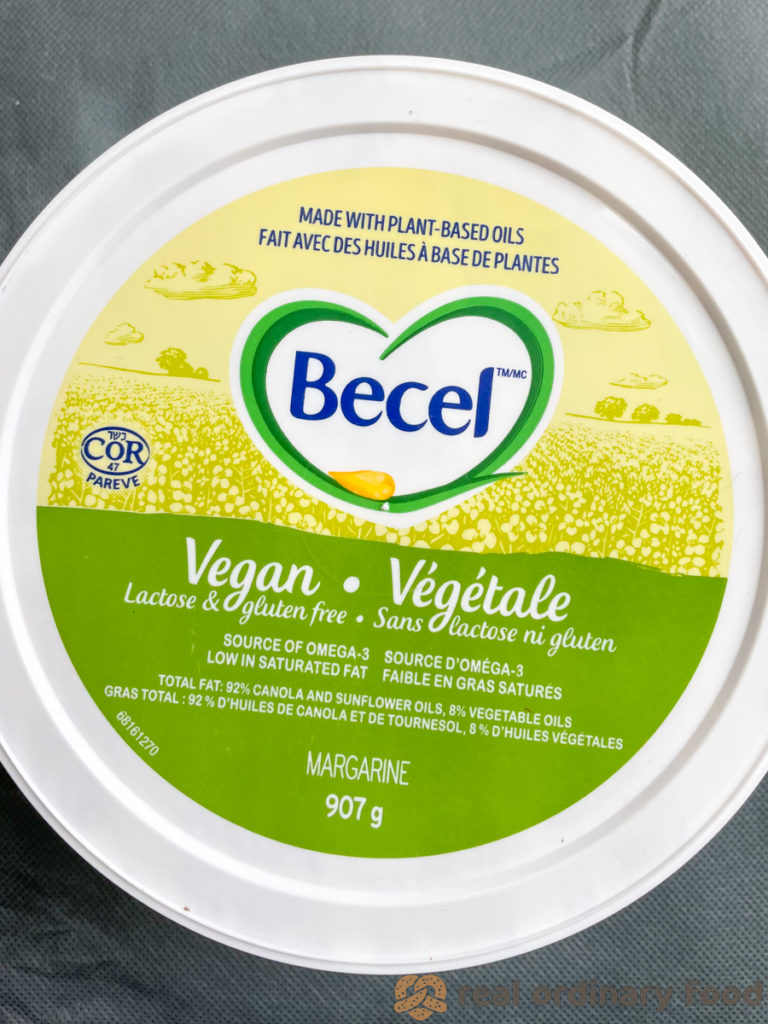
I usually use tub margarine straight out of the fridge. (Whatever brand is cheapest, which is usually Becel here in Canada.) Imo, there is no point to use a fancy expensive vegan butter, you will barely taste the difference in the baked bread. Save that stuff for spreading on top of your homemade toast! If you’re using a stick butter, let it soften slightly at room temperature while you gather the other ingredients.
You can even use oil instead of butter or margarine. (See Experiments 3, 4, 5, 9, 10).
If you plan on using the master sweet dough for something sweet, consider adding 1 tsp of LorAnn’s Butter Bakery Emulsion to the dough. I have checked with LorAnn customer service who confirmed that it is vegan-friendly. It adds a butterscotch sort of richness to the baked bread. (I do not recommend it for savoury bakes because this emulsion is decidedly a sweet flavouring.)
Salt
It might seem counterintuitive to put salt in a “sweet dough,” but as is the case with most sweet recipes, a little bit of salt does a lot to balance and enhance the other flavours of the bake. Trust me, I once forgot to put in the salt when making this dough, and the resulting bread tasted weirdly bland.
Bakers generally recommend the amount of salt to be 1.5–2% of the total weight of flour, whether it’s a sweet or savoury bread. This master sweet dough recipe uses 6g salt per 390g flour, which is just over 1.5%.
A lot of recipes tell you to put yeast on one side of the bowl and salt on the other side, as if the salt is deadly poison for the yeast. This makes zero sense to me because they’re all getting mixed up together within minutes anyway. I have never noticed a difference between adding the yeast and salt separately vs throwing them all in together (see Experiment 12). The only danger in salt harming your yeast is when you let a large amount of salt and yeast sit directly in water together, giving them the opportunity to dissolve in the same solution. If the salt level is high enough, it could do damage to the yeast cells. However, in this recipe, we are mixing together all of the ingredients at once and there is not enough salt to hurt the yeast in any way.

Step-by-Step Process
A thorough explanation of the process, for bread-making newbies:
Mix the Ingredients
Well, this step is pretty straightforward and doesn’t need much of an explanation.
If you have a stand mixer, just let the mixer (with dough hook attachment) do the work of mixing. It can transition seamlessly from mixing to kneading.
If you are making this dough by hand, stir all the ingredients together with a fork or small spatula. Once the mixture has come together in a shaggy ball, start kneading.
Stand Mixer vs Kneading by Hand
I recommend using a stand mixer to knead this dough. The reasons are the high fat content and low hydration. Fat inhibits gluten formation, meaning more kneading is necessary to achieve proper dough strength. Low hydration means the dough will be quite stiff to knead by hand.
However, I have tried the hand kneading method a couple of times and have a few tips below for those of you who don’t have a stand mixer.
Option 1: Knead by Hand
You can either do this right in the bowl or turn the dough out onto a flat work surface like a countertop for a bit more space. There are a number of methods for kneading dough by hand, some better suited to high-hydration doughs (such as the “slap and fold” technique) and others better for low-hydration doughs such as this one. I’ll show you the technique that requires the least elbow grease.
Option 2: Tuck-and-Fold Kneading Method
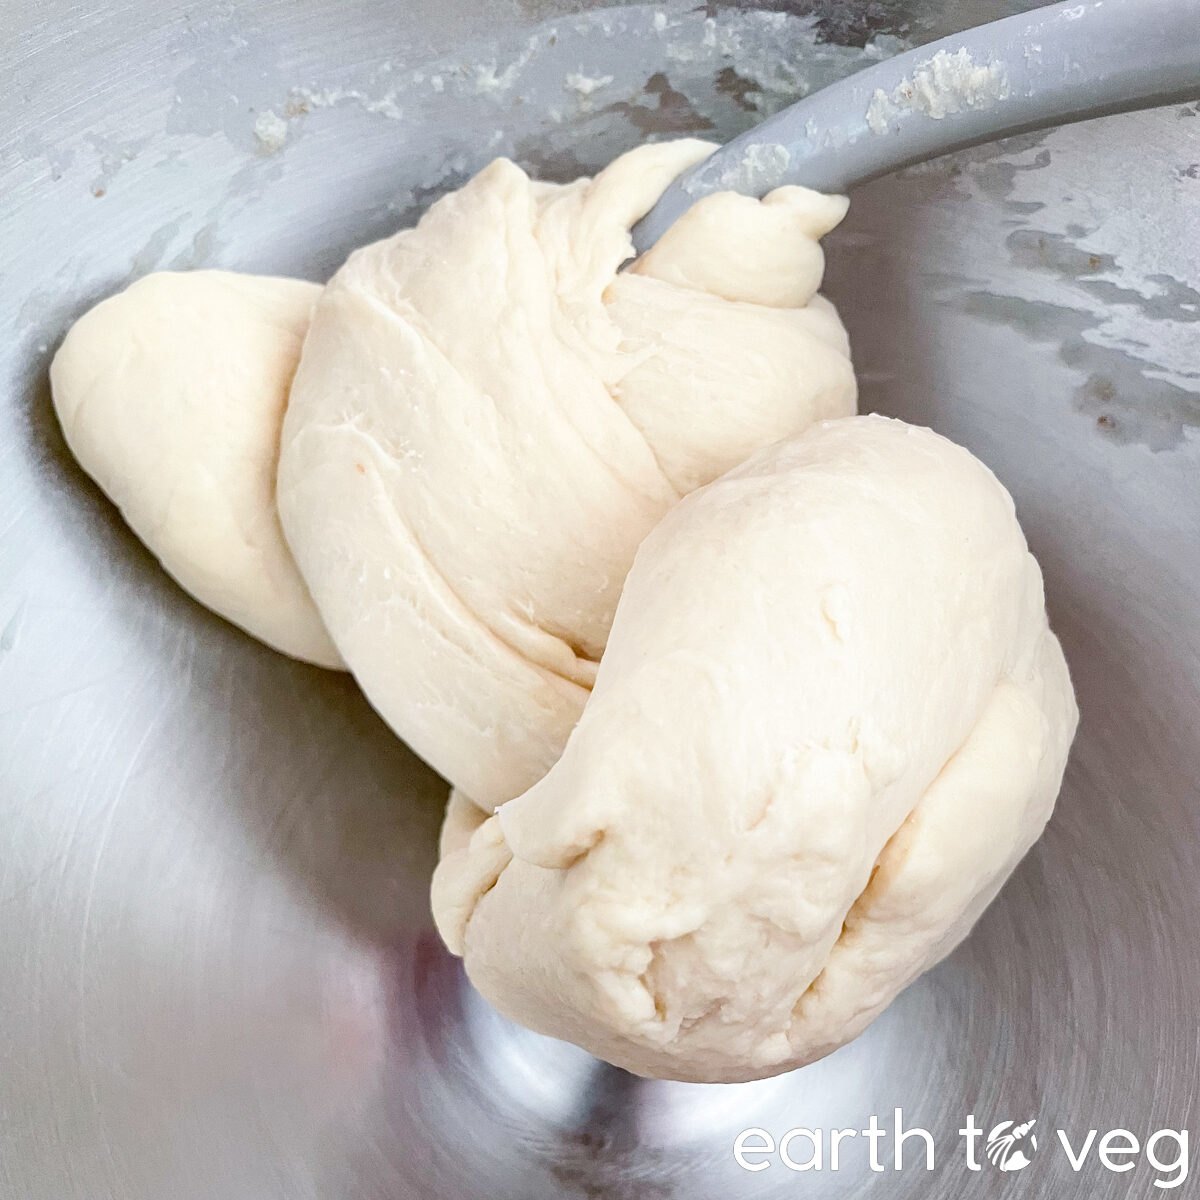
- To start with, knead your shaggy dough mixture by folding it in half (bring the end further away from you over the end closer to you) and punching down with your fists. And I mean literally punch. You don’t need to be very gentle with the dough at this stage. Do this until you have a fairly smooth ball. This step shouldn’t take too long at all, less than five minutes.
- Flatten your ball by punching it some more. Bring one side to the center of the dough, then bring the other side on top of it. Flatten again slightly, then bring the two remaining sides over the center in the same manner. (If your hands start sticking to the dough at any point during this process, wet them with water or a little oil. Don’t add more flour or it will make the dough dry.)
- Put the dough down, with the folds tucked underneath, so the smooth surface is facing up at you. Okay, we’ve done our first tuck-and-fold!! Cover it and let it rest for 10 minutes.
- After 10 minutes, you’ll notice the dough has puffed up a little. Punch it down again into a flattened ball. See how much softer the dough is now? That’s because the gluten network has had time to relax. Now repeat Step 2 and 3 again for the second tuck-and-fold. Also notice how the dough goes from slack/relaxed to tight/stiff again as we fold it. If we don’t give it the 10 minute rest periods, the dough will just keep getting tighter and tighter and more difficult to knead. Doing less folds, but spacing them out and giving the dough a chance to rest in between, will result in the same gluten development as kneading continuously, it’s just more efficient and saves you from an arm workout.
- Cover and rest for another 10 minutes, then repeat the tuck-and-fold method.
- Repeat Step 5 one more time, for a total of four tuck-and-folds. The dough is now ready to go into bulk fermentation.
Option 3: Knead by Machine
The stand mixer method is very simple. Simply add all the ingredients to the mixer bowl, attach the dough hook, and let it run on medium-low speed or whatever setting is recommended by your mixer for kneading bread. (For KitchenAid stand mixers, this is Speed 2). Once the dough starts coming together in a shaggy mass, set a timer for 12 minutes. You’ll end up with a smooth, supple dough when the 12 minutes is up, and it’s ready for bulk fermentation.
Note: I do not recommend using hand mixers to knead bread dough, even if your mixer comes with dough hooks. The motor on a hand mixer is not strong enough to work the dough and it will burn out. Not to mention, it takes insane strength to hold the mixer steady.
Over-Kneading
Don’t worry too much about over-kneading, especially not for an enriched dough. The sugar and fat in this recipe inhibit gluten development. I’ve heard many people say that it’s much easier to over-knead a dough in the more powerful stand mixer and it’s almost impossible to over-knead by hand, but that’s definitely not true for this sweet dough.
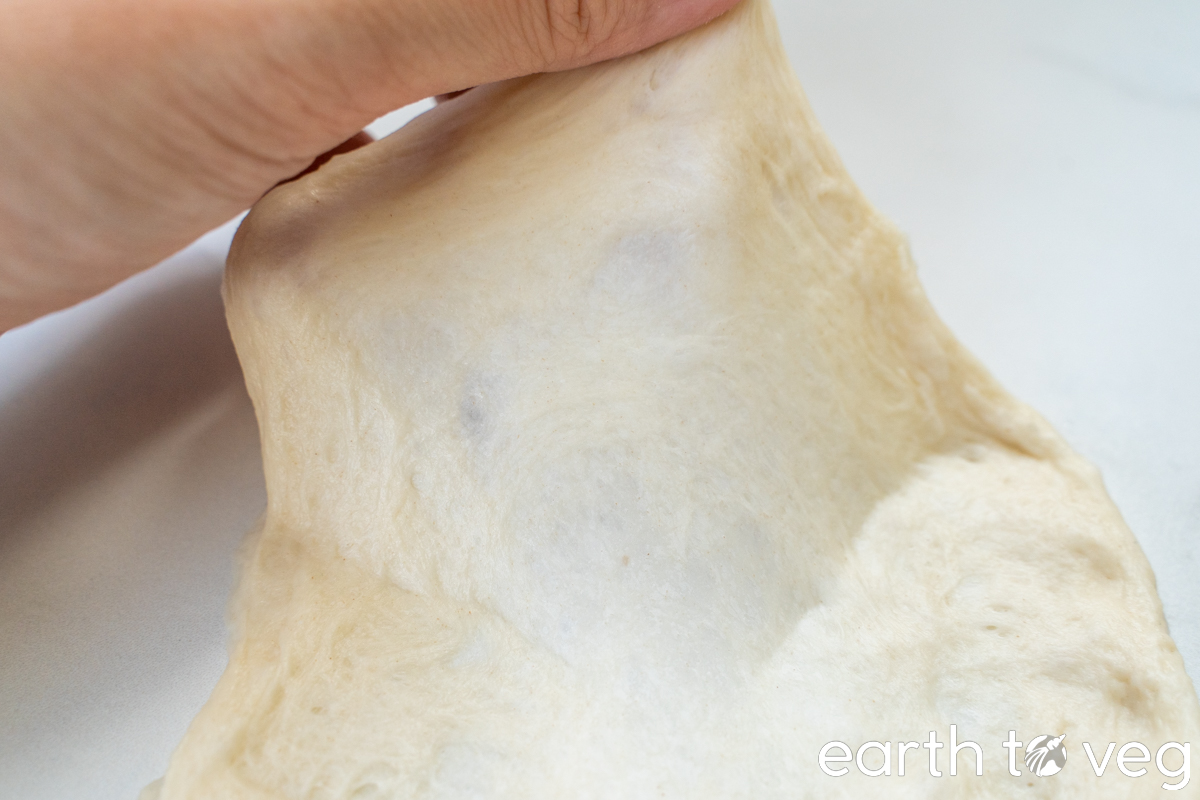
The Windowpane Test
So you may have seen people talk about this “windowpane test” to check if your gluten is properly developed. Basically, you should be able to stretch out the dough so thin that you can sort of see light through it, without it tearing.
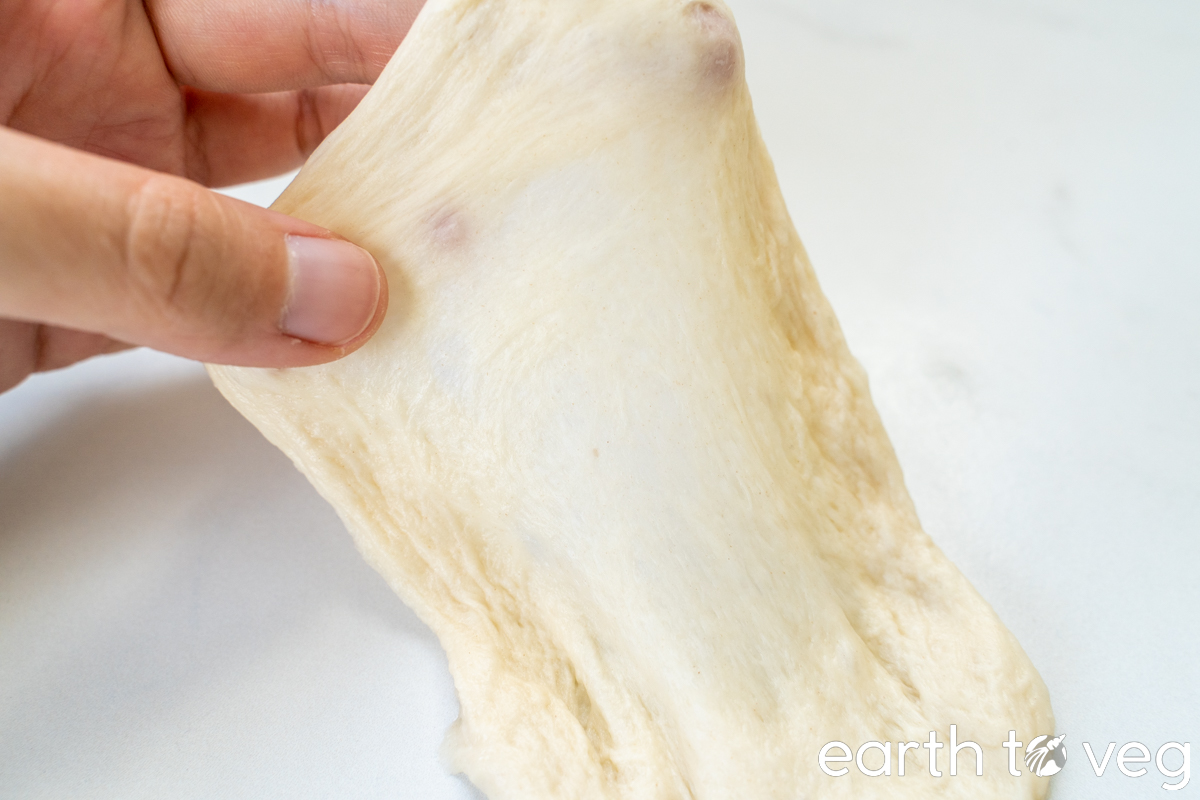
I baked bread for years without passing the windowpane test, and I always thought I was under-kneading my dough. But then my breads would turn out fine with a great crumb. And it seemed like no matter how long I kneaded, I only got mediocre windowpanes, nothing like those paper-thin pieces of dough I was seeing from other people.
First, the windowpane test is not really necessary. As long as you knead the dough for the full length of time specified in the recipe, you’ll be fine. The windowpane test is just extra assurance.
Second, it turns out that I’d been doing the test wrong the whole time. I found this video about a year ago which instructs to rest the dough briefly before stretching it for the windowpane. You shouldn’t be trying the test as soon as you’ve finished kneading. Instead, give it a couple of minutes to relax, and then slowly and gently pull it apart. Now, I get a decent windowpane on all my doughs!
How to Proof Dough
Once you’ve completed the kneading step, the sweet dough is ready for its first rise, also known as first proof, also known as bulk fermentation.
“Proofing” and “rising” mean the same thing in bread baking. Originally, rising referred to the first fermentation and proofing referred to the second fermentation, but now these terms are used pretty much interchangeably. Essentially, we’re letting the dough rest after handling it to allow the yeast inside to grow. As the yeast cells grow, they breathe, releasing carbon dioxide. The carbon dioxide is trapped by the gluten network we created earlier through kneading, forming bubbles inside the dough, causing it to increase in size.
The best dough temperature, recommended by Ken Forkish in his book Flour Water Salt Yeast, is between 75–80 °F (24–27 °C). However, I frequently use one of these two places to proof dough, neither of which fall into the ideal temperature window:
- In my Instant Pot, which maintains the temperature around 86–93 °F (30–34 °C)
- On the countertop at room temperature, which can be anywhere from 64–72 °F (18–22 °C)
Your dough will be fine as long as you find a place for it that isn’t hotter than 105 °F (40 °C). Temperatures hotter than that may damage the yeast.
Proofing can take as little as one hour if you start with warm soy milk and let the dough rise in a warm, draft-free environment, all the way up to three hours or even longer if you start with cold ingredients and proof at room temperature. If you want, you can even make this the day before and stick it in the fridge. (This is called “retarding.”)
Bulk Fermentation
It’s called “bulk” fermentation because when bakeries handle huge amounts of dough for their recipes, it’s easier for them to do the first rise with all the dough in one container, then split it up afterwards, instead of first dividing the dough into a bunch of small pieces and having to find a separate container for each one.

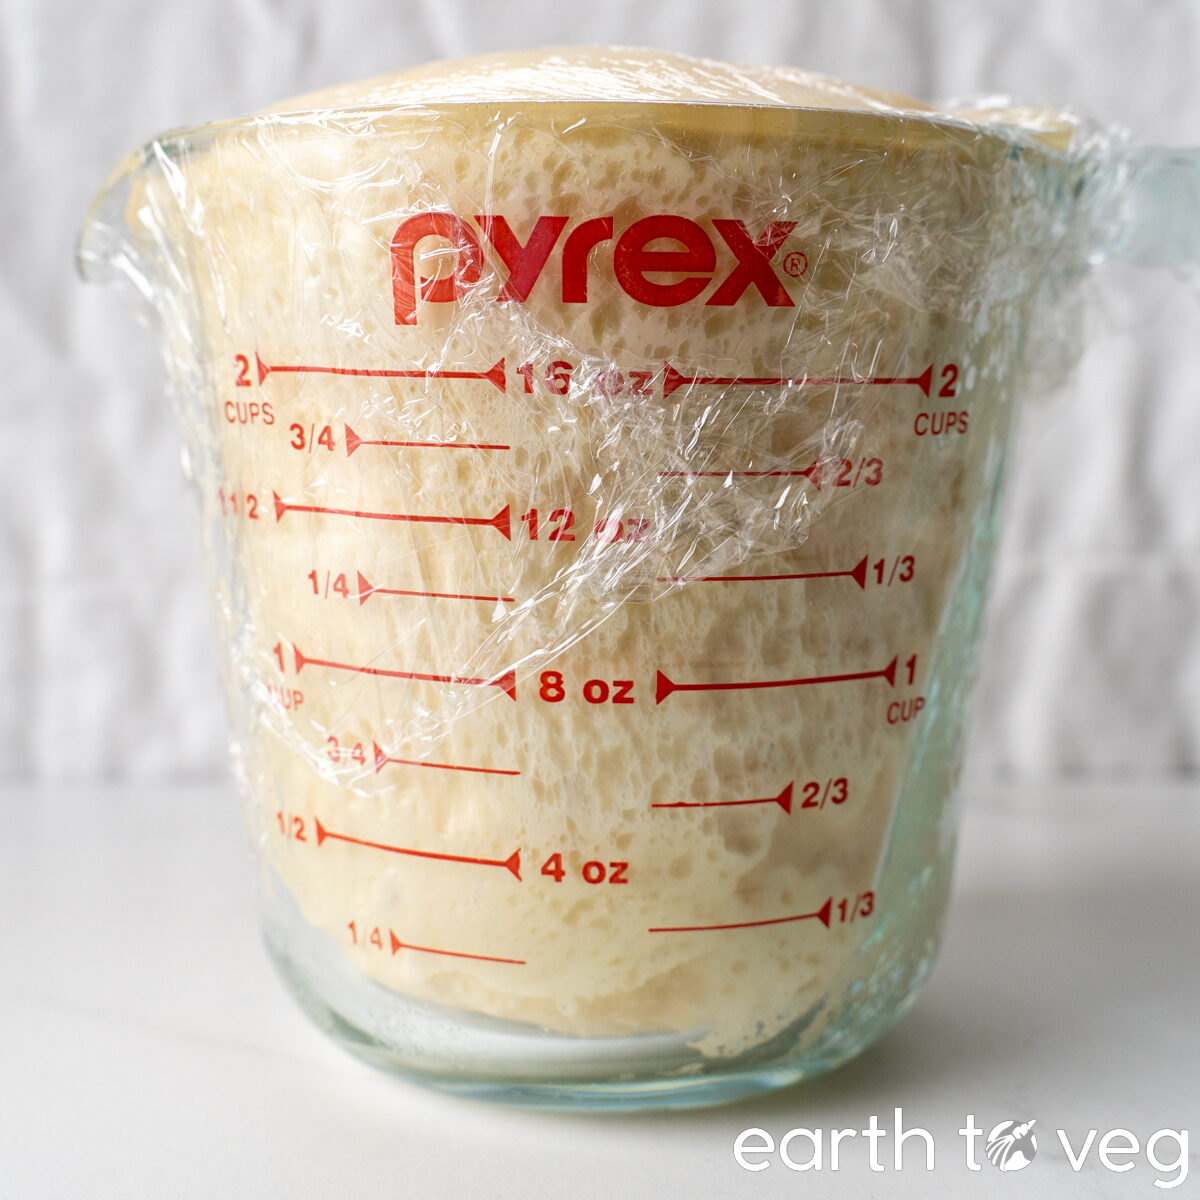
In the home kitchen, this matters less because we work with smaller quantities of dough. But it’s still more convenient to do the first rise with all the dough together in one “bulk” mass.
Final Proof
The final proof is also called the second rise, the final rise, the shaped proof, or the secondary fermentation.
I haven’t found much explanation for why bread dough is proofed twice, other than it adds more flavour by giving yeast more time to do their magic. However, you may notice that the recipe card below contains instructions for a one-rise loaf—because I have found that this dough makes a successful bread even if you skip the final proof entirely. See Experiment 24 for more details of my one-rise bread testing!
The Finger Poke Test
How do you know when dough is fully proofed? Gently poke it with a finger, up to the first knuckle, and watch to see if it bounces back. If it bounces back quickly, it’s not fully proofed yet. If it doesn’t bounce back at all, it’s over-proofed.

A properly risen dough results in a light and airy bread with a uniform crumb. If you bake dough that has not risen for long enough, it will be dense and gummy. If you bake dough that has overproofed, it may collapse in the oven. You may also find it has an unpleasant alcohol taste.
The great thing about this master sweet dough: it uses less yeast compared to most sweet dough recipes, which gives you a larger margin of error. The more yeast, the faster the dough rises, the faster it goes from perfectly-proofed to over-proofed. With this recipe, it won’t matter too much if you wait an extra 15 minutes (or even half an hour, if you’re proofing at room temperature) past its optimal proofing point.
TL;DR: the window of opportunity for optimally proofed dough is longer when you use less yeast.
Oven Spring
Now that your dough has risen, it’s ready to be baked. You’ll notice that the bread continues to expand in the oven. That’s due to oven spring—basically, the warmth of the oven causes the yeast to become really active, and they produce a lot of gas, puffing up the bread to lofty heights. Then, as the hot temperature causes the outer crust to harden, this expansion stops.
If your dough is not fully proofed when you put it into the oven, the dough might expand excessively, continuing to grow outwards even as the crust sets, which can your bread to split at the seams. On the other hand, if it’s over-proofed, you will get almost no oven spring at all, and your dough may even collapse as it bakes.
That’s why it’s important to use the finger poke test to find the sweet spot for when your bread is ready to bake!
Cool Before Slicing
Once your beautiful bread has been pulled out of the oven, you may be overwhelmed by the delicious smell of freshly baked bread. But resist the temptation. Your bread will have the best texture if you let it cool down before you cut it open.
This is less important for dinner rolls, cinnamon buns, and anything that you plan to finish in one sitting. But larger breads like sandwich loaves, which will last several days, benefit from a full cool-down. The inside of the loaf is still hot after you take it out of the oven, and if you slice into it, the delicate, airy crumb will be squished. You’ll end up with a gummy slice of bread. If you let it cool fully, the crumb will have solidified and the air pockets will be preserved even when you cut or tear the bread open.

Make Ahead & Storage Tips
You can knead the dough ahead of time and store it until you’re ready to bake.
Fridge
This vegan master sweet dough can be stored, covered tightly, in the fridge for up to three days before you bake with it. (You could technically let it go for longer, too, but the dough will begin to develop a noticeable sour taste after three days. Of course, if you’re into that, I won’t judge you for keeping your dough in the fridge for a week or two!)
You can refrigerate it at the beginning of either the first rise (bulk ferment, ie. at step 4 in the recipe card below) or the second rise (secondary ferment, ie. after shaping into the final form).
Refrigerating before bulk fermentation
The dough should be able to complete the rise in the fridge overnight. De-gas and shape it immediately after pulling it out of the fridge, then let it go through its second rise. This second rise will take longer than usual because the dough is still cold, so it could take double the time it usually does (if you keep it in a warm place like a proofing drawer) or even three times as long (if you leave it on the counter at room temperature).
If you notice that the dough has not risen adequately, your fridge is probably on the cold side. No worries, just take it out and let it rise until nearly doubled in size before proceeding with the shaping and second rise. By the time it is ready for shaping and second rise, it should be around room temperature or even a little warmer, so the second rise should take the same length of time as a normal bake.
Refrigerating before secondary fermentation
If you refrigerate sweet dough at the secondary fermentation stage, it means you have already shaped it into the shape you want to bake it in, whether that’s a loaf, or buns, or rolls, or whatever. You can bake with it right away, no need to let it come to room temperature. It will have done all the rising necessary inside the fridge. This option is really great for when you want freshly baked bread first thing in the morning. Just take it out of the fridge, pop it into a preheated oven and bake.
Freezer
For even longer periods of storage, you can freeze dough in a very similar manner to refrigerating it.
Freezing before bulk fermentation
Immediately after kneading, wrap the dough up in plastic wrap and freeze it. To defrost, unwrap it, put it in a covered bowl, and let it slowly thaw in a warm place or at room temperature, until it’s reached nearly double its size. Per my 13th experiment, it took this dough over 7 hours to thaw completely and finish its bulk fermentation at room temperature. (Because it takes so long for the yeast to warm up and get going again, it’s important to keep your dough fully covered, or else the surface will dry out.) The second rise took 1½ hours, just a little over the 1 hour it usually takes for my unfrozen doughs.
Also, Experiment 13 showed me that letting the dough defrost in the fridge is a waste of time. Because it’s already so cold, the most it will do is thaw, which takes around 24 hours. The activity of the yeast will be so slow as to almost be negligible. You might be concerned that taking the dough out of the freezer and putting it straight into a warm place will harm the yeast by heat-shocking it. However, Experiment 15 proved this is not the case.
Freezing before secondary fermentation
As you can see with Experiment 23, I haven’t figured out the best way of freezing shaped dough yet. I will update this section after I have experimented some more.
Sweet Dough FAQs
Sweet dough is a type of enriched dough. Enriched doughs contain ingredients like milk, butter, sugar, in contrast to lean doughs which contain only flour, water, yeast, and salt. Lean dough is associated with the crusty, chewy artisan breads that are so trendy these days, while enriched dough is the stuff of fluffy white sandwich bread, buttery dinner rolls, soft sticky buns, and more. Sweet dough is one of the most common types of enriched dough, and is an all purpose dough that can be used for most enriched bread recipes. There are other types of enriched dough, such as brioche (made with a lot more fat) and panettone (made with a pre-fermented starter).
Bakers proof their breads twice because a longer proofing time adds additional flavour. You can’t simply combine the time into one extended rise because the bread will expand way too much (overproof), lose elasticity, and collapse in the oven. The second rise is also supposed to lighten up the texture of the baked bread, although I haven’t noticed much of a difference myself. Surprisingly, however, I’ve found that you can get away with a single rise, just keep it the same length of time as you would a normal bulk ferment. See results of Experiment 24 for a more in-depth discussion.
The finger poke test, while it seems subjective, is the best way to gauge whether your dough is perfectly proofed.
Yes. Punch it down, give it a quick knead (less than a minute), reshape, and let rise again. The flavour will take a slight hit, but you’ll still get a decent result. Also, what I’ve just said here applies to bread that was overproofed during the second rise. IMO, the bulk fermentation is much more forgiving and my Experiment 20 has shown that even dough that was overproofed at the bulk ferment stage still tastes pretty good, as long as you pay closer attention to time for the final rise. And note, of course, this doesn’t work for dough that contains filling (eg. cinnamon rolls, babkas, etc).
No. Although they are both in the enriched dough family, brioche has a much higher fat content (usually 50–100% of the total flour in the recipe). This makes it stickier, softer, more difficult to work with, and much slower to rise. Although the result is a buttery, luscious, and truly mouthwatering bread, it’s not exactly an everyday dough due to the strenuous kneading and the long waiting times. In contrast, this master sweet dough is very quick and simple to make, making it perfect for most of your daily baking needs.
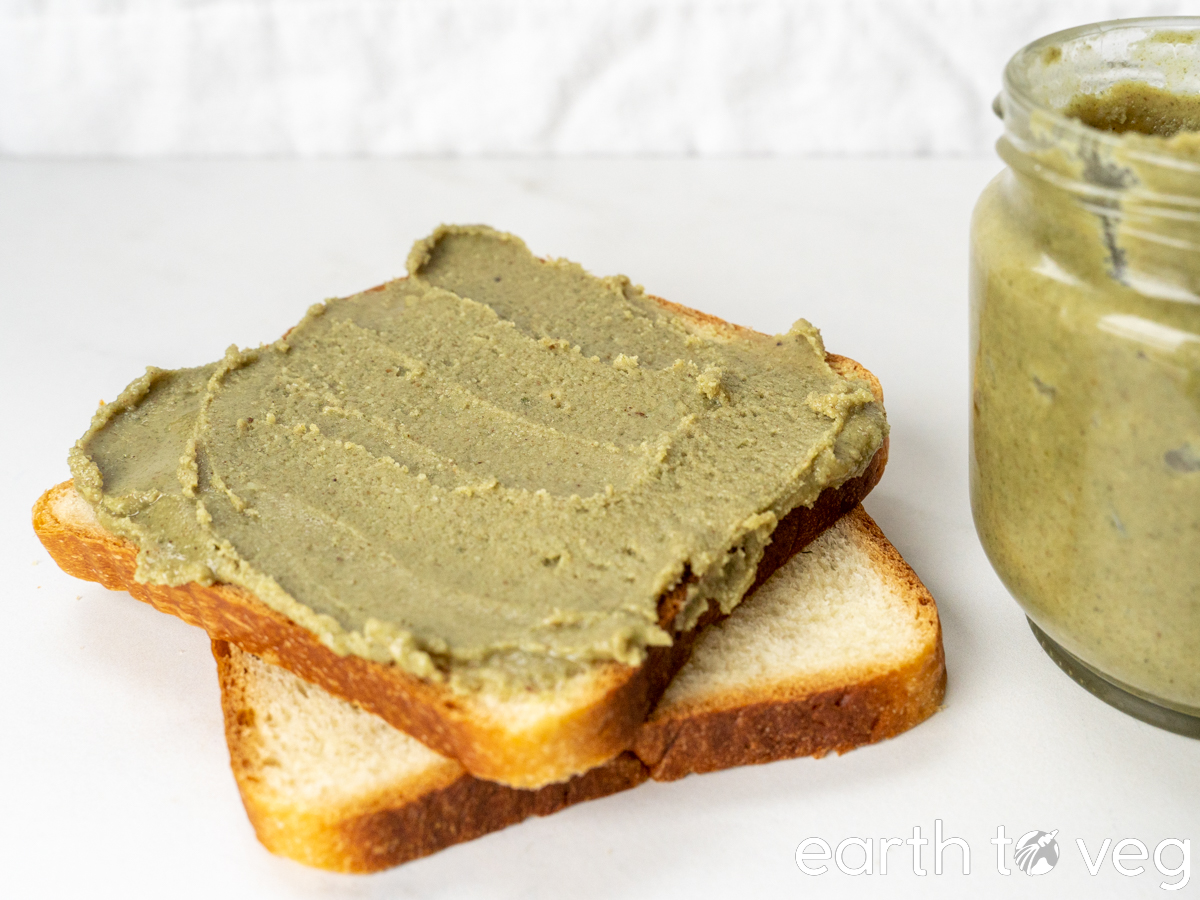
Yes! I’ve used it to make garlic bread and pesto braids. The slight sweetness of the dough plays well with these rich savoury flavours, achieving a balance between sweet and salty similar to what you’d find in bakery bread.
Yes, you can freeze this dough right after kneading and take it out to thaw about half a day before you want the bake to be ready. See the “Make Ahead & Storage Tips” section for tips and best practice.
Please leave a comment if you have any questions about this recipe (or breadmaking in general). It will help other readers too!
More Bread Recipes


Recipe Card
Did you make this recipe? Please consider leaving a rating below to let me know how you liked it. You can also take a picture and tag me on Instagram @earthtoveg, I will shout you out in my Stories!
Vegan Master Sweet Dough
Equipment
- Stand mixer with dough hook attachment
- Bench scraper (*optional)
Ingredients
Switch between volume vs weight measurements:
- 1 tsp dry yeast *you can double this if you're in a hurry
- 1 cup Homemade Soy Milk *can sub with any milk of your choice
- ¼ cup water *only if following the optional Tangzhong step; see Note 1
- ¼ cup sugar
- 6 tbsp butter I use Becel Plant Butter; *can sub with 75g oil
- 3 cups bread flour or all purpose flour see Note 2
- 1 tsp salt
Instructions
Tangzhong *optional
- Take 1/4 cup of the flour (30g) and put it in a small saucepan along with 1/4 cup water (60g). Set on medium-low heat and whisk until a smooth paste forms with no lumps (or very few).
- Pour in 1/4 cup of the soy milk (60g) and continue whisking until a thick slurry forms (like a roux).
- Remove from heat and let cool until comfortable to touch before proceeding with the rest of the recipe.
Sweet Dough
- If using active dry yeast, dissolve the yeast and sugar in soy milk and let stand for 10 minutes before proceeding with recipe. (If using instant yeast, you can skip this step.)
- Add all the ingredients to a mixing bowl. (Remember, if you chose to make the tangzhong, you will be adding only 3/4 cup soy milk (180g) and 2¾ cups flour (360g) here. Also make sure to add the tangzhong you just made too.)
- Using the stand mixer fitted with the dough hook attachment, mix the ingredients together. Once the ingredients have been roughly incorporated into a shaggy mess, let the mixer knead it for 12 minutes. (See Knead By Hand section for instructions if you don’t have a stand mixer.)
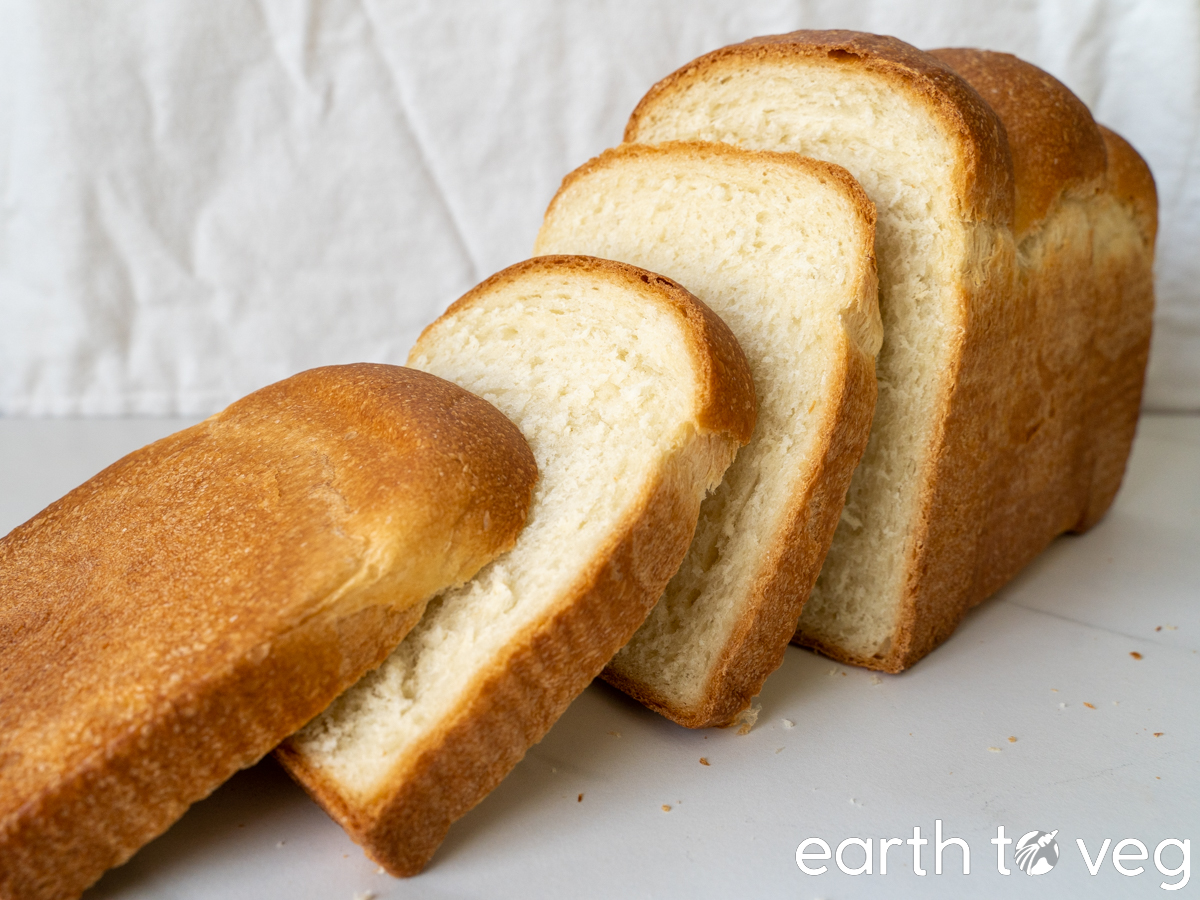
- The dough should be smooth and slightly tacky. You are now ready to use this vegan master sweet dough in any enriched bread recipe. (If not using immediately, please see the Make Ahead & Storage Tips section for how to store your dough.) Below is an example of a simple sandwich loaf you can make with this dough.
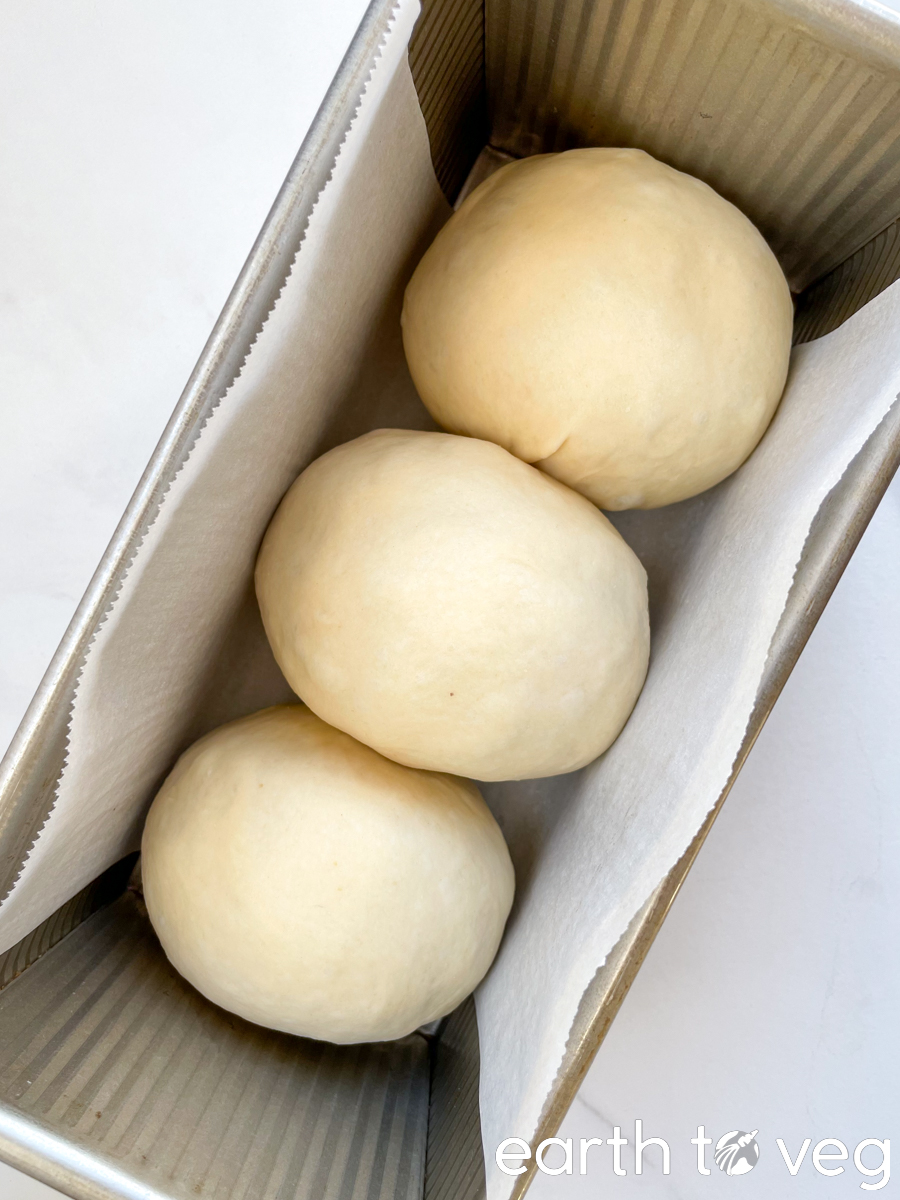
One-Rise Sandwich Loaf
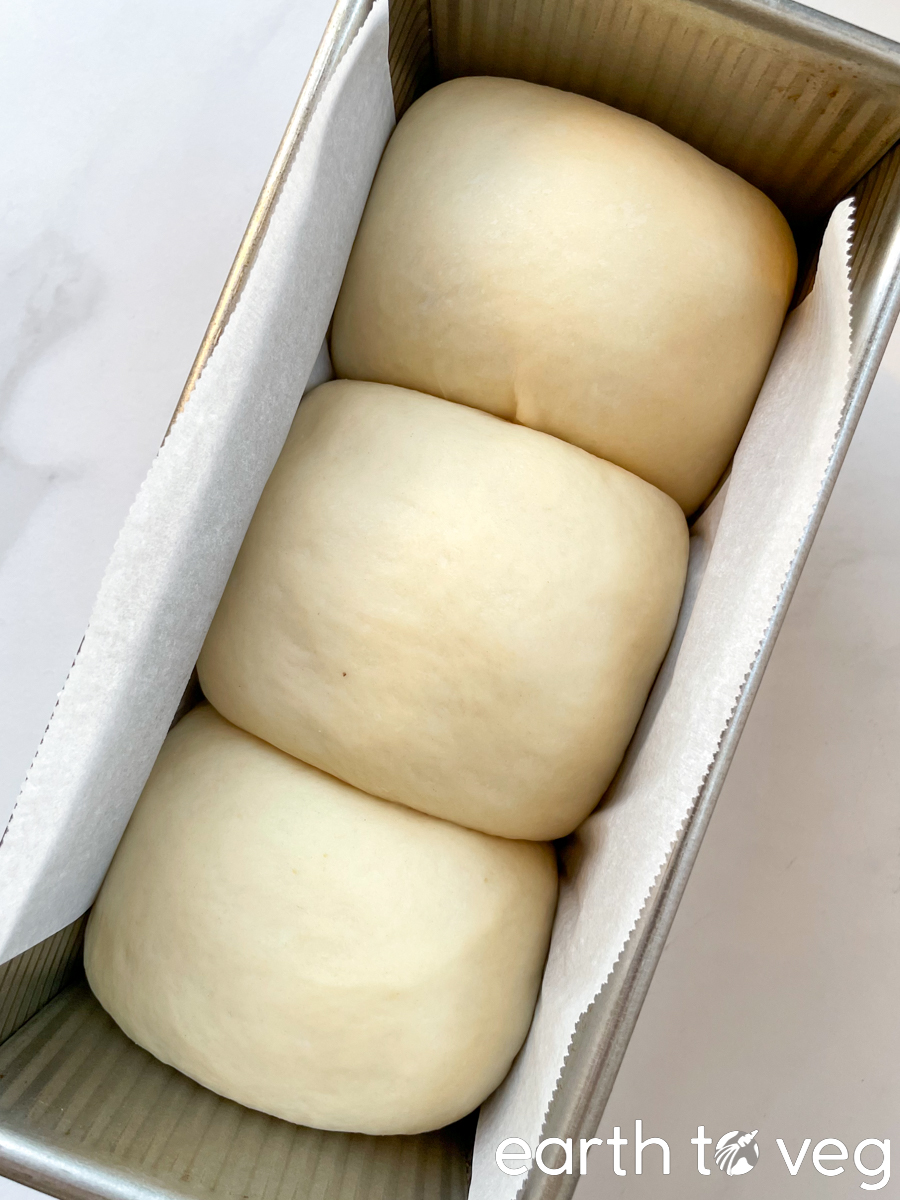
- Divide the dough into three or four pieces. Roll each piece into a smooth ball.
- Place the balls in a loaf pan (see Note 3
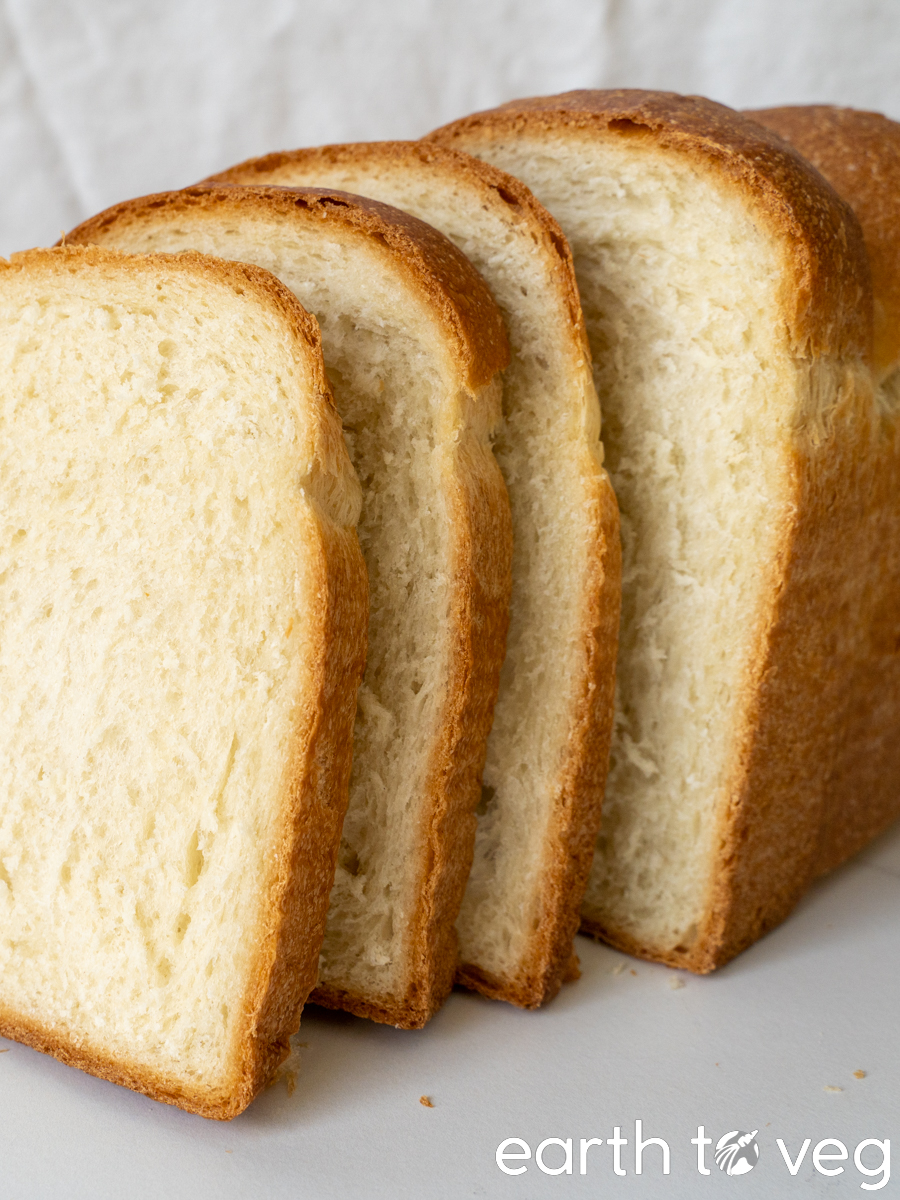
). Cover and let rise until nearly doubled in size (should be around 1 inch away from the top of the loaf pan. Meanwhile, preheat the oven to 350 °F. - Bake uncovered for 40 minutes on the middle rack. If you have a food thermometer, the inside of the bread should reach 190 °F.
- Let the bread sit for 10 minutes inside the pan, then turn it out onto a cooling rack. Cool fully before slicing.
Notes
- Tangzhong is an Asian method of pre-gelatinizing part of the flour in a bread recipe to make the resulting bread more fluffy, tender, and keep it fresh for longer. You can read more about it in my Coconut Pandan Bread Recipe. Using tangzhong in this recipe is optional, but I especially recommend it if you are making the dough for an Asian bread recipe. Bread recipes using tangzhong should have a higher hydration (at least 75%) for the tangzhong to be most effective. Without the tangzhong, this recipe has 61.5% hydration. Therefore, we add an additional 1/4 cup of water when making the tangzhong to bring the hydration up to nearly 77%. Because of the extra liquid, the dough made with the tangzhong will be stickier. It may not lift cleanly from the bottom of the mixer bowl even after kneading for a full 12 minutes. It may stick to your hands more. This is okay and normal. Resist the temptation to add more flour.
- If you live in a dry climate, or are using bread flour, you can reduce the total flour to 2¾ cups (360g).
- For the sandwich bread, I tested in my stainless steel loaf pan. Loaves baked in ceramic loaf pans may take a few minutes longer because of the thicker insulating walls. Any standard 8×4 or 9×5 loaf pan size works for this recipe.
- I recently updated this recipe to increase the butter from 4 tbsp to 6 tbsp. Much richer taste and easier to shape as well. Worth the extra calories!
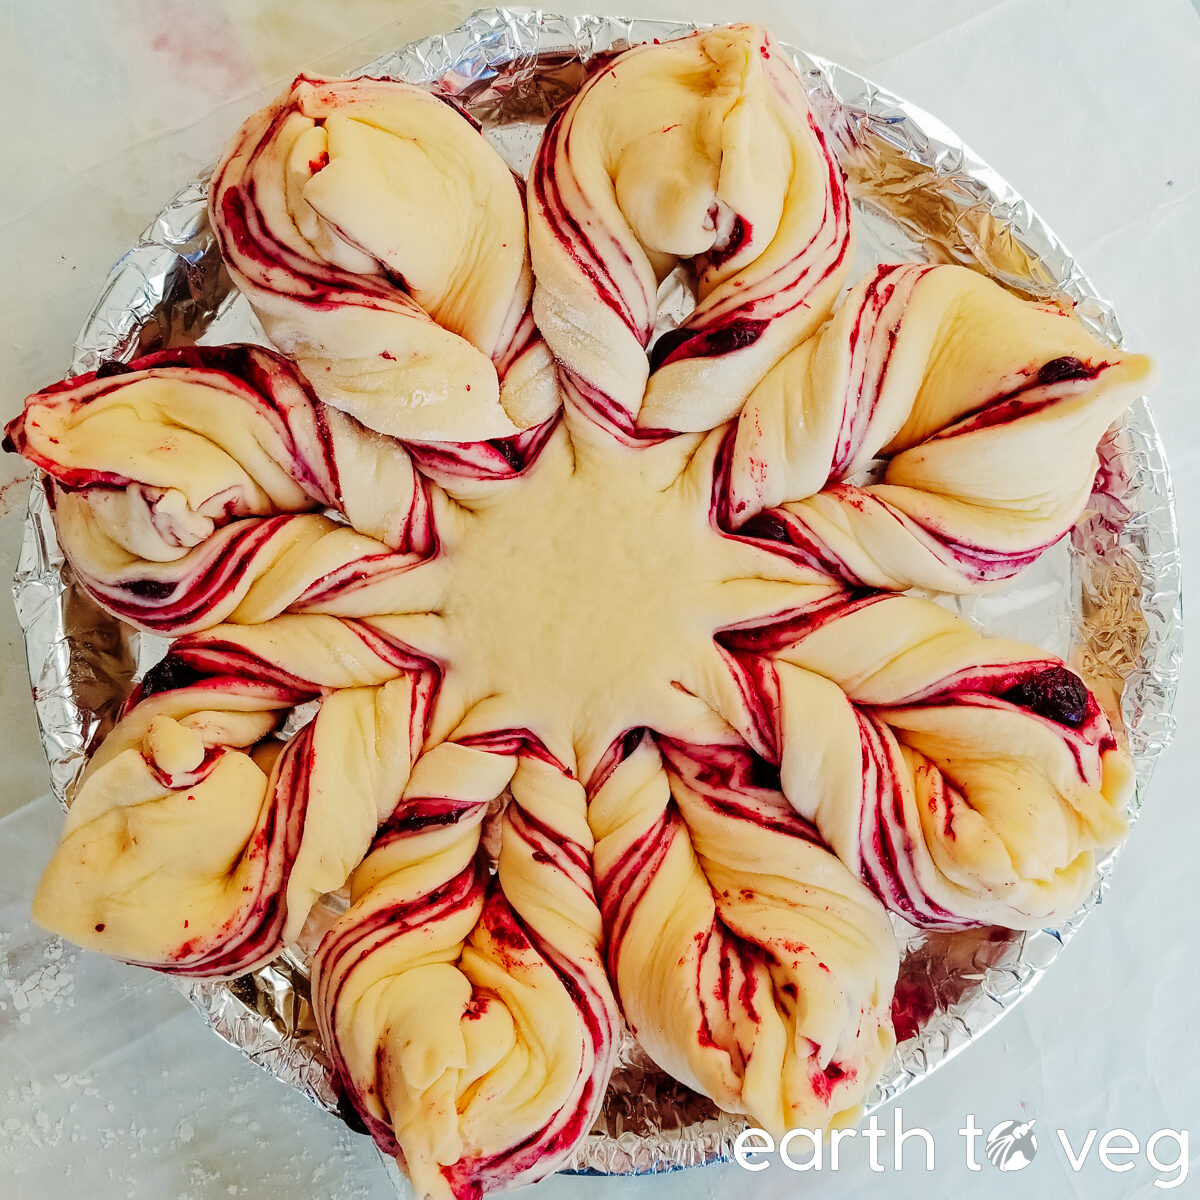
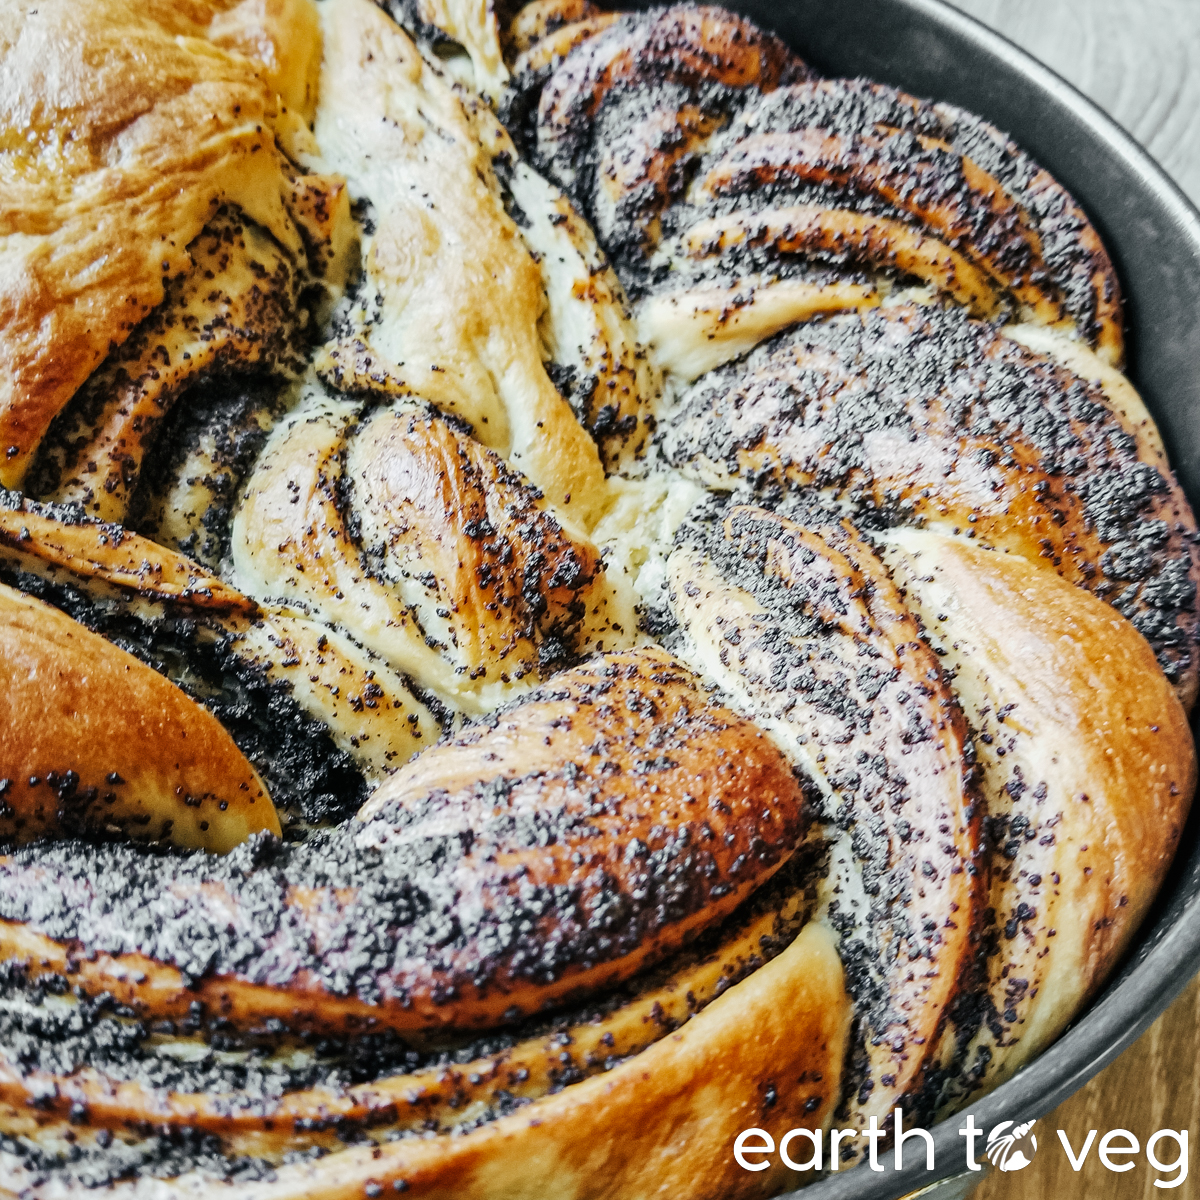
is there a recipe for the poppyseed bread? thanks
I haven’t published a recipe yet, but the bread in my photo has a poppyseed filling made from mixing 100g ground poppyseeds + 70g sugar + 90g soy milk + squeeze of lemon juice. I followed this video for the shaping: https://youtu.be/SXoInjT_fqY?si=_R-ZKyHHo4YraUFy&t=195
Thank you, Kelly for putting in all the time and effort in creating such a magnificent recipe! And your directions, tips, and notes were especially helpful! I Appreciate you sharing it with the world!🙌❤ I made my first loaf a week ago, and ate every piece in 5 days, except 1 piece which I brought to my Mom who is recovering from knee surgery. I have my second loaf in the oven doing it’s first proof, with it off but the light on for a little warmth. I made the recipe usinghe Tangzhong method, and I kneaded it using the hand method! You are right! Boy, what a workout! Thankfully, this is my last loaf kneading by hand because my Mom gave me her old Kitchen Aide!!❤🙌😝👏❤ I ordered a grease and seal kit today to do the upkeep maintenance on it before I can use it. This is why I had to do tonight’s loaf by hand! I’m praying I receive the kit before I finish eating this loaf! LOL!😁🙏💞 Thanks again! Sending loving vibes your way!💞🙏😇
No problem Tiffany! I’m glad you and your Mom both enjoyed the bread. 100% recommend using the KitchenAid, you’ll find it so much easier 😊
Hi Kelly, an update to add. I used your recipe to make monkey bread and a regular loaf seasoned to an “everything” bread. I just did a 1 1/2 batch. It worked fantastic! 🙌💞 This recipe you created is PHENOMENAL!!!! To say the least! Also, I finally got the Fence easing kit for my KitchenAid. I’m making more bread now! I’m so excited! Thank you again for sharing such an amazing recipe! YOU ROCK!👊😎✌💞
Another update, but real quick…. the KitchenAid method is the only way to go! How incredibly easy it is now to make bread!! If you were standing in my kitchen right now, I’d give you a big kiss! 😂🙌 (just kidding) Thanks again!
Your comments made my day, thank you so much!! 🙂
Also I’m wondering how you made the “everything” bread – did you mix the seasonings right into the dough or rolled them in after it was kneaded? It sounds so good and I kinda want to give it a try. Have a huge jar of everything bagel seasoning that I’m trying to use up.
Hi Kelly. I just rolled the dough in the “everything” mixture before I put it in the bread pan to rise. worked out great!👏💞
I also never ever have commented on a recipe before and I was prepared to make an account just to comment on this. Wow this has to be the most amazing and informative bread recipe. Your passion I could feel throughout this page is so inspiring!! Definitely going to be baking some bread this week utilizing your tips!
Damn this is one of the sweetest comments I’ve gotten on this blog 🥺 Thank you so much Jodie and I hope you enjoy your bread!
This is one incredible recipe right here! Seriously, I never comment on blogs but I have to make an exception here. You just shared one of the most amazing tutorials that I have ever seen with so much research included so that we can make consistently excellent bread. Thank you so very much. I live in Tasmania and we are heading into our cold period now and I plan on experimenting with bread making this year. I have a big 4 oven wood stove and am going to trial your recipe because I don’t think I could possibly find a better recipe for how to make bread online! Amazing share, excellent recipe and thank you SO much for all of that hard work and more specifically, the willingness to share all of that with the rest of the world. From Tasmania, I salute you! 🙂
Thank you so much Narf, your comment means a lot to me! Yes, I put a ton of work into this recipe; it was worth it because everyone deserves to make delicious bread at home. If you have any questions throughout your bread journey, feel free to ask them here.
Thanks good work
🫡🫡🫡🫡🫡