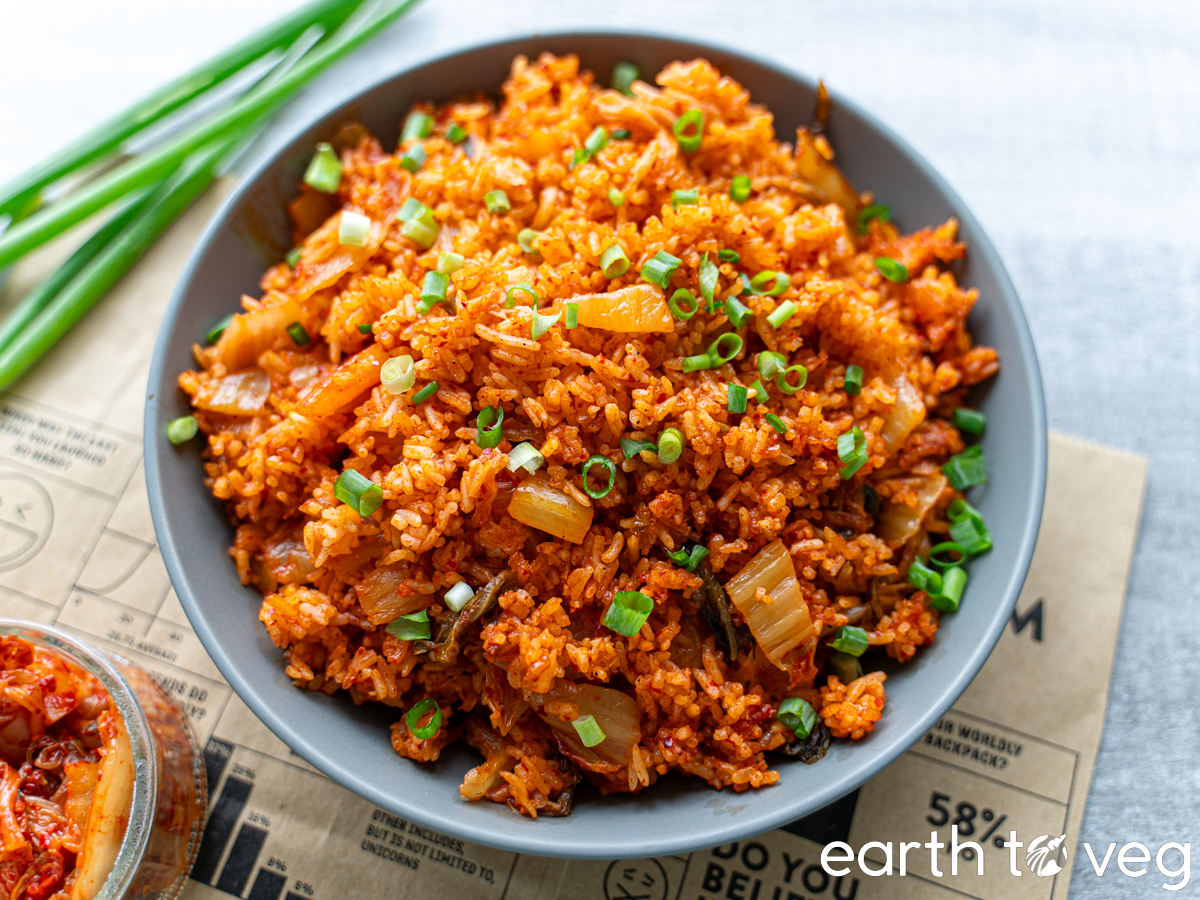
Kimchi-Bokkeumbap is Korean-style fried rice flavoured with kimchi. The fermented combo of kimchi and gochujang gives new life to leftover rice by infusing it with sweet, spicy, and tangy flavour. Traditionally a go-to recipe for busy college students and families, it’s also perfect for weeknight dinners!
Why You’ll Love This Recipe
- Easy: Fried rice can be a daunting recipe because it usually requires a frenetic, super-hot stir-fry technique, and will burn if you don’t act fast enough. But Korean fried kimchi rice is perfect for beginners because it doesn’t require such high temperatures. Unlike other versions of fried rice, you cook kimchi rice on moderate heat and it even works in a non-stick pan.
- Uses Leftovers: This recipe is best made with leftover rice and old overripe kimchi. Make sure those ingredients sitting in your fridge don’t go to waste!
- Customizable: Kimchi-bokkeumbap is so versatile and it plays well with lots of add-in’s. You can add vegetables like carrots, peas, or mushrooms. Throw in some protein like tofu or Vegan Sausage. Add your favourite toppings like scallions, chili oil, sesame seeds, and more.
Background
Bokkeumbap is the Korean word for “fried rice,” and it’s a staple dish in South Korea as it is for many East Asian countries. There are so many types of fried rice in Korea, but Kimchi-Bokkeumbap is one of the most popular variations. College students and busy families love this recipe, because it’s budget-friendly and doesn’t take much time to cook. (One of the stars of Kim’s Convenience has also said it’s his favourite meal!)
The base recipe for kimchi-bokkeumbap is simple, with just six ingredients. Kimchi is strong enough to give plenty of flavour to the fried rice, and it’s a nutritional powerhouse to boot. No wonder it’s a favourite meal across South Korea.
What You’ll Need

Important notes on some of the ingredients used in this Kimchi Fried Rice:
Kimchi: The thing with kimchi is it never really goes bad, it just gets ever more sour, soft, and pungent over time. Kimchi-bokkeumbap is great for using up your old, smelly, overripe kimchi. The older, the more flavourful the rice will be. So if you’ve got a jar kicking around your fridge that dates back to the Stone Age, this is the perfect recipe. (Check out my recipes Soondubu Jjigae and Kongbiji Jjigae for more ways to use up old kimchi.) If you are vegan or vegetarian, please make sure to use a Vegan Kimchi as most kimchi contains fish sauce or anchovy paste.
Oil: Make sure to use a cooking oil with a high smoke point, such as peanut oil, grapeseed oil, or sunflower seed oil. You can use sesame oil to add a nice flavour, but drizzle it on at the end, don’t use it for cooking. High temperatures destroy the volatile aromas in the sesame oil.
Gochujang: I’ve seen kimchi fried rice recipes with this ingredient, and recipes without. I’ve tried it both ways, and both Kevin and I agree it just tastes so much better using gochujang. It may not be the purist way of making kimchi-bokkeumbap, but most restaurant versions contain a bit of gochujang and that’s the version I prefer as well. Gochujang adds extra umami, sweetness, and spiciness. What’s not to like? Make sure not to add too much, or your fried rice will be too salty! The gochujang pictured above is from Chung Jung One O’Food, but I also like Sempio brand.
Rice: Use cold day-old Plain Cooked Rice for the best results. Freshly cooked rice tends to stick to the pan, even when you use extra oil. Then it just leads to greasy, mushy rice… and it’s not a good time… Chilled rice, on the other hand, is drier with a firmer texture, and doesn’t get as sticky. It’s best to cook your rice the night before, then let it chill in the fridge before using. Refrigerating the rice for at least 4 hours is best.
Did you know? Cold rice has a much higher proportion of resistant starch than fresh cooked rice. Resistant starch has a lot of health benefits but one cool feature is that it reduces the amount of digestible calories in the rice. Even if you reheat rice that’s been previously cooled, the benefits of resistant starch don’t go away. Just another perk of using leftover rice!
For a full list of ingredients and quantities, refer to the recipe card at the bottom of this post.
Variations + Substitutions
- Melt 1 tbsp of butter into the kimchi rice at the end for an even richer flavour.
- Don’t have gochujang? Add 2 tsp each of sugar and gochugaru (Korean chili flakes) instead. They won’t have the same depth of flavour that fermented chili paste brings, but will add the right amount of sweet heat.
- Sauté some garlic (fresh or powdered) along with the kimchi.
Step-by-Step Process

Step 1: Heat up a skillet or frying pan on medium heat. Once it’s hot, pour in a glug of oil.
Step 2: Add kimchi, gochujang, black pepper, and sugar. Stir fry until the gochujang has mixed into the kimchi.
Did you know: Although you might associate fried rice with woks, wok-cooking (wokking?) is not really common in Korean cuisine. Typically kimchi-bokkeumbap is just made in a fry pan or skillet.

Step 3: Add the rice. Break apart any clumps with a spatula until all the rice grains are separated and covered in kimchi.
Step 4: Turn off the heat and add the toppings (if using). This recipe makes 2 servings as a main or 4 if serving as a side.
Meal Prep & Storage
Fridge: Store kimchi-bokkeumbap in an airtight container for up to 3 days in the fridge.
Freezer: Freeze kimchi fried rice for up to three months. (Try to pack the rice to the top of the container to minimize the amount of air in the container, as oxygen causes freezer burn.) Defrost overnight in the fridge before reheating.
Reheating: The easiest is to microwave the rice until you can see steam rising from it. You can also put it back into a skillet with a little bit of butter and reheat it on the stove on medium-low heat.
Recipe FAQs
Bokkeumbap is a Korean word that translates to “fried rice” in English. It is a combination of two words: “bokkeum” (볶음) meaning “stir-fried” and “bap” (밥) meaning “rice.” Bokkeumbap is a common dish in Korean cuisine, allowing for endless variations and combinations of flavors. It is often made with leftover rice and can incorporate a range of ingredients such as vegetables, meats, seafood, or tofu, making it a flexible and satisfying meal.
Bibimbap (비빔밥) and bokkeumbap (볶음밥) are both popular Korean rice dishes, but they have some key differences: Bibimbap is fresh steamed rice served in a stone bowl topped with various seasoned vegetables, meat (optional), and usually a fried egg. The ingredients are typically arranged in separate sections on top of the rice and are not stir-fried together. On the other hand, bokkeumbap refers to day-old rice that is stir-fried in the pan with a variety of ingredients, with all the ingredients well-mixed and cooked together before serving.
Start by plating your cooked kimchi-bokkeumbap in a bowl or on a plate. Optionally, you can garnish your rice with a sprinkle of sesame seeds and chopped scallions. Furikake (a rice seasoning made from sesame seeds and roasted seaweed) is another good topping option. Kimchi fried rice is often enjoyed with a few small Korean side dishes called “banchan.” Common choices include pickled vegetables, Korean macaroni salad, and japchae. Grab a spoon and dig in, alternating bites of rice with banchan!
More Vegan Korean Recipes

Recipe Card
Did you make this recipe? Please consider leaving a rating below to let me know how you liked it. You can also take a picture and tag me on Instagram @earthtoveg, I will shout you out in my Stories!

Kimchi Fried Rice (Kimchi-Bokkeumbap)
Equipment
- Large skillet or frying pan
- Spatula
Ingredients
Switch between volume vs weight measurements:
Bokkeumbap
- 2 tbsp cooking oil
- 1.5 cups kimchi see Note 1
- 1 tbsp gochujang I'm using this Chung Jung O'Food brand
- 1 batch Cooked White Rice = 3 cups cooked rice; see Note 2
- ½ tsp black pepper
- ½ tbsp sugar
Optional Toppings
- 2 tsp sesame oil
- 2 tbsp Homemade Furikake Seasoning
- 2 scallions, diced
Instructions
- Optional: If your kimchi comes in large pieces, cut it into smaller bits.
- Heat up a wok or sauté pan on medium heat. Once it’s hot, pour in the oil and swirl it around. Add 1½ cups of kimchi and 1 tbsp gochujang, and stir fry for about a minute, just to heat through.
- Stir in 1/2 tsp black pepper and 1/2 tbsp sugar.
- Add 3 cups of leftover cooked rice. Break apart any clumps with a spatula until all the rice grains are separated and mixed with the kimchi.
- Turn off the heat and add any toppings (sesame oil, furikake, scallions) if using.
Notes
- Kimchi: This is a perfect time to use up any old bits of kimchi you have. As kimchi ages, it becomes more sour and pungent, so if you’d like a more intense flavour, dig up the oldest kimchi you’ve got.
- Rice: Use cold leftover Plain Cooked Rice for the best results. Freshly cooked rice tends to stick to the pan, even when you use extra oil. Then it just leads to greasy, mushy rice… and it’s not a good time… Chilled rice, on the other hand, is drier with a firmer texture, and doesn’t get as sticky. It’s best to cook your rice the night before, then let it chill in the fridge before using. Refrigerating the rice for at least 4 hours is best.
- Add-ons: Try adding up to 2 cups of mix-in’s of tofu or vegetables (eg. corn, carrots, mushrooms, snap peas, bean sprouts) to bulk up the rice and make it a complete one-pan meal.
Love how versatile kimchi is. It’s rare to find an ingredient that works in so many different meals while still keeping its own unique taste.
I couldn’t agree more Jon. There’s something weirdly comforting about that funky umami super-salty flavour. Have you tried my Kongbiji-Jjigae or Soondubu-Jjigae yet? Both are traditional Korean tofu stews that use kimchi for flavour.