You don’t need fancy equipment to make perfect rice. Here’s how to cook Stovetop White Rice in any pot. This cooking method is perfect for small batches (1 to 2 cups of dried rice). No oil, no salt, just rice and water. No need to soak your rice ahead of time, either. If you follow these four steps, you’ll never get mushy or burnt rice again, whether you’re using basmati, calrose, jasmine, koshihikari, or any other white rice.
Why Stovetop Rice?
I admit it. I’m an Asian who doesn’t own a rice cooker. Why? Because I don’t think it’s worth the counter space. With stovetop rice, I can use the equipment that I already have in my kitchen.
Rice cookers are awesome for big families, but I’m only in charge of feeding two people. Sure, we eat rice almost every day, using plain white rice to soak up the delicious flavours of Kongbiji Jjigae or Thai Red Curry. But I like to cook in small batches so we never have more than one or two servings leftover. (Leftovers usually get turned into fried rice.)
I like to switch up the variety, too: jasmine rice if cooking Chinese food or Thai food, koshihikari for Japanese meals, basmati or sona masuri for Indian dishes. And I use the exact same 4-step stovetop method to cook all of these different kinds of rice. It’s versatile!
My dinner routine usually starts with rinsing rice, then I throw it on the stove and leave it alone while I prepare whatever else I’m eating that day. I just have to set a timer to keep track of three numbers: how long the water takes to come to a boil, how long the rice needs to be simmered, and how long it needs to be steamed after the heat is turned off. And I’ve already worked out those numbers for you—refer to the White Rice Cook Time Chart below.
It’s barely any more work than using a rice cooker, and for small batches of rice it’s faster too.
The Four Steps
There’s only four steps to cooking rice on the stove: Rinse, Boil, Simmer, Steam. Let me explain.
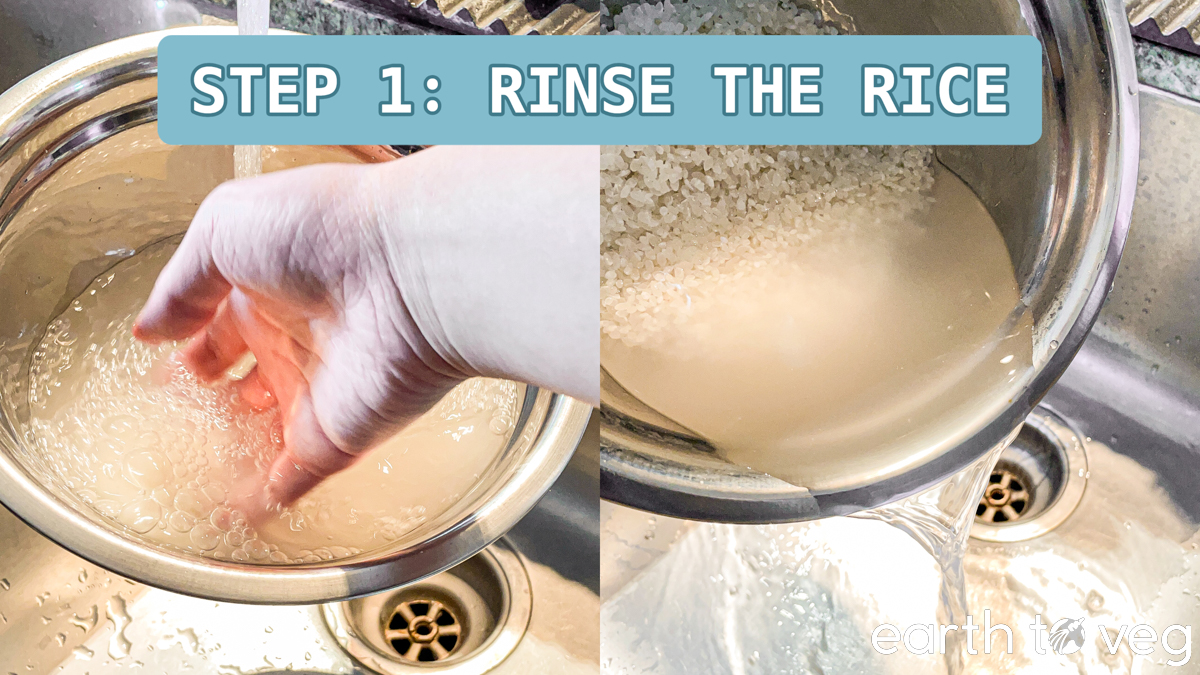
Start with rinsing your rice. This removes excess starch from the surface of the rice, and ensures that the cooked rice is not clumpy or mushy. Measure out 1 cup of rice into a bowl and cover it with cold tap water, then swish it around with your fingers until the water turns cloudy white. Scrub the rice against the side of the bowl to rub off the starch. Pour off most of the water (being careful not to spill the rice), then cover with water again and repeat a few times until the rice water is fairly transparent.
Drain out as much of the rice-rinsing water as you can without dumping out any of the rice. No need to use a colander, just pour slowly and carefully. There will be some water left in the bowl. Once rinsed and drained, 1 cup of uncooked rice will retain 3–4 tbsp (45–60g) of water. This is fine; the recipe below accounts for the residual water. Add the washed rice to your cooking pot. (It doesn’t really matter which pot you use, though I prefer a Dutch oven or clay pot—see Finding the Right Pot below.)
Tip: The rice water will never be perfectly clear, no matter how many times you wash the rice, but it’s fine as long as it’s no longer totally opaque. I usually rinse my rice at least three times.
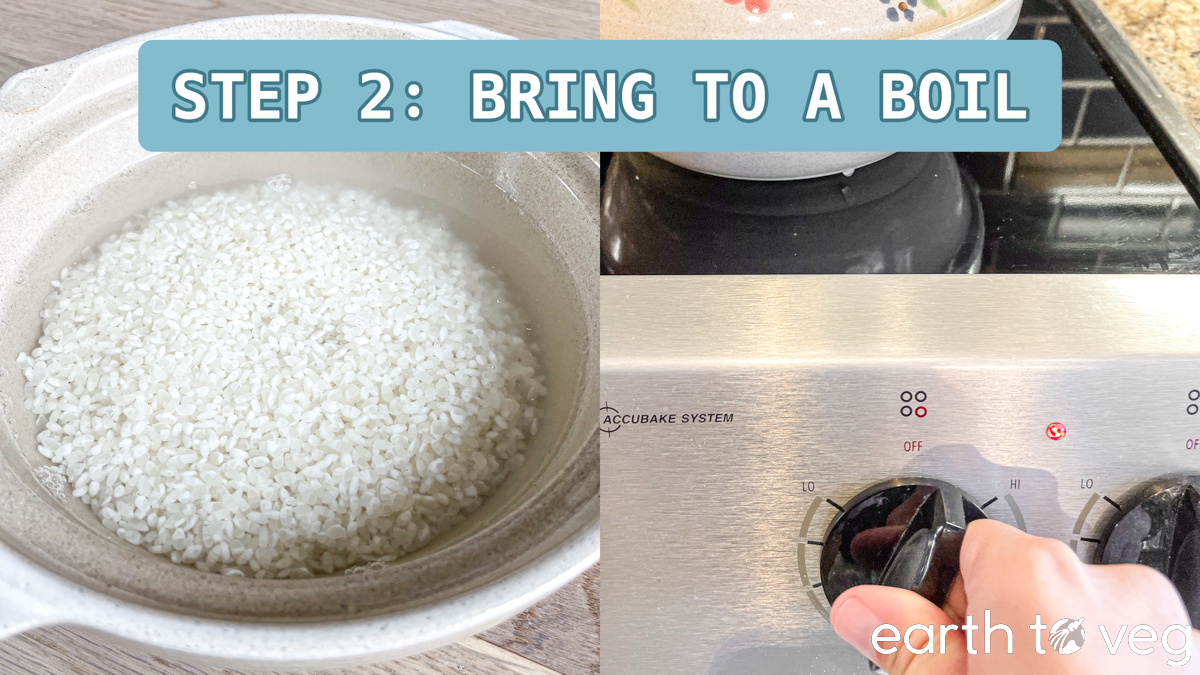
Set the pot on the stove. Pour in 1 cup of water (1.5 cups if using basmati rice). Cover the pot with a lid or a heavy plate.
⚠️ Important: Measure water precisely to avoid soggy rice or undercooked rice.
Turn the stove on medium heat and wait until the water begins to bubble. This depends on the power of your stove. But in my experience (using various glass/electric cooktops) it will take around 10–13 minutes.
You might ask: Why not turn the heat up high so the water boils faster? The reason is, on high heat, you risk burning the rice grains that sink to the bottom of the pot. Medium heat might take a few minutes longer, but it’s more gentle and ensures that all your rice is consistently cooked with no burnt bottom. (Unless that’s your thing—see the Scorched Rice section on how to achieve this.)
Try not to open the lid to check on the rice frequently as this lets moisture escape. A clear glass lid or a lid with a venting hole is helpful to determine when the water is simmering. Or just listen closely because you’ll be able to hear the sound of bubbling and chortling. Once you cook rice this way a few times, you’ll get an idea of how long it takes. Then you can set a timer to let you know when it’s boiling.
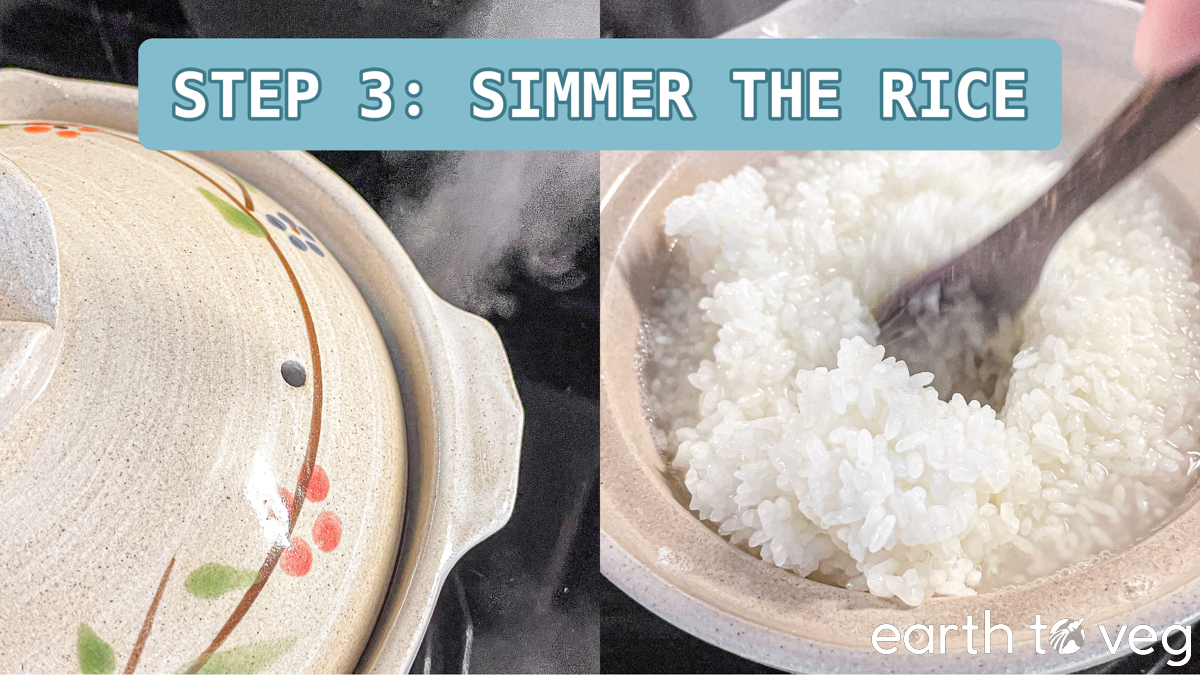
As soon as the rice comes to a boil, uncover the pot and give it a quick stir. Dislodge any grains that are stuck to the bottom of the pot. Put the lid back on and turn the heat down to the lowest it can go on your stove (excluding any melt or keep warm functions). Continue to simmer for 6 to 14 minutes. The time depends on the type of rice you’re using. Refer to the White Rice Cook Time Chart below.
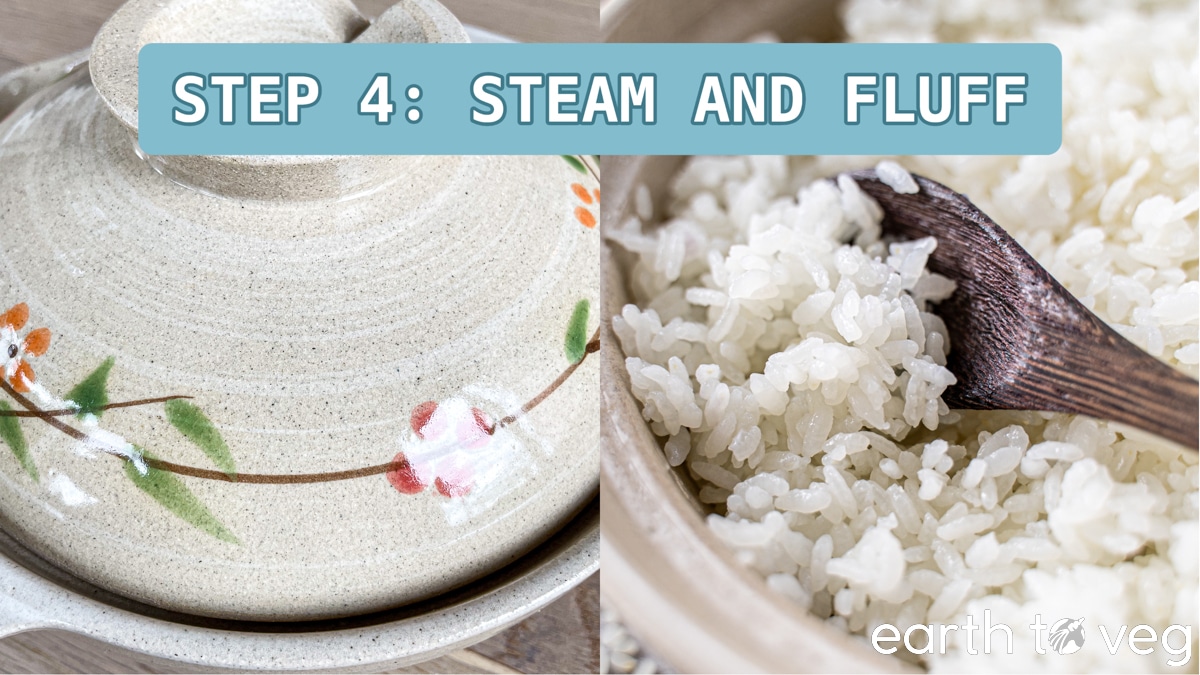
Once the minutes are up, remove the rice from the heat. Keep covered for another 10 minutes (15 minutes if using jasmine rice). This step is just as important as the cooking itself. The rice is still slightly underdone at this stage. Keeping the lid on allows it to fully cook in the steam that’s trapped in the pot. Rice cooked the Asian way is half-boiled, half-steamed, to ensure that all the grains are nice and fluffy, not waterlogged.
Now you can safely remove the lid. Fluff the rice gently with a rice paddle or wooden spoon while it’s still hot. The motion is similar to folding batter. Dig your spoon in all the way to the bottom of the pot and turn the rice over as you stir. Repeat several times until you’ve loosened up all the rice. This prevents your rice from clumping and also helps evaporate any excess moisture at the bottom of the pot.
White Rice Cook Time Chart
All the different types of white rice that work with this recipe, and how long they take to cook:
- Basmati Rice: Medium heat until simmering → low heat 12 minutes → turn off the stove and keep covered 10 minutes
- Calrose Rice: Medium heat until simmering → low heat 14 minutes → turn off the stove and keep covered 10 minutes
- Jasmine Rice: Medium heat until simmering → low heat 10 minutes → turn off the stove and keep covered 15 minutes
- Koshihikari Rice: Medium heat until simmering → low heat 12 minutes → turn off the stove and keep covered 10 minutes
- Nishiki Rice: Medium heat until simmering → low heat 12 minutes → turn off the stove and keep covered 10 minutes
- Sekka Rice: Medium heat until simmering → low heat 12 minutes → turn off the stove and keep covered 10 minutes
- Sona Masoori Rice: Medium heat until simmering → low heat 12 minutes → turn off the stove and keep covered 10 minutes
Note: This recipe is intended for plain white rice, specifically the “dry” varieties that are frequently eaten on their own or as a side to a meal. I have not tested this recipe with arborio rice, bomba rice, carnaroli rice, sticky rice, instant rice, brown rice, black rice, or wild rice. These rice varieties require different cooking methods and times.
Set a timer and get cooking!
Finding the Right Pot
The most important thing is to use a pot that isn’t too small or too big for the batch of rice you’re cooking. For 1 cup of dried rice, you’ll want to find a pot with a 1-quart capacity. For 2 cups of dried rice, a 2- or 3-quart pot is the perfect size.
The type of vessel you choose doesn’t particularly matter, though you’ll get best results in a Dutch oven.
I’ve also tested with a stainless steel stockpot, a pyroceram saucepan, a Korean ttukbaegi, a Japanese donabe… pretty much every pot in my kitchen with a suitable size. They all produced rice that I was happy with.
The Dutch oven and the ttukbaegi tended to distribute heat more evenly. This meant the rice at the bottom was at less risk of getting mushy even when I was a bit inattentive at the stove. But as long as you follow each step of the recipe carefully, you can avoid overcooked rice no matter which type of pot you use.
Variations
Check out some of the things you can do with plain white rice:
How to Make Scorched Rice
Scorched rice is the brown, crunchy layer at the bottom of the pot when you overcook rice. It can be a desirable byproduct of cooking rice.
Maybe the most famous example is Persian tahdig, or maybe Spanish soccarat, where the scorched layer is the best part of the dish. But this crunchy rice is beloved in many other countries as well.
It’s known as guoba in Chinese, intip in Javanese, concón in Dominican Spanish, okoge in Japanese, nurungji in Korean, and cơm cháy in Vietnamese. It’s especially delicious eaten with a saucy or soupy dish such as Stinky Tofu Soup.
Growing up, guoba was usually achieved by accident when my mom left the rice cooking for too long. This used to be my favourite part of eating rice as a kid lol.

Here’s how you can easily add a scorched rice crust to this recipe: Use the same total cooking time, but instead of moving the pot off the heat for the last ten minutes, keep it on the stove. Crank the heat back up to medium heat. (Check on it after five minutes to prevent burning.)
For example, if using calrose rice: Bring it to a simmer, then turn it down to low for 12 minutes. Then turn the heat back up to medium for 10 minutes. Easy scorched rice.
Food Safety Guidance
Although dried white rice is pretty much safe to use indefinitely, cooked rice should not be left at room temperature for more than two hours. You might’ve heard of fried rice syndrome, a type of food poisoning associated with fried rice. That’s because fried rice is commonly made with leftover white rice. If leftover rice isn’t kept chilled, it’s really easy for bacteria to grow on it.
It’s best to refrigerate rice within 1 hour of cooking, and use up leftover rice the next day.
Meal Prep & Storage Tips
Fridge: Cooked white rice should be refrigerated. The most stringent food safety guidance says leftover rice should be eaten within one day, but if you grew up in an Asian household you probably know we sometimes keep rice for several days before finishing it all. I generally follow the FDA’s guidelines which say to refrigerate rice for a maximum of four days.
Freezer: Rice can be kept frozen for up to two months, and defrosted in the fridge overnight. Once defrosted, rice should be eaten within one day.
Reheating: Rice turns brittle and chalky once chilled, but all you need is a microwave to bring it back to its soft, fluffy, and slightly chewy glory. Put a mug of water next to the rice in the microwave, or sprinkle a teaspoon of water over the rice, then microwave until it’s steaming. This ensures your rice will be nice and moist. Alternatively, turn leftover rice into Kimchi Fried Rice. Fried rice works best with cold day-old rice!
What to Serve with Rice
Oh boy. Are you ready? Probably half of the recipes on this entire site would go well with a side of rice. In the interest of not overwhelming you with recipes, I’ve curated here only dishes that are traditionally best paired with plain white rice:
- Soondubu Jjigae (Korean Soft Tofu Stew)
- Frijoles de la Olla (Mexican Beans)
- Shimeji Mushroom Stir Fry
- Canh Khổ Qua (Vietnamese Stuffed Bitter Melon Soup)
- Fanqie Chaodan (Chinese Tomato Egg Stir Fry)
- Vegan Cajun Gumbo
- Kaeng Pa (Thai Jungle Curry)
- Kongbiji Jjigae (Korean Okara Stew)
- Pan-Fried Soft Tofu
Recipe FAQs
For stovetop rice cooking, a ratio of 1 cup water (240g) to 1 cup rice (200g) is suitable for most common types of white rice, such as calrose, jasmine, koshihikari, nishiki, sekka, and sona masoori rice. Use a ratio of 1 ½ cups water (360g) to 1 cup rice (200g) for cooking basmati or long grain white rice.
To cook 1 cup of dry rice, you should use 1 cup (240g) of water for most varieties of white rice, unless you are using basmati rice or long grain rice, in which case you should use 1 ½ cups (360g) of water.
The exact time depends on the strength of your stove, but it will generally take around 30–35 minutes from start to finish (10–15 minutes to start simmering, 6–14 minutes to boil, and 10 minutes to finish steaming).
There’s no need to stir rice as it boils. You may want to stir once in the middle of cooking to dislodge any rice grains that are stuck to the bottom of the pot, but it’s not necessary. In fact, I don’t recommend opening the lid to stir the rice frequently because this will cause moisture to evaporate from the pot and it might lead to undercooked or burnt rice.
More of the Basics
- Vegan Master Sweet Dough (for all the sweet breads of your dreams)
- Hot Water Dough (for dumplings, perogies, tortillas, and more)
- Vegan Instant Pot Yogurt (eat it plain, add your favourite mix-in’s, or use as an egg substitute in baking)

Recipe Card
Did you make this recipe? Please consider leaving a rating below to let me know how you liked it. You can also take a picture and tag me on Instagram @earthtoveg, I will shout you out in my Stories!
4-Step Stovetop Rice
Equipment
- Dutch oven, clay pot, or stock pot with a lid (at least 1-quart capacity for every 1 cup of rice)
- Rice paddle or wooden spoon
Ingredients
Switch between volume vs weight measurements:
- 1 cup white rice
- 1 cup water use 1 ½ cups (360 g) if using basmati rice; see Note 1
Instructions
- Rinse: Wash and drain the rice (see Note 2).
- Boil: Add the washed rice to a pot and set it on the stove. Pour in 1 cup of water (1 ½ cups if using basmati rice) and cover with a lid. Turn the stove on to medium heat and wait for the water to come to a simmer, around 10–13 minutes.
- Simmer: Once the rice begins to boil, uncover the pot and give it a quick stir to make sure no rice grains are stuck to the bottom of the pot. Put the lid back on and turn the heat down to the lowest it can go on your stove. Simmer for 6 to 14 minutes, depending on the type of rice:
- Basmati Rice: 12 minutes
- Calrose Rice: 14 minutes
- Jasmine Rice: 10 minutes
- Koshihikari Rice: 12 minutes
- Nishiki Rice: 12 minutes
- Sekka Rice: 12 minutes
- Sona Masoori Rice: 12 minutes
- Steam: Once the minutes are up, remove the rice from the heat. Keep covered for another 10 minutes (15 minutes if using jasmine rice). Then remove the lid and gently fluff the rice with a rice paddle or wooden spoon.
Notes
- Water: It’s important to measure out your rice and water carefully to avoid over/undercooked rice. You must use the right ratio of rice and water with the right cooking technique to get quality stovetop rice.
- Is rinsing optional? Look, I’ve made rice without rinsing before, and it turned out fine, but it’s always just a little more clumpy, so I’d recommend rinsing if you can. The rice water will never run perfectly clear, no mater how many times you wash the rice, but it’s fine as long as it’s no longer totally opaque. I usually rinse my rice at least three times.
- No need to use a colander to drain your rice. Just pour out the water carefully without dumping any of your rice along with it.
- Once rinsed and drained, 1 cup of uncooked rice will retain 3–4 tbsp (45–60g) of water. This is fine; the recipe accounts for the residual water.
- Soaking: You may notice that I don’t call for soaking the rice in this recipe. Unless you’re cooking sticky rice, the soaking does not make a big difference. I’m often in a hurry when cooking dinner so I usually don’t have time to soak beforehand. HOWEVER, if you would like to soak your rice, do it about 30 minutes before cooking. Also, add an extra 2 tbsp of water when cooking.
I’m so glad I came across this. No more mushy rice for me!!!
YAY! So happy to help Lucia 🙂
It workssssssssssssssssssssssssssssssssssssssssssssssss. I’m so glad I followed your recipe. No more mushy rice for me and my family again. WHOOOOOO!!!!!!!!!!!!!!!!!!!!!!
I’m right now staying at a home without a rice cooker and this recipe has been a huge help! Thank you!
I took my new donabe for a spin today and made some rice using this reicpe. It was delicious and fluffy, way better tahn the rice cooker. i think the key is to use a good quality Japanese rice.
Agreed, the rice makes a difference as well. Our favourite rice at the moment is Koshihikari!
Today, I cooked rice that wasn’t mushy for the first time in m life. THANK YOU!!!
No problem, glad to help!